EPSON WF-C5790/WF-C5790a/WF-C5710/ET-8700/WF-C5210/WF-C5290/WF-C5290a Revision A
Disassembly/assembly Disassembly/Reassembly Procedures 435
Confidential
Printhead
In this product, Ink Leak Check is necessary to prevent the ink leakage due to
assembly mistake.
Therefore, make sure to install the ink leak measurement jig when installing the Ink
Tube to Printhead.
Before using the Leak Check Jig, push the ink leak measurement jig along the folds
until the fold angle become 90 degrees.
Types of Ink Leak Measurement Jig
Part Name Part Code Photo Remark
LEAK TESTER
SHEET FRONT
1684353
LEAK TESTER
SHEET REAR
1684354
90°
Ink Leak Measurement Jig
90°
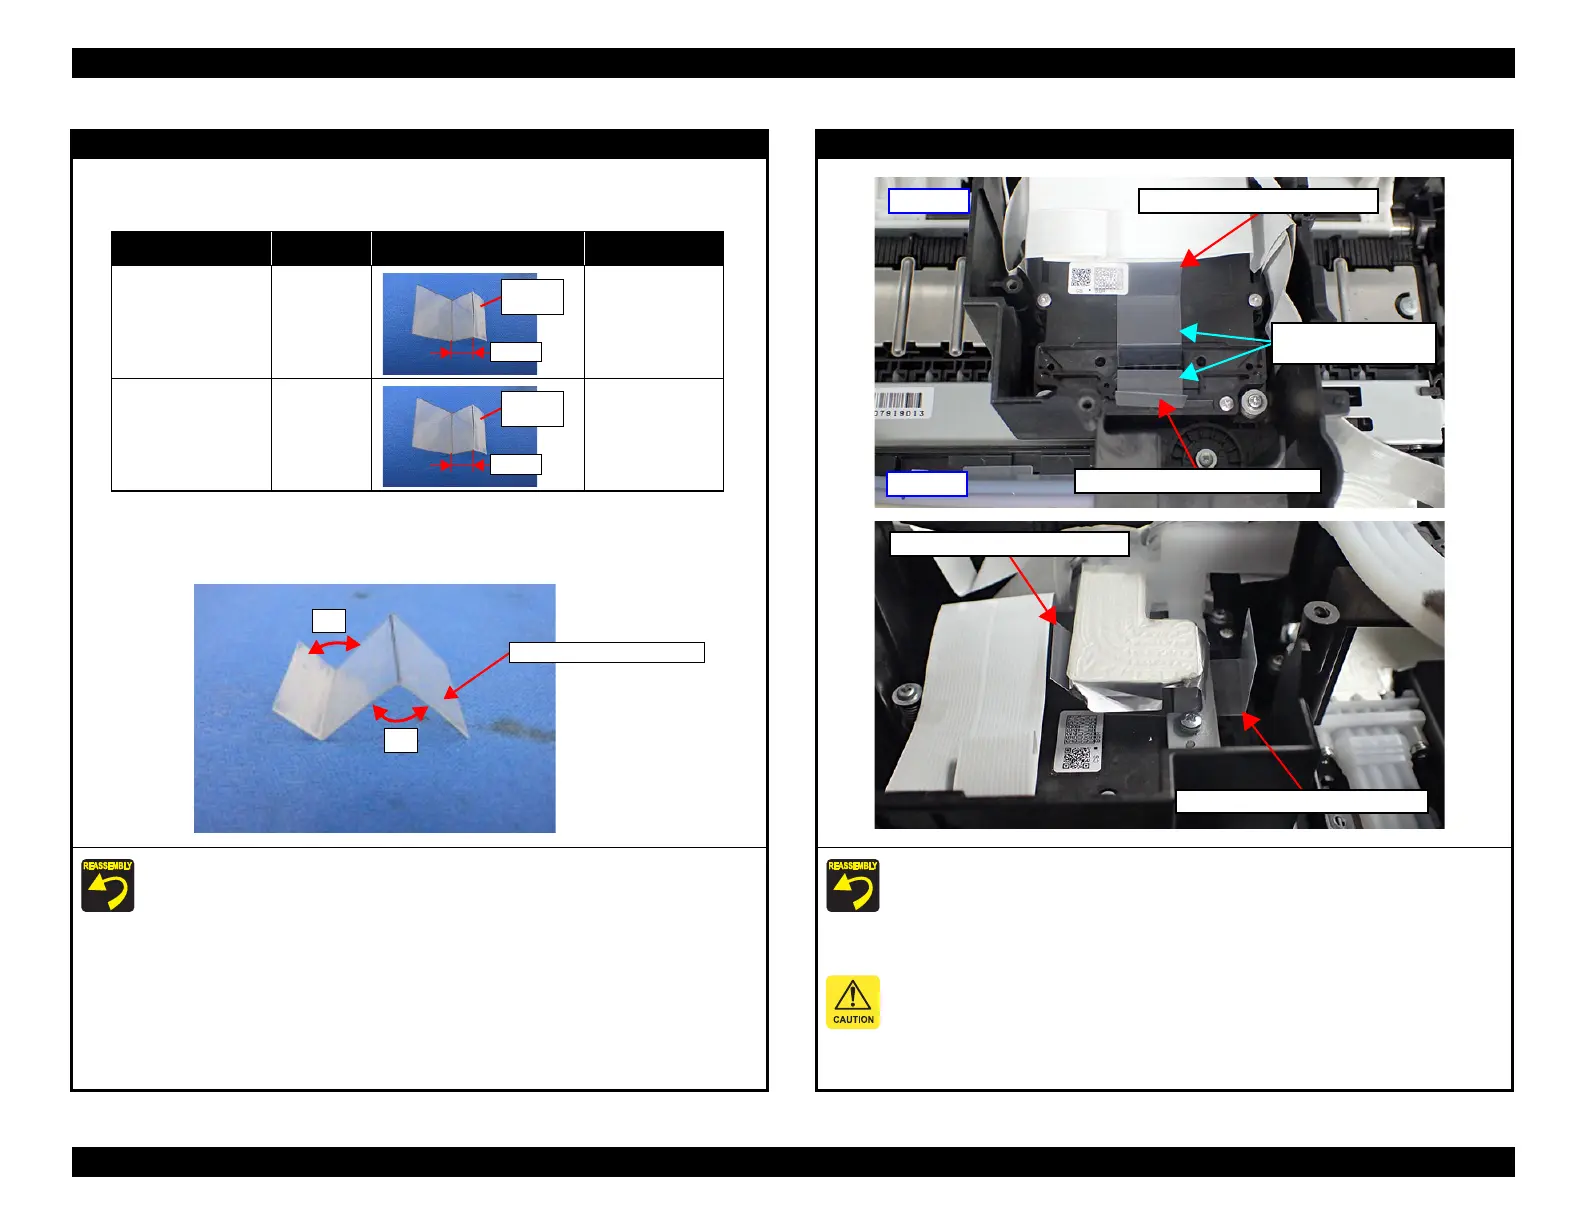
Printhead
1. Set the ink leak measurement jig to the ink tube connector of the Print Head.
2. Set the Ink Supply Tube to the Printhead.
3. After ink charging, follow the instructions on the Ink leak check (p.563) to remove
the LEAK TESTER SHEET FRONT/REAR, then perform Leak Check
Judgement.
The smoked face of ink leak measurement jig is put toward the upside.
When installing the Ink Supply Tube, make sure to tighten the screws using a torque driver
with the specified torque.
Screw tightening torque: 0.33±0.02Nm
Front side
LEAK TESTER SHEET FRONT
The smoked face is
put toward the upside.
LEAK TESTER SHEET REAR
Rear side
LEAK TESTER SHEET REAR
LEAK TESTER SHEET FRONT