Chapter 6 RAID Group Management
6.2 Functions in the Action Area for RAID Group
ETERNUS Web GUI User’s Guide
126
Copyright 2011 FUJITSU LIMITED P2X0-1090-02ENZ0
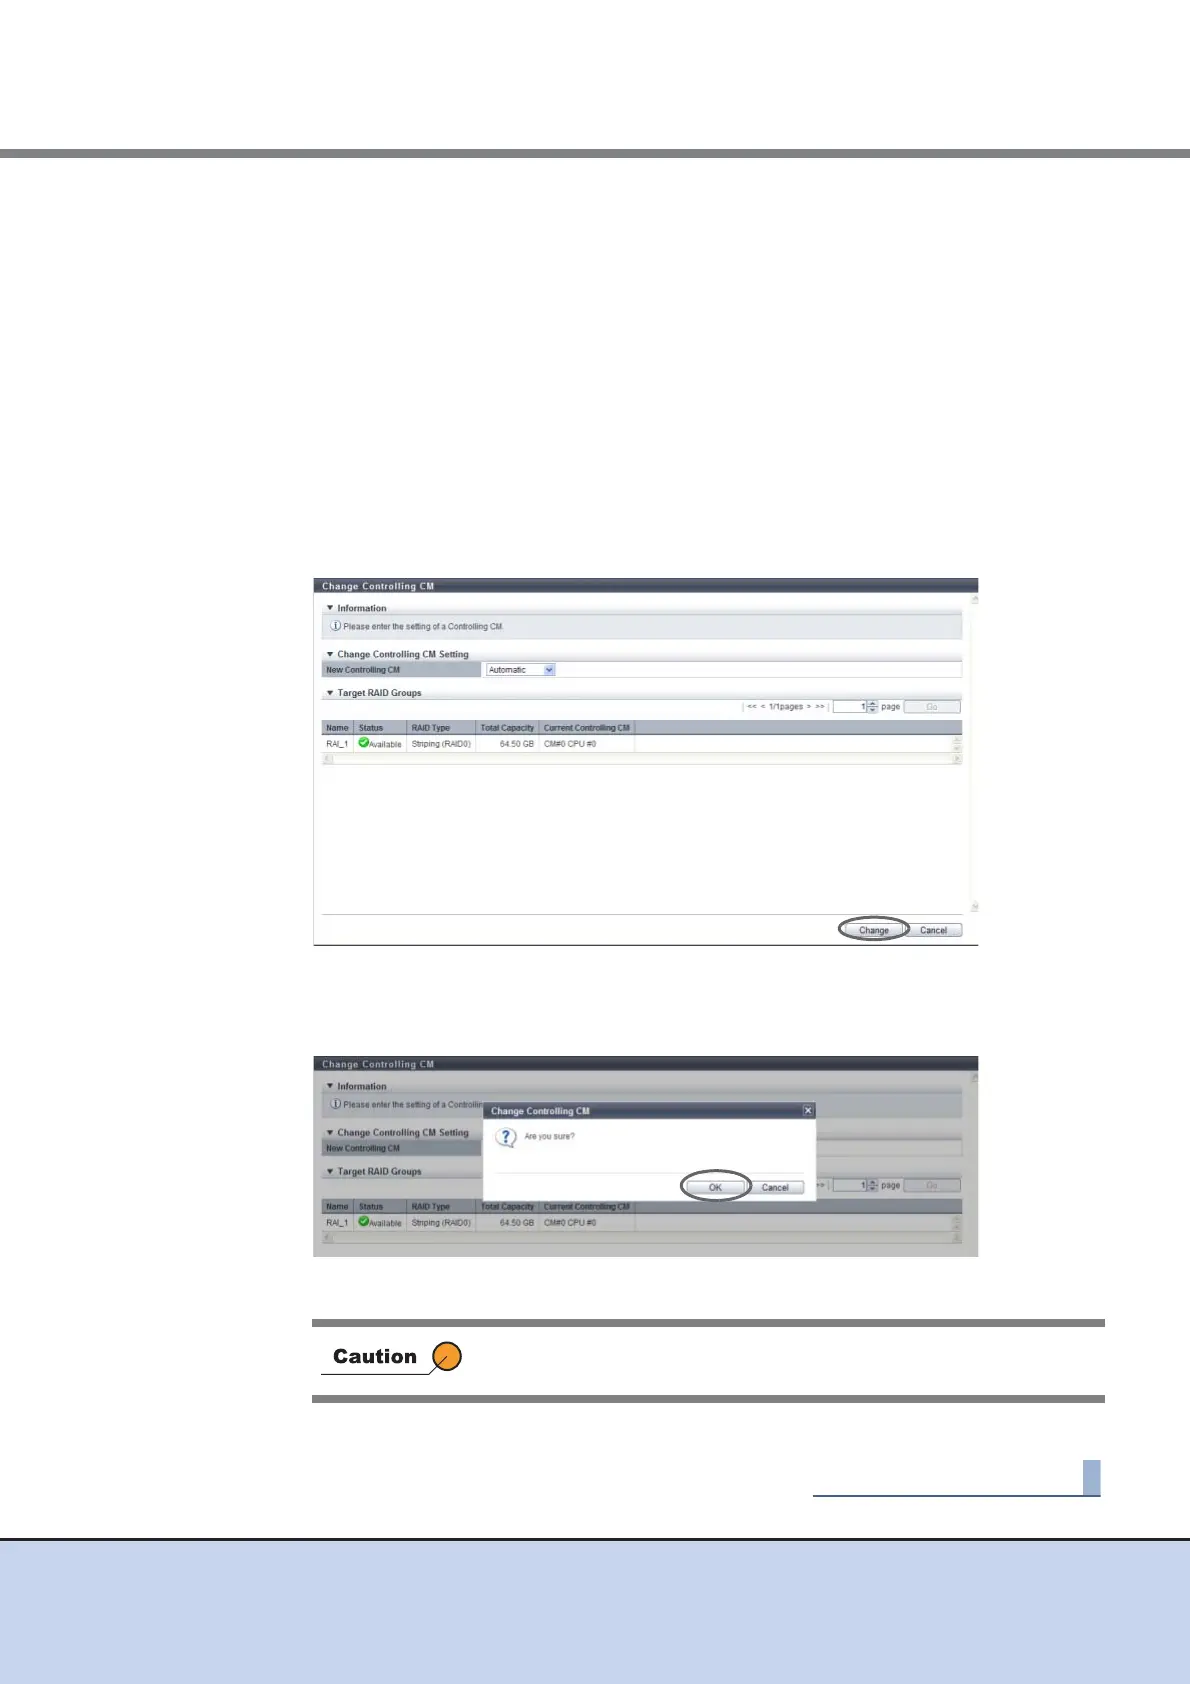
2 Select the controlling CM after changing, and click the [Change] button.
• New Controlling CM
Specify the new controlling CM and CPU.
- CM#x CPU#y ("CM#x CPU#y" that is installed and in normal status. x: CM number,
y: CPU number)
- Automatic
The CM and CPU that is to be assigned is determined by the RAID group number.
For the ETERNUS DX80 S2/DX90 S2 or the ETERNUS DX410 S2, "CM#0 CPU#0"
is assigned for the RAID groups with even numbers. For RAID groups with odd
numbers, "CM#1 CPU#0" is assigned. For the ETERNUS DX440 S2, "CM#0
CPU#0" is assigned for RAID groups if the RAID group number is dividable by "4"
(the number of CM-CPUs). If the remainder is "1", "CM#1 CPU#1" is assigned. If the
remainder is "2", "CM#1 CPU#0" is assigned. If the remainder is "3", "CM#0
CPU#1" is assigned.
→ A confirmation screen appears.
3 Click the [OK] button.
→ Changing controlling CM starts.
4 Click the [Done] button to return to the [RAID Group] screen.
During controlling CM change, the device status is changed from
Write Back mode to Write Through mode.