GE VOLUSON
i / VOLUSON
e
D
IRECTION KTI106052, REVISION 10 SERVICE MANUAL
Chapter 4 - Functional Checks 4-3
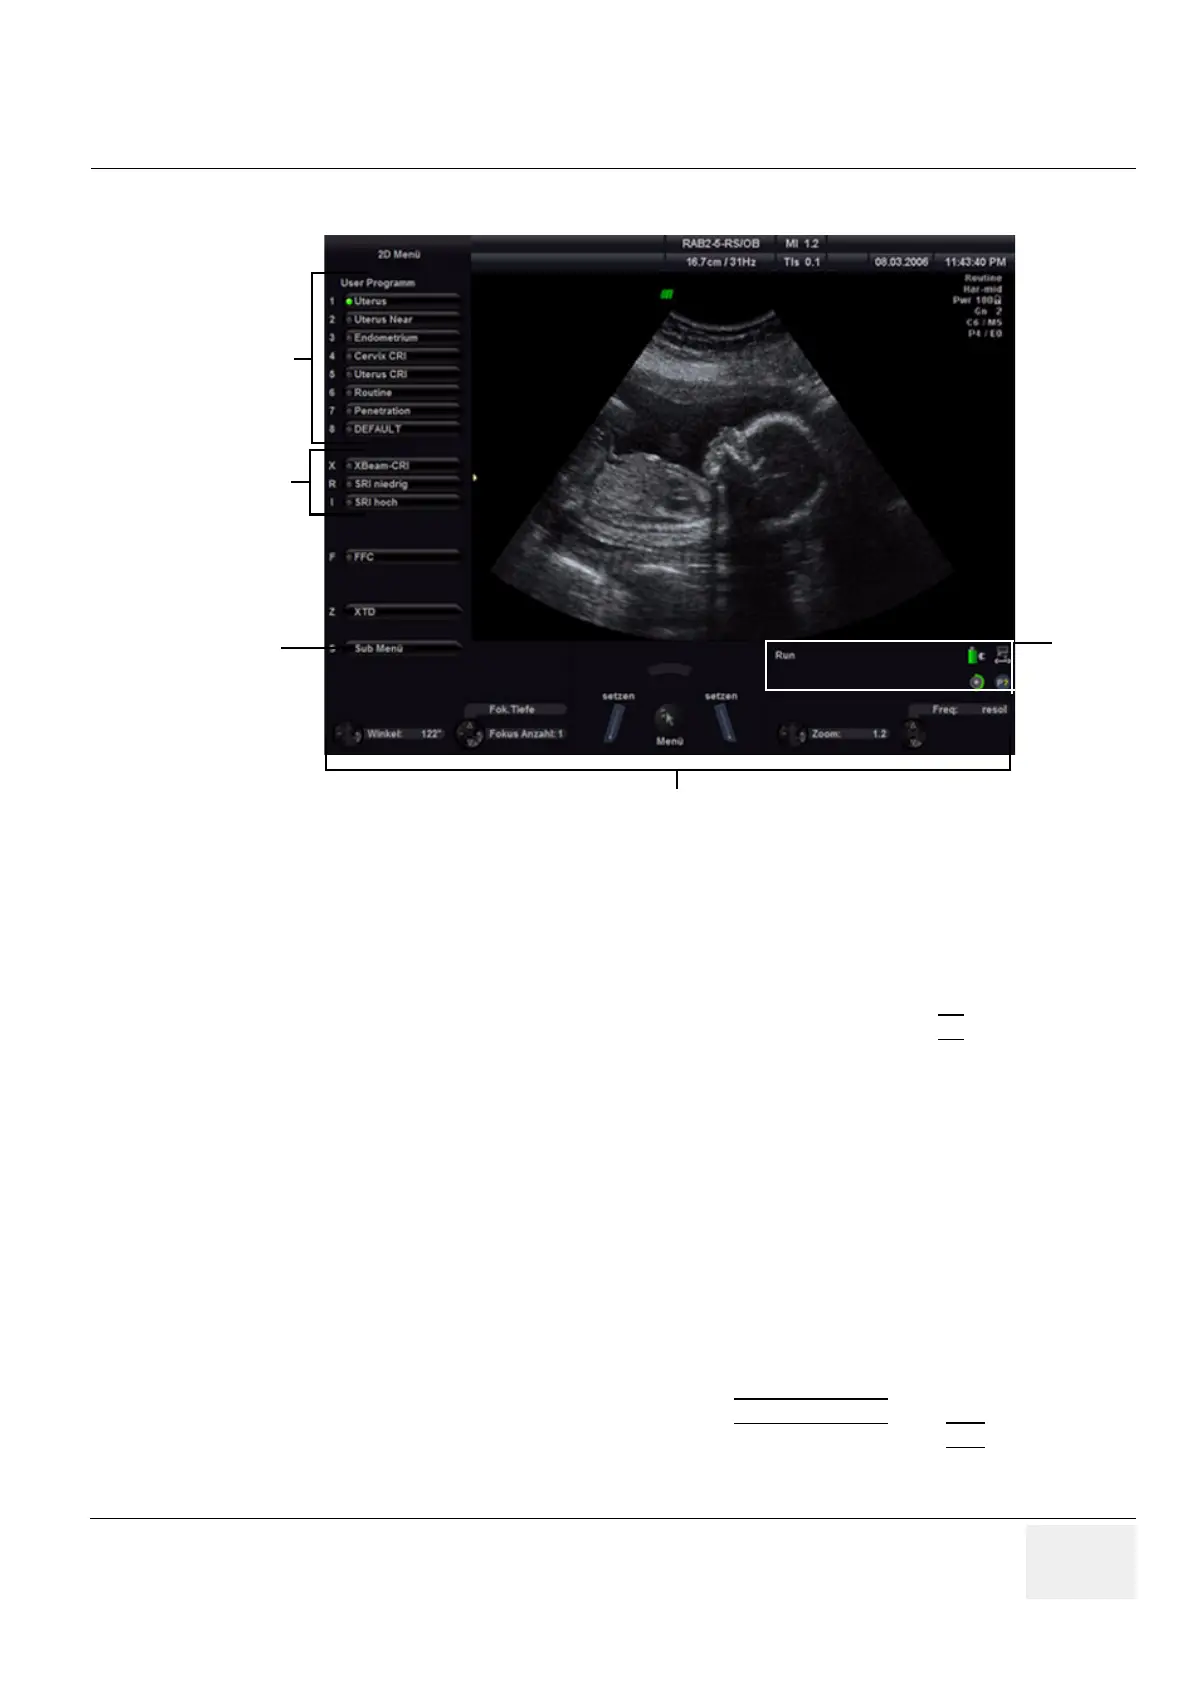
4-3-1-2 Menu Control
1.) User Program: shows all setting for the active application. The active one is highlighted
2.) Additional functions which are supported by the selected Scan mode.
3.) Sub Menu: to adjust settings of the selected “Main” mode.
4.) Status Area: shows the current functionality of the Trackball, the Trackball keys and
the Soft-menu buttons.
5.) Area indicates operation state, shows current battery status and function of P?
Printer buttons.
NOTE: Different menus are displayed depending on which Menu and which Mode is selected.
SOFT- BUTTONS, TRACKBALL and Trackball KEYS
Currently activated functions are displayed in the status area by their location, their function and their
actual value of setting. They are easily controlled by moving the trackball, pressing the trackball keys
or switching the corresponding Soft-menu button.
FUNCTION KEYS located on the alphanumeric Keyboard
Many main functions (e.g., Utilities, Bodymarks, Power up/down, etc.) are activated by pressing its
specific key on the alphanumeric keyboard.
KEYBOARD-SHORTCUT FUNCTIONS
Available menus are shown in the menu area on the left side of the screen. The current menu selection
is highlighted. If not active (key is illuminated), press the MENU POINTER
[Cursor] key nearby the
trackball. Now move the cursor to another item in the menu area and then press SET
(the left or right
trackball key) to select and start the desired function.
Alternatively, press the keyboard shortcut (1, 2, 3, etc.) which is shown on the left of the actual item.
Figure 4-2 Menu Control Area - 2D Main Menu
 Loading...


