GE VOLUSON
i / VOLUSON
e
D
IRECTION KTI106052, REVISION 10 SERVICE MANUAL
Chapter 4 - Functional Checks 4-17
4-4-5-2 Functions after the 3D Acquisition
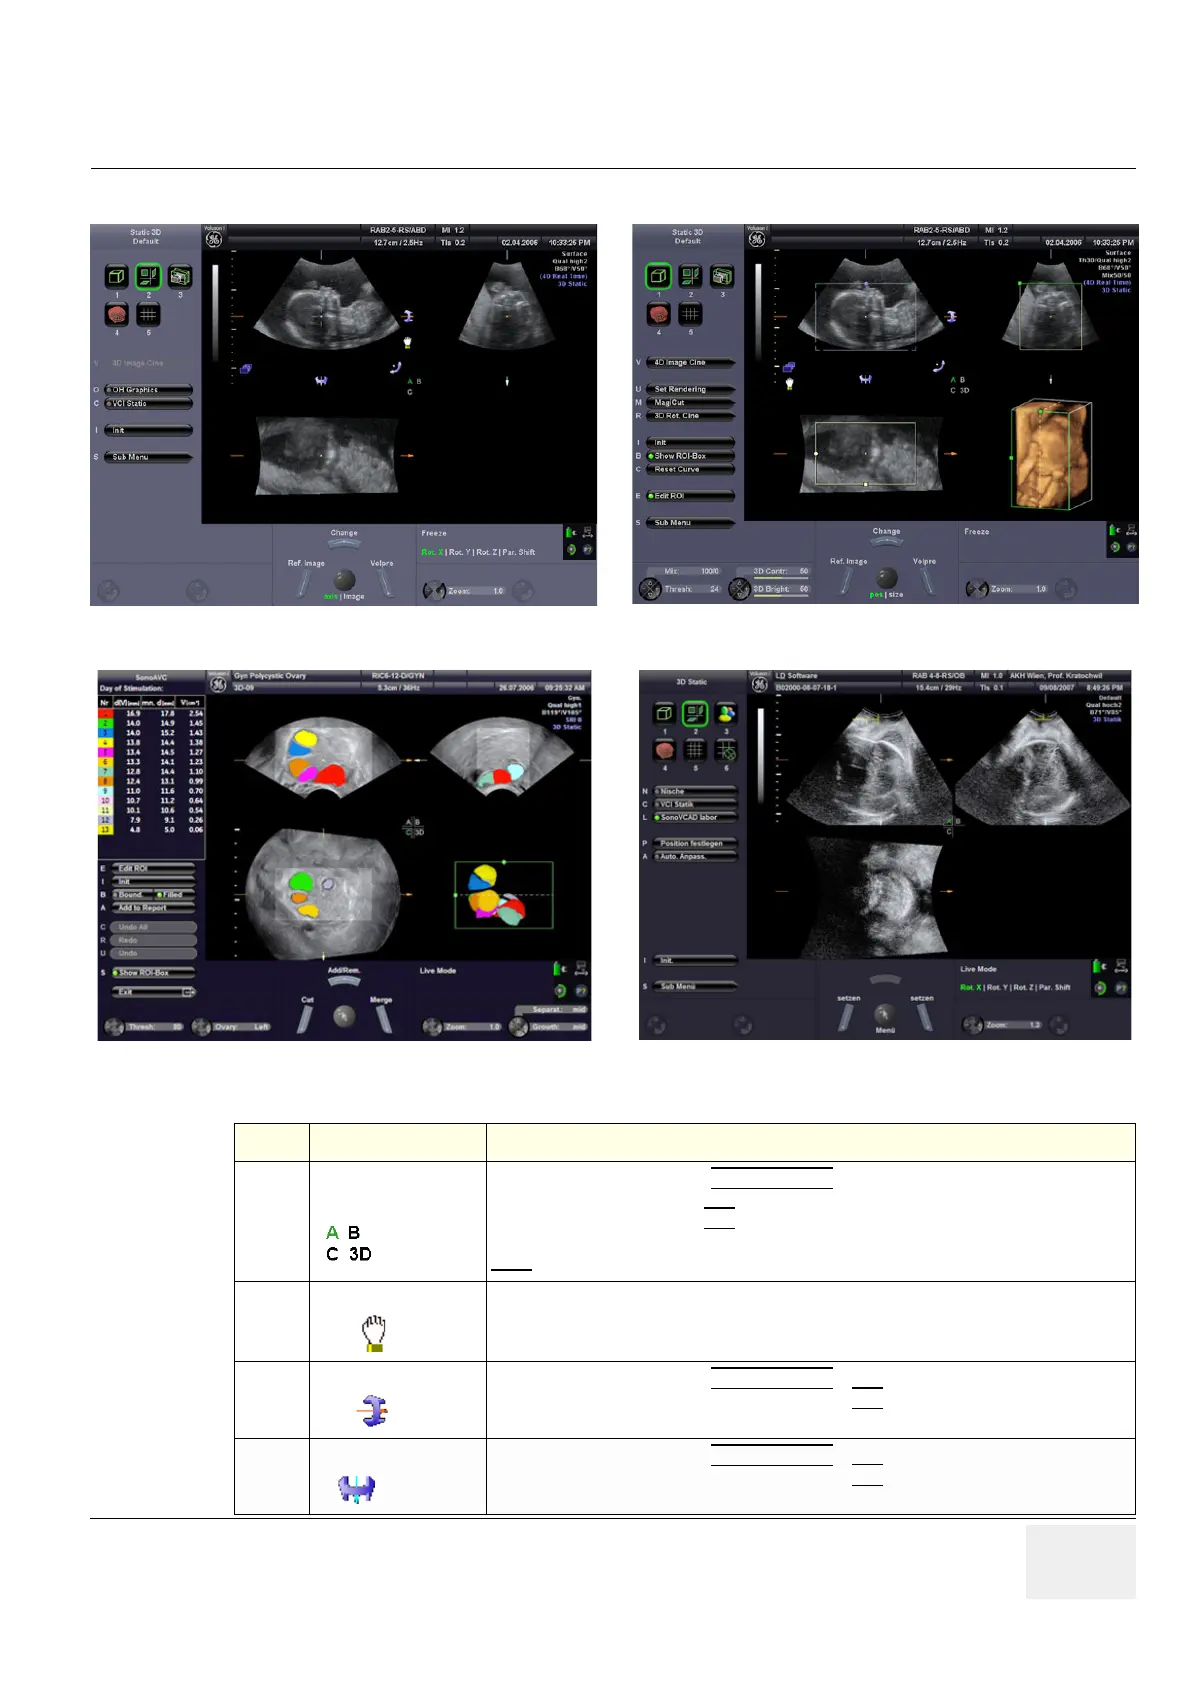
Figure 4-10 3D/4D Main - Sectional Planes and Image Rendering
Figure 4-11 SonoAVC / SonoVCAD
Table 4-8 Functions after the 3D Acquisition
Step Task Expected Results
1
Choose the
Reference image
If not currently active, press the MENU POINTER
[Cursor] key near the trackball. Now move
the cursor to the desired Sectional Plane (A, B or C) or the rendered 3D image in the lower
right quadrant and then press SET
(right or left trackball key).
The chosen reference image is marked by the “green” letter on the screen.
Note:
All control functions are automatically assigned to the image chosen for reference.
2
Move the image
Image data can be moved around.
3
Rotation about X-axis
If not currently active, press the MENU POINTER
[Cursor] key near the trackball. Now move
the cursor to this icon on the screen and then press SET
(right or left trackball key). Use the
trackball to rotate the reference image about the X-axis.
4
Rotation about Y-axis
If not currently active, press the MENU POINTER [Cursor] key near the trackball. Now move
the cursor to this icon on the screen and then press SET
(right or left trackball key). Use the
trackball to rotate the reference image about the Y-axis.
 Loading...


