Operation Instruction SC201(1900A/1903A)
22
2.4.9 Setting the Pattern Thread Tension
Needle thread tension for 6 stitches at the sewing start, the portion which is changed over from
basting stitch to zigzag stitch, and the portion of the stitch at the sewing end can be individually
set.
2.4.10 Table of the Standard Patterns
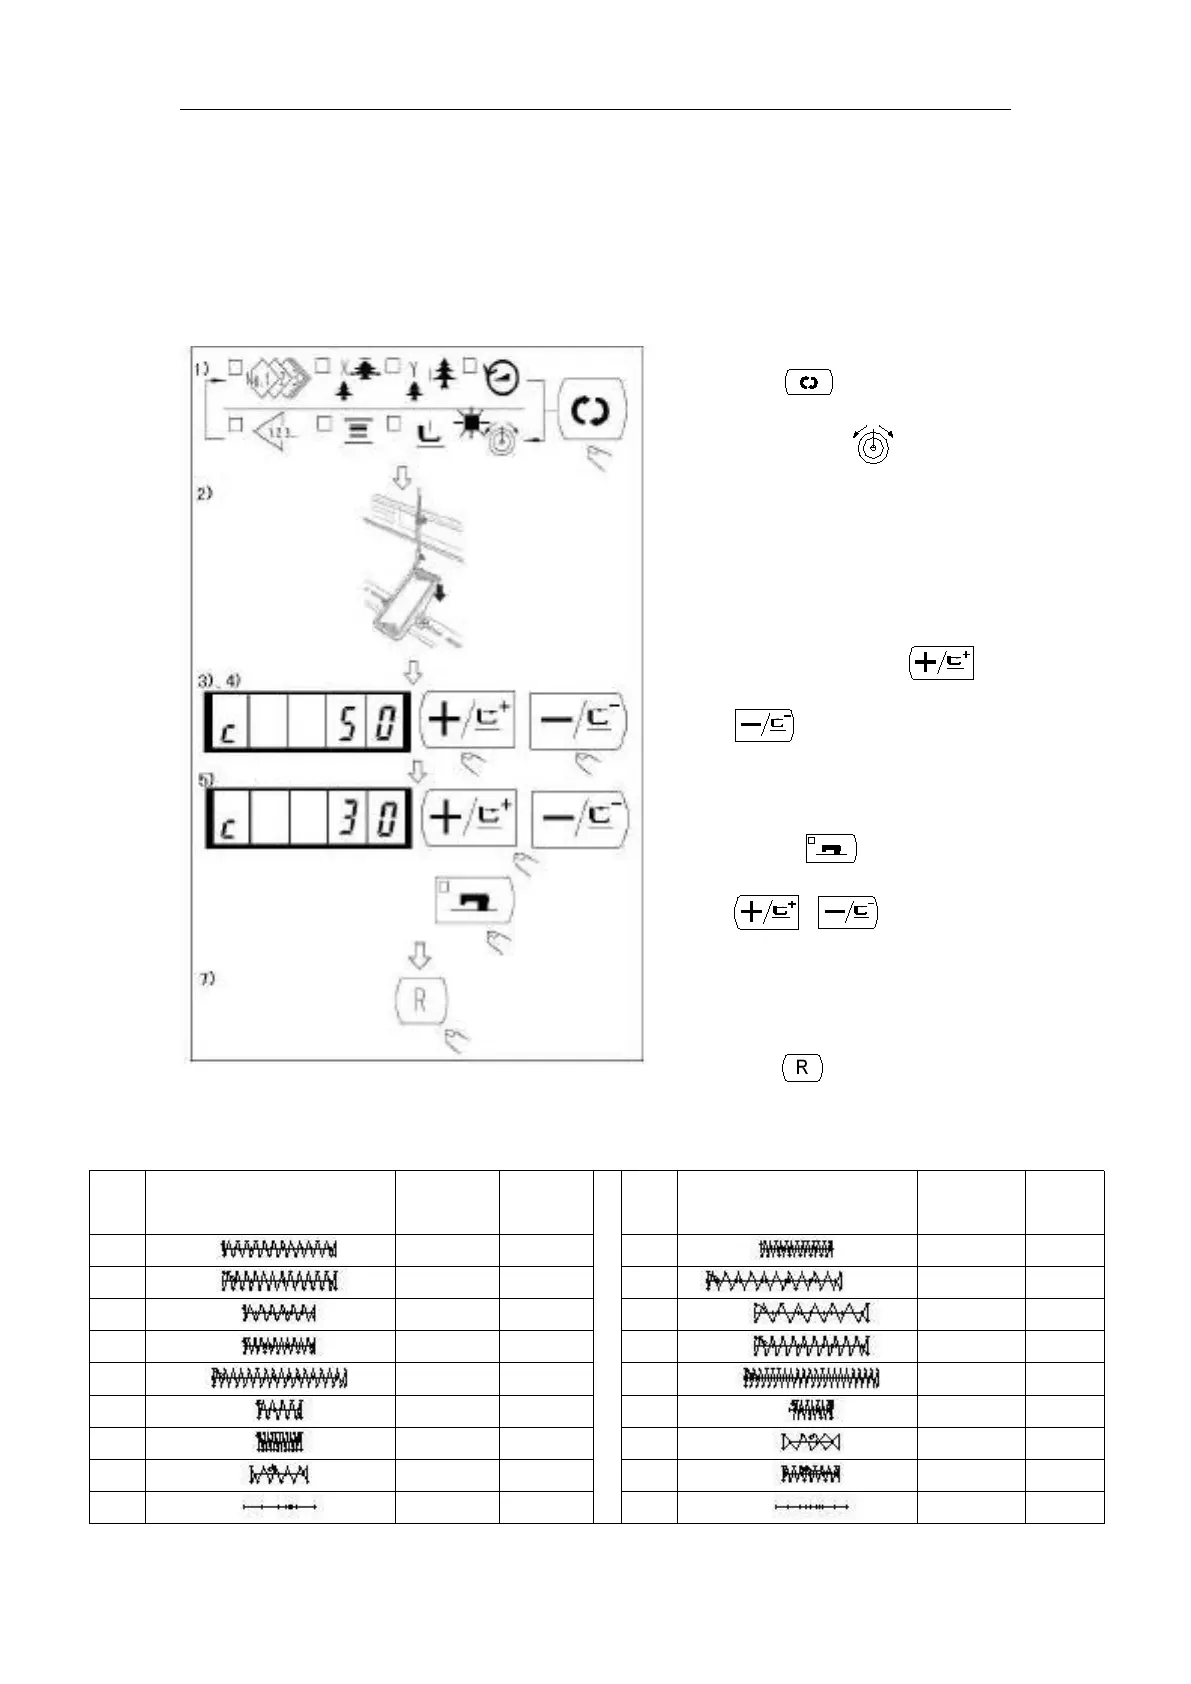
1) When the sewing LED lights up,
press key to indicate the needle
thread tension .
2) Lower the presser with foot pedal.
(Caution: When the foot pedal is
depressed until it will go no further,
the sewing machine starts. So, be
careful.)
4) “c” is indicated at the position where
the tension position is possible.
5) Pressing key, set the tension with
6) Repeat steps 3), 4) and 5) to set the
7) When setting is complete,
press key. The presser moves to
the origin and goes up.