使用说明书 Operation Instruction
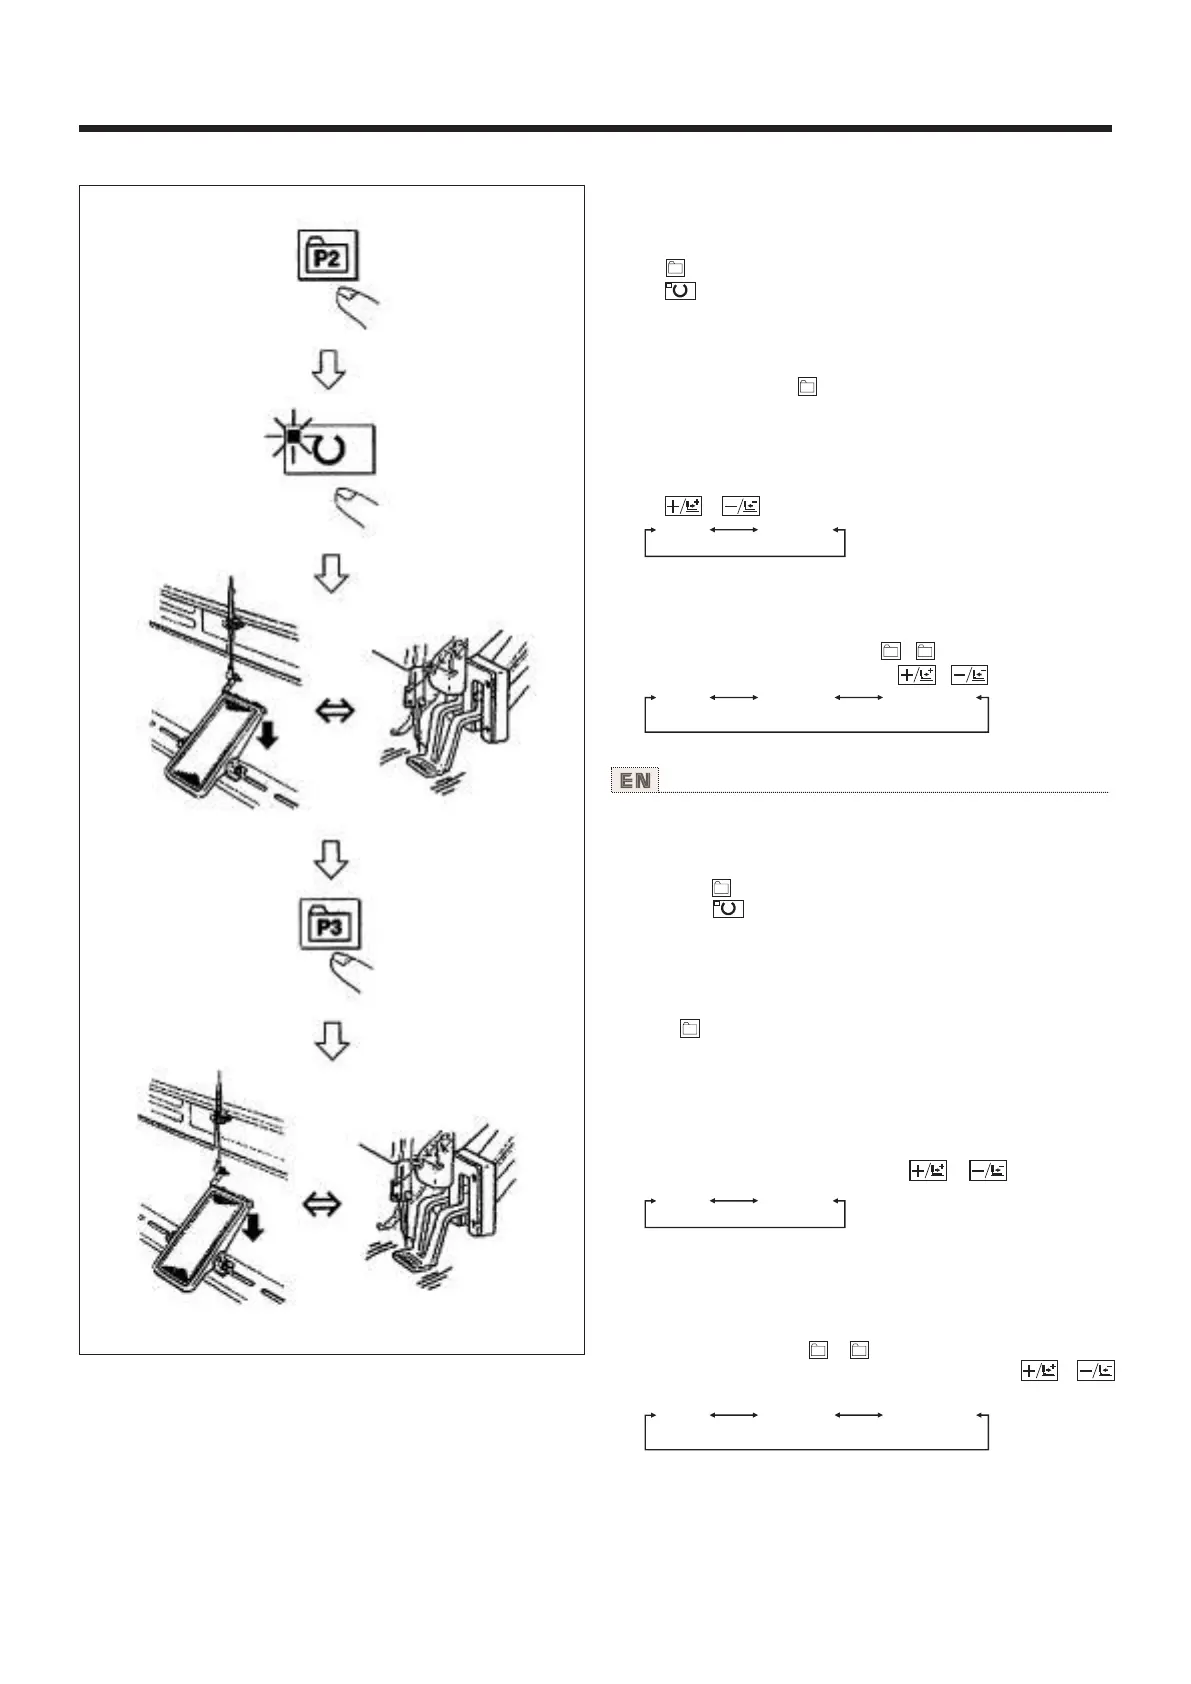
P2
P3
0-99 P1-P25
0-99 P1-P25 P26-P50
(2)
Operation example : After performing sewing with the contents
of the registered P2, perform sewing with the contents of P3.
1) Turn ON the power switch.
2) Press the key.
3) Press the key, and when the sewing LED lights up, the
work clamp foot goes up after it has moved.
4) Check the contour of the sewing pattern.
(Refer to the item "Checking the contour of a sewing pattern".)
5) lf the contour of the sewing pattern is acceptable, the
sewing can be made.
6) Press key after completion of sewing and the presser
comes down. The presser moves to the sewing start point after
origin retrieval and goes up. (The P keys can operate the
pattern chage by one-touch even when the sewing LED is
lighting up.)
7) Perform the above items 4) and 5).
* The Pl to P25 can be indicated on the display when
seiecting the pattern by pressing the or key.
P1 to P25 which have not been registered are not indicated.
(NOTE) Press P1 to P25 key while the sewing LED lights up
and the presser comes down. Be careful that your fingers are
not caught in the presser.
Pattern register from P26 to P50 can be performed. Register
can not be performed in to key. Designate the pattern by
the pattern selection only. Indicate the pattern with or
key.
Pattern selection from P26 to P50 cannot be performed while
the sewing LED lights up.
P2
P3
0-99 P1-P25
P1 P5
P1 P5
0-99 P1-P25 P26-P50
(2)缝制操作 Sewing operation
0
操作例:以登记的P2内容进行缝制,然后缝制P3的内
容。
1)打开电源。
2)按 键。
3)按 键,缝制LED亮灯后,压脚移动上升。
4)确认图案形状。
(请参照[图案形状的确认]之项。)
5)如果图案形状正确,则可以缝制。
6)缝制结束后,按 键,压脚下降,检索原点后,移
动到缝制开始点,然后压脚上升。
(P键在缝制LED亮灯时,也可以按键变换图案。)
7)进行4)、5)项操作。
※ 也可以指定选择P1、P25的图案。
用 、 键显示。
没有登记的P1-P25不显示。
(注意)缝制LED亮灯时,按P1-P25键之后,压脚下
降。请注意不要压到手指。
P26-P50可以进行图案登记。 - 键不能登记,只能
用选择图案的方式指定。请用 、 键进行显示。
缝制LED亮灯时,不能选择P26-P50的图案。
26