Ⅲ.LK-1902A高速电子锁眼加固缝纫机的说明 Explanation of LK-1902A. computer-controlled high-speed
bartacking machjne
使用说明书 Operation Instruction
1.规格 Specifications
l)转速
2)使用机针
3)压脚提升方式
4)压脚上升量
5)记忆数据数量
6)拨线方式
Different specifications from those of the LK-1900A only are described.
最高3.00 0rpm
DP×5 #14,# 16
脉冲马达
最大17mm
3种
脉冲马达压脚提升连动
这里起记述与LK-1900A不同部位的说明内容。
.... ..... ..... ..... ..... ..... ..... .....
.... ..... ..... ..... ..... ..... ..... .
.... ..... ..... ..... ..... ..... ..
.... ..... ..... ..... ..... ..... ....
.... ..... ..... ..... ..... ..... ..
.... ..... ..... ..... ..... ..... ..... .
1) Sewing speed
2) Needle
3) Lifting method of the work clamp foot.
4) Lift of the work clamp foot
5) Number of standard patterns
6) Wiper method
Max. 3,000rpm
DPx5 #14, #16
Stepping motor
Max, 17mm
3 patterns
Interlocked with work clamp foot lifter driven by stepping motor
......................................................................
.................................................................................
.................................
...................................................
...............................................
......................................................................
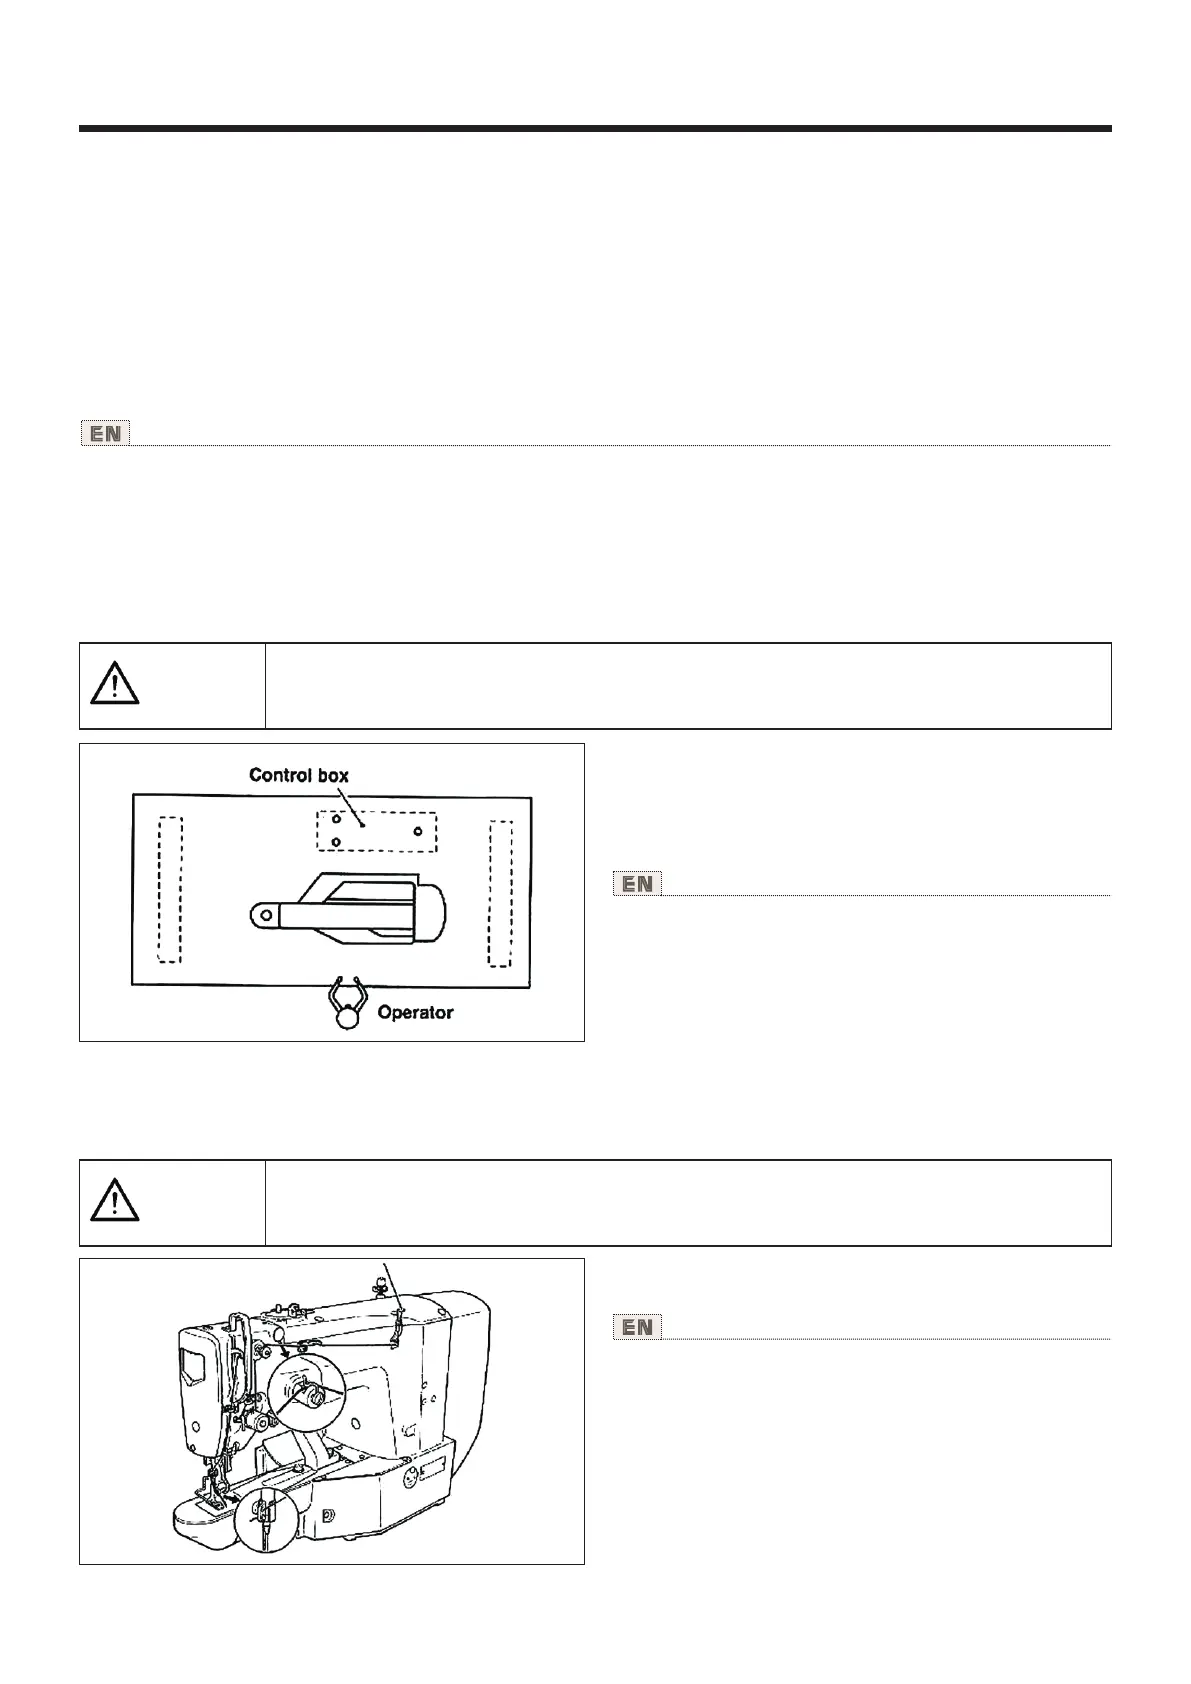
2.安装和运转 准备 Installation of the sewing machine and preparation of the operation
1) The standard installing position of the belt-loop attaching
machine should be lateral on the table.
2) Install the control box the same as the longitudinal installa-
tion
3) Use the extension cord packed in the machine head box to
connect the control box with the machine head.
(NOTE) Tilt slowly the sewing machine head until it hits agai-
nst the machine head support bar when tilting the sewing ma-
chine head.
1)钉皮带环缝纫机的标准安装为横置。
2)电气箱与纵置同样的安装。
3)使用机头专用延长电缆线,连接电气箱和机头。
(注意)放倒缝纫机时,请把机头部慢慢地放到机头支
撑杆上。
为了防止缝纫机的意外起动,请关掉电源之后进行操作
注意
CAUTION
Turn OFF the power before starting the work so as to prevent accidents caused by abrupt start of the
sewing machine.
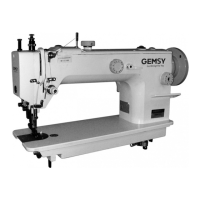
3.上线的穿线 方法 Installation of the sewing machine and preparation of the operation
Thread the machine in the order as illustrated in the left figure.
Leave thread of approximately 4 cm after passing through the
needle.
(NOTE) For a thick thread, pass the thread through only one
of the two holes in needle bar thread guide ①.
请按上图所示穿线。穿过针之后线头约留4mm。
(注意)粗线时,机线只穿针杆导线器①上的1个孔。
为了防止缝纫机的意外起动,请关掉电源之后进行操作
注意
CAUTION
Turn OFF the power before starting the work so as to prevent accidents caused by abrupt start of the
sewing machine.
①
67