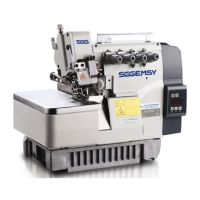
5.缝纫机机头的安装 Installation of the sewing machine head
使用说明书 Operation Instruction
6
1) 把胶垫①插到机轴上,固定缝纫机主题。
2) 拧紧固定铰链橡胶①的螺母③时,请拧紧螺母③
让弹簧垫②呈图中B所示的那样,然后用螺母④进行
固定。
(注意)铰链橡胶①拧得过紧的话,就会妨碍其功能
的正常发挥,务请注意。搬运缝纫机时,请手拿A部。
1) Fit hinge rubber ① to the hinge shaft, and fix the sewing
machine main unit.
2) When tightening nut ③ to hinge rubber ①, tighten nut ③
until spring washer ② becomes as B In the illustration, and
fix it with nut ④ .
(NOTE)if tightening hinge rubber ① excessively, it will not
work properly. So, be careful. Hold section A when moving
the Sewing machine.
1) 用固定螺丝③(4个)把发油槽②固定到机台①的安
装孔上。
2) 把发油销④拧紧发油槽②。
3) 把缝纫机发油管⑤插到发油销②里。
4) 把机头支撑橡胶$6$插进机台①。
(注意)
1. 放倒缝纫机机头后,发油管⑤应该不从发油销④
脱落,牢牢的插到最里面。
2. 请卸下固定发油管⑤的胶带。
1) Fix drain receiver ② in the installing hole of table ① with
four setscrews ③.
2) Screw in drain bin ④ to drain receiver ② .
3) Insert sewing machine drain pipe ⑤ into drain bin ④.
4) Insert head support rubber ⑥ into table ① .
(NOTE)
1. Insert drain pipe ⑤ until it will go no further so that it does
not come off drain bin ④ when tilting the machine head.
2. Remove the tape fixing drain pipa ⑤.
6.发油槽和机头支撑橡胶的安装 Installing the drain receiver and the head support rubber
③
①
②
⑤
④
①
搬运缝纫机时,请一定2人以上进行。
注意
CAUTION
To prevent possible accidents caused by the full of the sewing machine, perform the work by two
persons or more when the machine is moved.
A
①
①
A
④
②
③
③
②
④
②
③
④
②
②
A
B
⑥
⑥


 To Next Page