使用说明书 Operation Instruction
3.压脚的高度 Adjusting the lift of the work clamp foot
为了防止缝纫机的意外起动,请关掉电源之后进行操作
注意
CAUTION
Turn OFF the power before starting the work so as to prevent accidents caused by abrupt start of the
sewing machine.
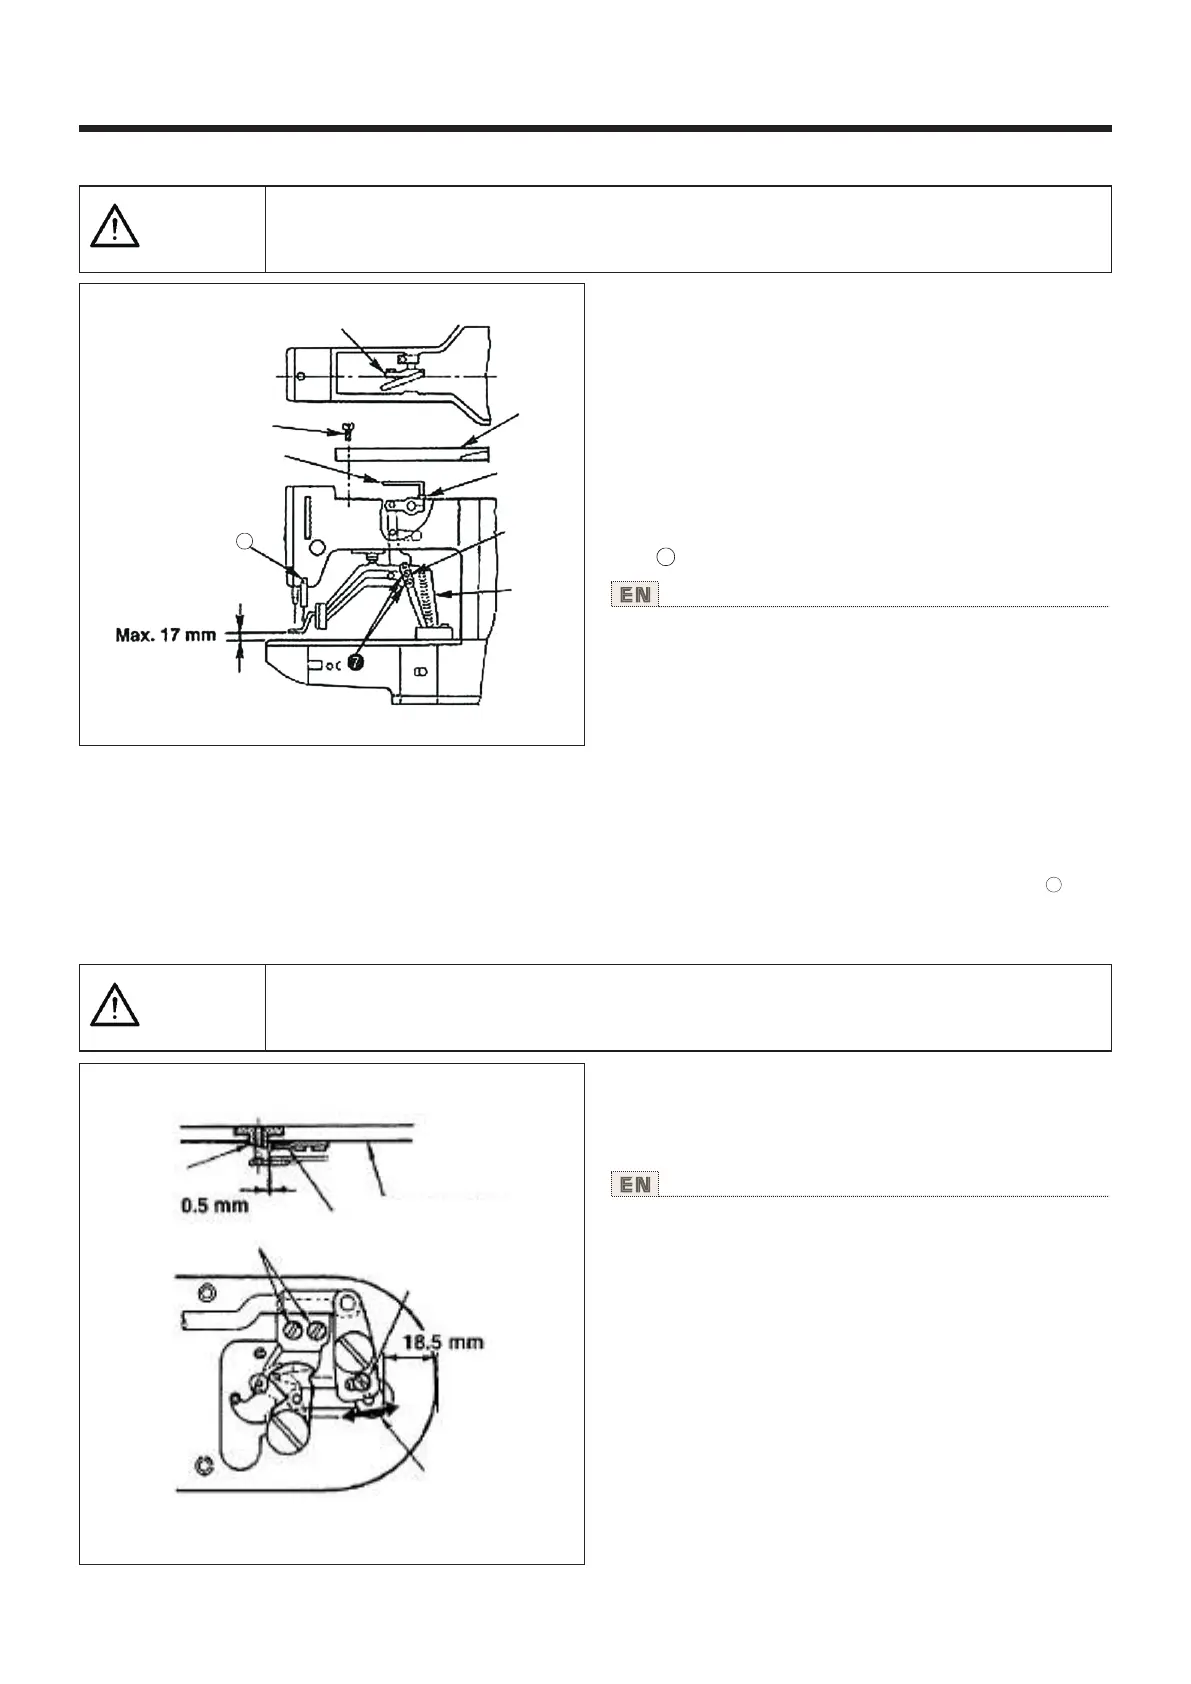
1)在停止状态,卸下6根机架外罩固定螺丝①,然后
卸下机架外罩②。
2)把L形扳手插入中央的紧固筒的六角孔螺栓⑤,把
他拧松。
3)把L形扳手③向下压布压脚升高,向上抬布压脚降
低。
4)调节后,把六角孔螺栓⑤确实拧紧。
5)左右压脚不一致时,拧松固定螺丝⑦,调节布压脚
拨杆挡板⑧调整高度。
(注意)此时,请不要让布压脚拨杆挡板⑧与送布台
⑨相碰。如果和挑线杆相碰,请用挑线杆安装台固定
螺丝⑨调节挑线杆高度
1) With the machine in stop mode, remove six setscrews ① of
the top cover, and take off top cover ②.
2) Apply L-shaped wrench ③ to socket bolt ⑤ of clamp ④ ,
and loosen the socket bolt.
3) Push down L-shaped wrench ③ to increase the lift of the
work clamp foot. or pull it up to decrease the lift.
4) After the adjustment. securely tighten socket bolt ⑤.
5) If the right and left work clamp feet are not levelled,loosen
fixing screw ⑦ and adjust the position of the work clamp foot
lever support plate ⑧ to level them.
(NOTE) At this time, be careful not to cause work clamp foot
lever support plate ⑧ to interfere with feed bracket ⑨.
If the work clamp foot lever support plate interferes with the
wiper, readjust the height of the wiper using setscrew ⑧ in the
wiper installing base.
10
10
4.移动刀和固定刀 he moving knife and counter knifeT
为了防止缝纫机的意外起动,请关掉电源之后进行操作
注意
CAUTION
Turn OFF the power before starting the work so as to prevent accidents caused by abrupt start of the
sewing machine.
1)拧松调节螺丝③,想箭头方向移动动刀,把从针
板前端到切线小拨杆①前端的距离调整为18.5mm。
2)拧松固定螺丝⑤,移动固定刀,把针孔导线器②
和固定刀④之间的间隙调整为0.5mm。
1) Loosen adjusting screw ③ so that a clearance of 18.5 mm
is provided between the front end of the throat plate and the
top end of thread trimmer lever, small ① . To adjust, move the
moving knife in the direction of arrow.
2) Loosen setscrew ⑤ so that a clearance of 0.5 mm is
provided between needle hole guide ② and counter knife ④.
To adjust, move the counter knife.
④
③
①
10
②
⑧
⑨
⑤
⑦
③
⑤
④
①
②
针板
throat plate
33