1. The needle thread
slips off at the start
of bar-tacking.
2. Thread often
breaks or synthetic
fiber thread splits
finely.
3. The needle often
breaks.
4. Threads are not
trimmed.
(Bobbin thread only)
5. Stitch skipping
often occurs.
6. The needle thread comes
out on the wrong side of the
material.
7. Threads break at time of
thread trimming.
8. The thread clamp is entan-
gled with needle thread.
9. Uneven length of the needle
thread
10.The length of needle thread
does not become short.
11.The knotting section of bo-
bbin thread at 2nd stitch at the
sewing start appears on the
riaht side.
① Stitches are slipped at the start.
② The needle thread remaining on the needle
after thread trimming is too short.
③ The bobbin thread is too short.
④ Needle thread tension at 1st stitch is too high.
⑤ Thread clamp is unstable(material is apt to
be expanded, thread is hard to slide, thread is
thick, etc.).
⑥ Pitch at 1st stitch is too small.
① The shuttle or the driver has scratches.
② The needle hole guide has scratches.
③ The needle strikes the work clamp foot.
④ Fibrous dust is in the groove of the shuttle race.
⑤ The needle thread tension is too high.
⑥ The tension of the thread take-up spring is too
high.
⑦ The synthetic fiber thread melts due to heat
generated on the needle.
① The needle is bent.
② The needle hits the work clamp foot.
③ The needle is too thin for the material.
④ The driver excessively bends the needle.
⑤ Needle thread is stepped on by the work
clamp foot at the start of sewing. (Needle bend)
① The counter knife is dull.
② The difference in level between the needle hole
guide and the counter knife is not enough.
③ The moving knife has been improperly positioned.
④ The last stitch is skipped.
⑤ Bobbin thread tension is too low.
① The motions of the needle and shuttle are not
properly synchronized.
② The clearance between the needle and shuttle is
too large.
③ The needle is bent.
④ The driver excessively bends the needle.
① The needle thread tension is not high enough.
② The tension release mechanism fails to work
properly.
③ The needle thread after thread trimming is too
long.
④ Number of stitches is too few.
⑤ When sewing length is short (End of needle
thread protrudes on the wrong side of sewing
product.)
⑥ Number of stitches is too few.
① The moving knife has been improperly position.
① The needle thread at the sewing start is too long.
① The tension of thread take-up spring is too low.
① The tension of thread tension controller No. 1
is too low.
② The tension of thread take-up spring is too high.
③ The tension of thread take-up spring is too low
and motion is unstable.
① ldling of bobbin is large.
② The bobbin thread tension is too low.
③ The needle thread tension at 1st stitch is too high.
※ Adjust the clearance between the needle and the
shuttle to 0.05 to 0.1 mm.
※ Set soft-start sewing at the start of bartacking.
※ Correct the thread tension release timing of the
thread tension controller No. 2.
※ Increase the tension of the thread take-up spring,
or decrease the tension of the thread tension
controller No. 1.
※ Decrease the tension of the bobbin thread.
※ Increase the clearance between the needle hole
guide and the counter knife.
※ Decrease the tension at lst stitch.
※ Decrease the number of rotation at 1st stitch at
the sewing start. (Extent of 600 to 1,000 rpm)
※ Increase the number of stitches of thread clamp to
3 to 4 stitches.
※ Make the pitch at lst stitch longer.
※ Decrease the needle thread tension at 1st stitch.
※ Take it out and remove the scratches using a fine
whetstone or buff.
※ Buff or replace it.
※ Correct the position of the work clamp foot.
※ Take out the shuttle and remove the fibrous dust
from the shuttle race.
※ Reduce the needle thread tension.
※ Reduce the tension.
※ Use silicone oil.
※ Replace the bent needle.
※ Correct the position of the work clamp foot.
※ Replace it with a thicker needle according to the
material.
※ Correctly position the needle and the shuttle.
※ Widen the distance between the needle and the
wiper. (23 to 25 mm)
※ Replace the counter knife.
※ Increase the bend of the counter knife.
※ Correct the position of the moving knife.
※ Correct the timing between the needle and the
shuttle.
※ In crease the bobbin thread tension.
※ Correct the positions of the needle and shuttle.
※ Correct the positions of the needle and shuttle.
※ Replace the bent needle.
※ Correctly position the driver.
※ Increase the needle thread tension.
※ Check whether or not the tension disc No.2 is
released during bar-tracking.
※ Increase the tension of the thread tension
controller No. 1 .
※ Correct the position of the moving knife.
※ Turn OFF the thread clamp.
※ Turn OFF the thread clamp.
※ Use the lower plate, the hole of which is larger
than the presser.
※ Correct the position of the moving knife.
※ Tighten thread tension controller No. 1 and
make the length of needle thread 33 to 36 mm.
※ Increase the tension of the thread take-up spring.
※ Increase the tension of thread tension controller
No.1 .
※ Decrease the tension of thread take-up spring.
※ Increase the tension of thread take-up spring
and lengthen the stroke as well.
※ Adjust the position of the moving knife.
※ Increase the bobbin thread tension.
※ Decrease the needle thread tension at 1st stitch.
※ Turn OFF the thread clamp.
33
38
16
15
34
33
15
16
14
13
33
33
35
34
33
33
33
13
33
15
15
34
Trouble Cause Corrective measures page
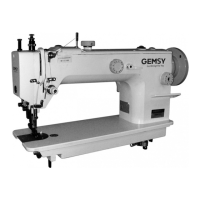
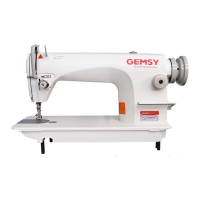
使用说明书 Operation Instruction
60