FC8000-UM-251-9370 6-22
6. DISASSEMBLY AND REASSEMBLY
6.2.11 How to Replace the X-motor
How to detach the X-motor
(1) Detachtherightsidecover(seeSubsection6.1.1).
(2) Detachthemainboard(seeSubsection6.2.12).
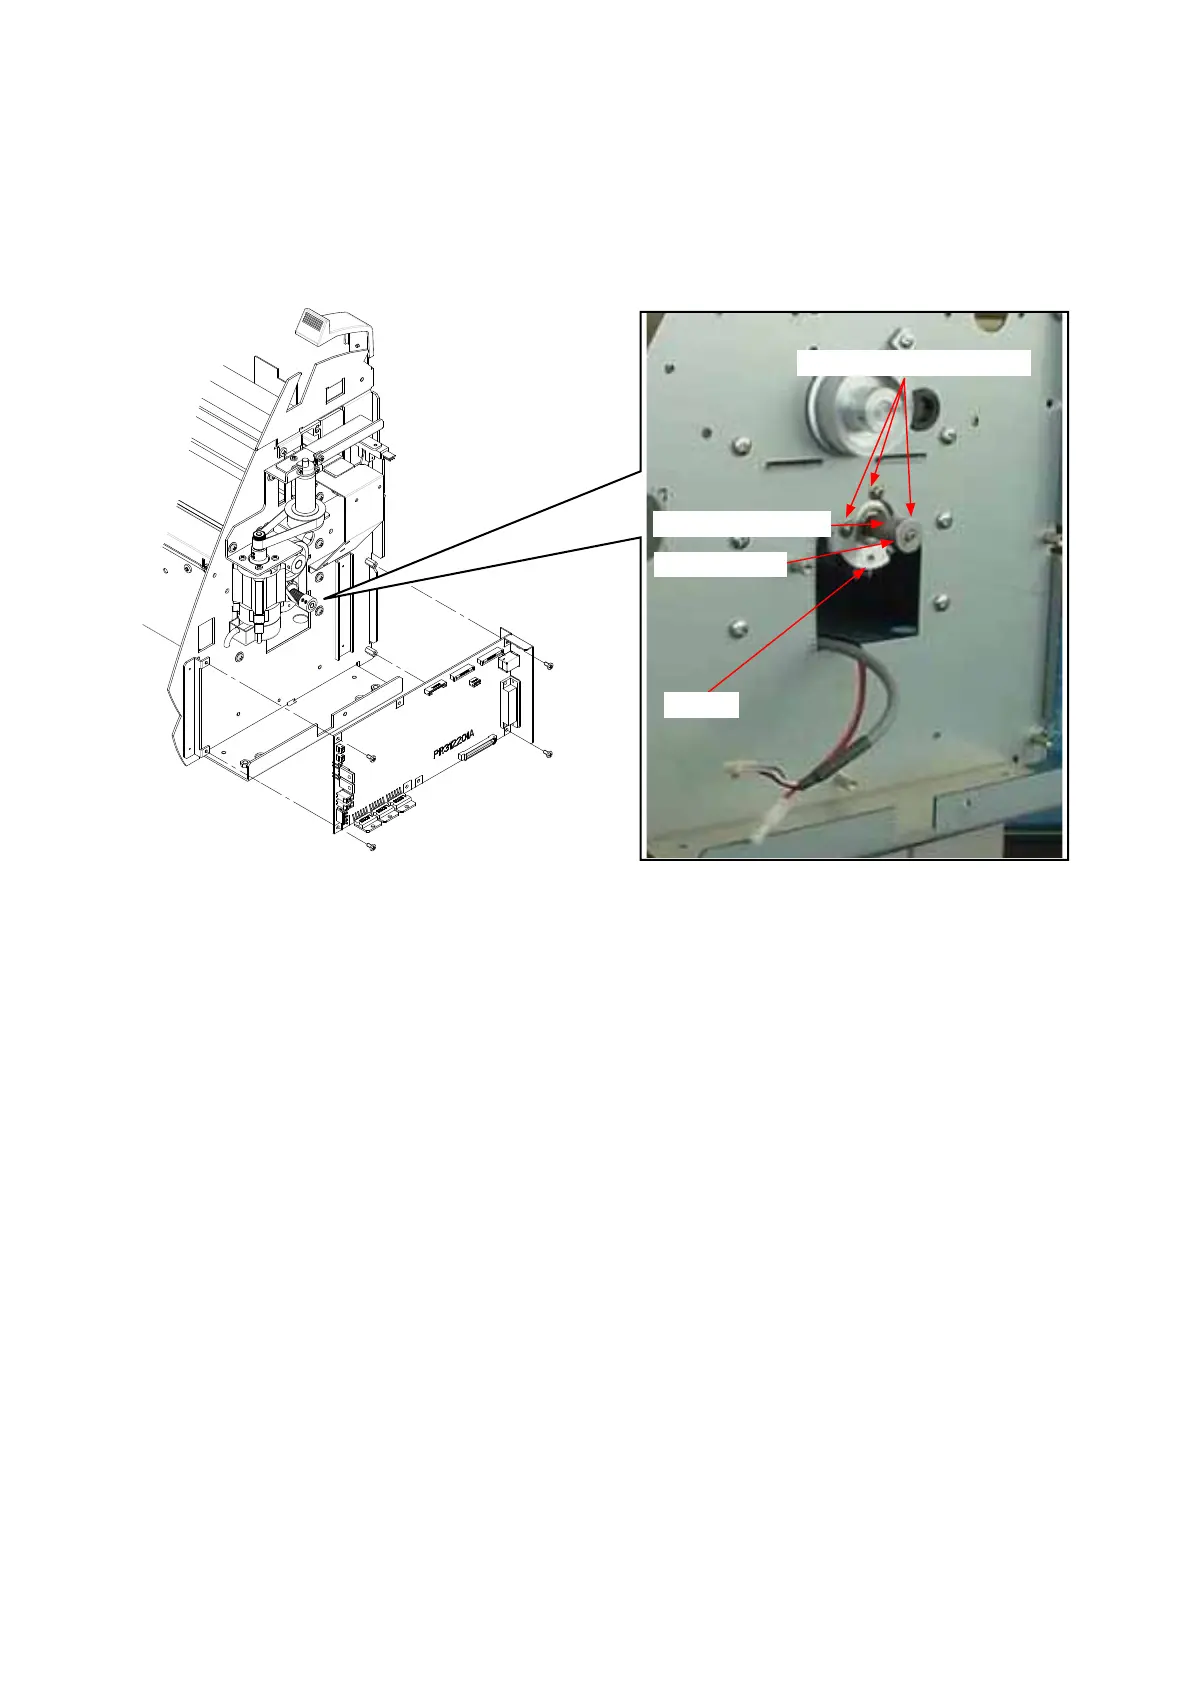
(3) LoosenthetwoM3L4WPsetscrewsholdingtheX-motorpulley,thendetachtheX-motorpulley.
M3L6bindingheadscrew
M3L4WPsetscrew
Xmotorpulley
Xmotor
(4) RemovethethreeM3L6bindingheadscrewsholdingtheX-motor,thendetachtheX-motor.
How to reinstall the X-motor
(1) AttachtheX-motortotherightsideplate.
(2) HangtheX-drivebeltontheX-drivepulley.
(3) AttachtheX-motorpulleytotheX-motor.
(4) TightenthetwoM3L4WPsetscrewsthatholdtheX-motorpulley.
(5) SpreadasuitablequantityofLoctite222onthetwoM3L4WPsetscrewsthatholdtheX-motorpulley.
(6) PerformtheX-drivebelttensionadjustment.(seeSubsection7.2.3).
(7) TightenthemountingscrewsthatholdtheX-motor.
(8) SpreadasuitablequantityoftheShinetusilicongreaseG501ontheX-motorpulley.
(9) MovetheX-drivepulleyandcheckthetensionoftheX-drivebelt.
(10)Reattachtheotherpartsinthereverseorderinwhichtheyweredetached.