4
Applicator description Operating instructions HERMA 400
60/154 3.28 US (130519)
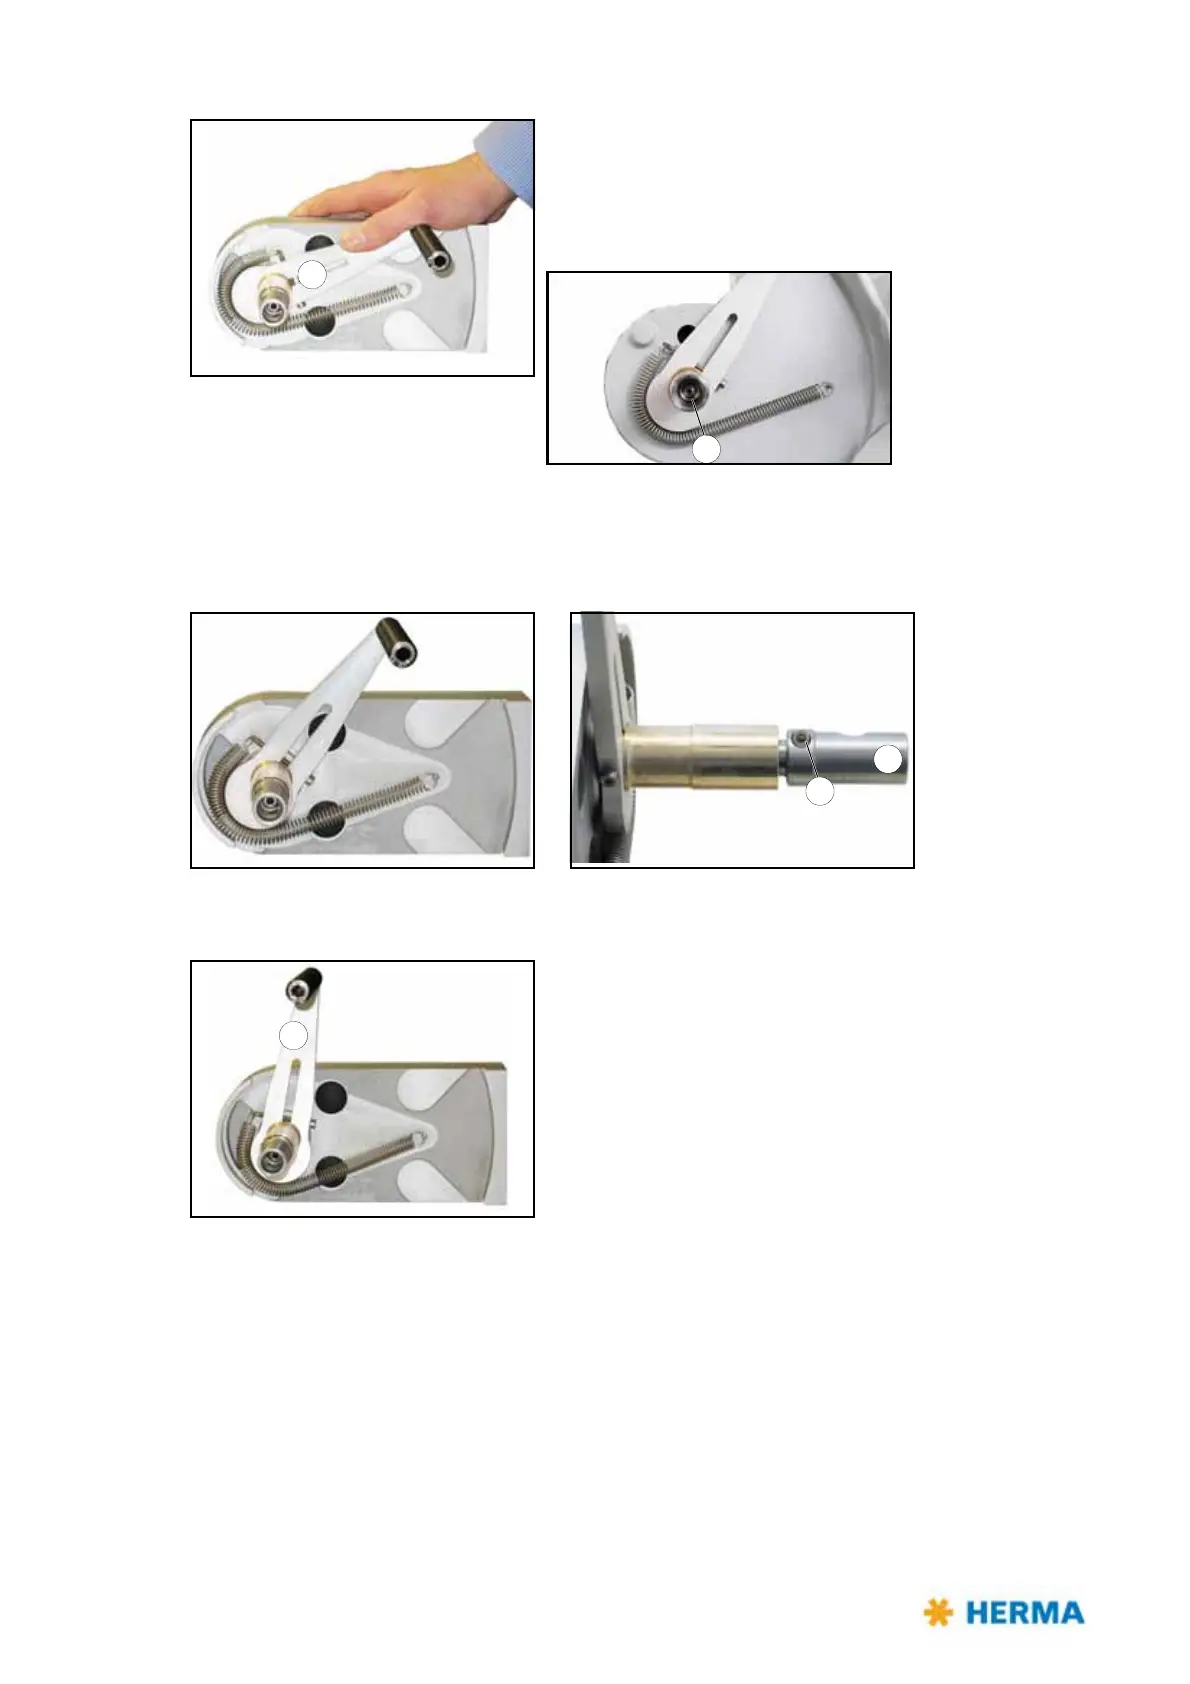
> Deflect lever 20 widely. Tighten clamping screw 18 slightly
(not completely) such that the lever remains deflected
after letting go but still can be turned manually. Make sure
at the same time that clamping piece 17 is fixed on the
shaft without play.
Fully tighten screw 25, slowly loosen it thereafter until lever 20 is deflected approx. 45° (see following
figure). So not change screw 25 thereafter.
Position lever 20 manually into a position of approx.
80° – 85° with respect to the basic unit. Put on clamping
screw 18 completely.
If you deflect and let go of the lever several times after
having adjusted it this way it must stand still when guided
back (not letting go from a deflected position) at a position
of max. 90°.