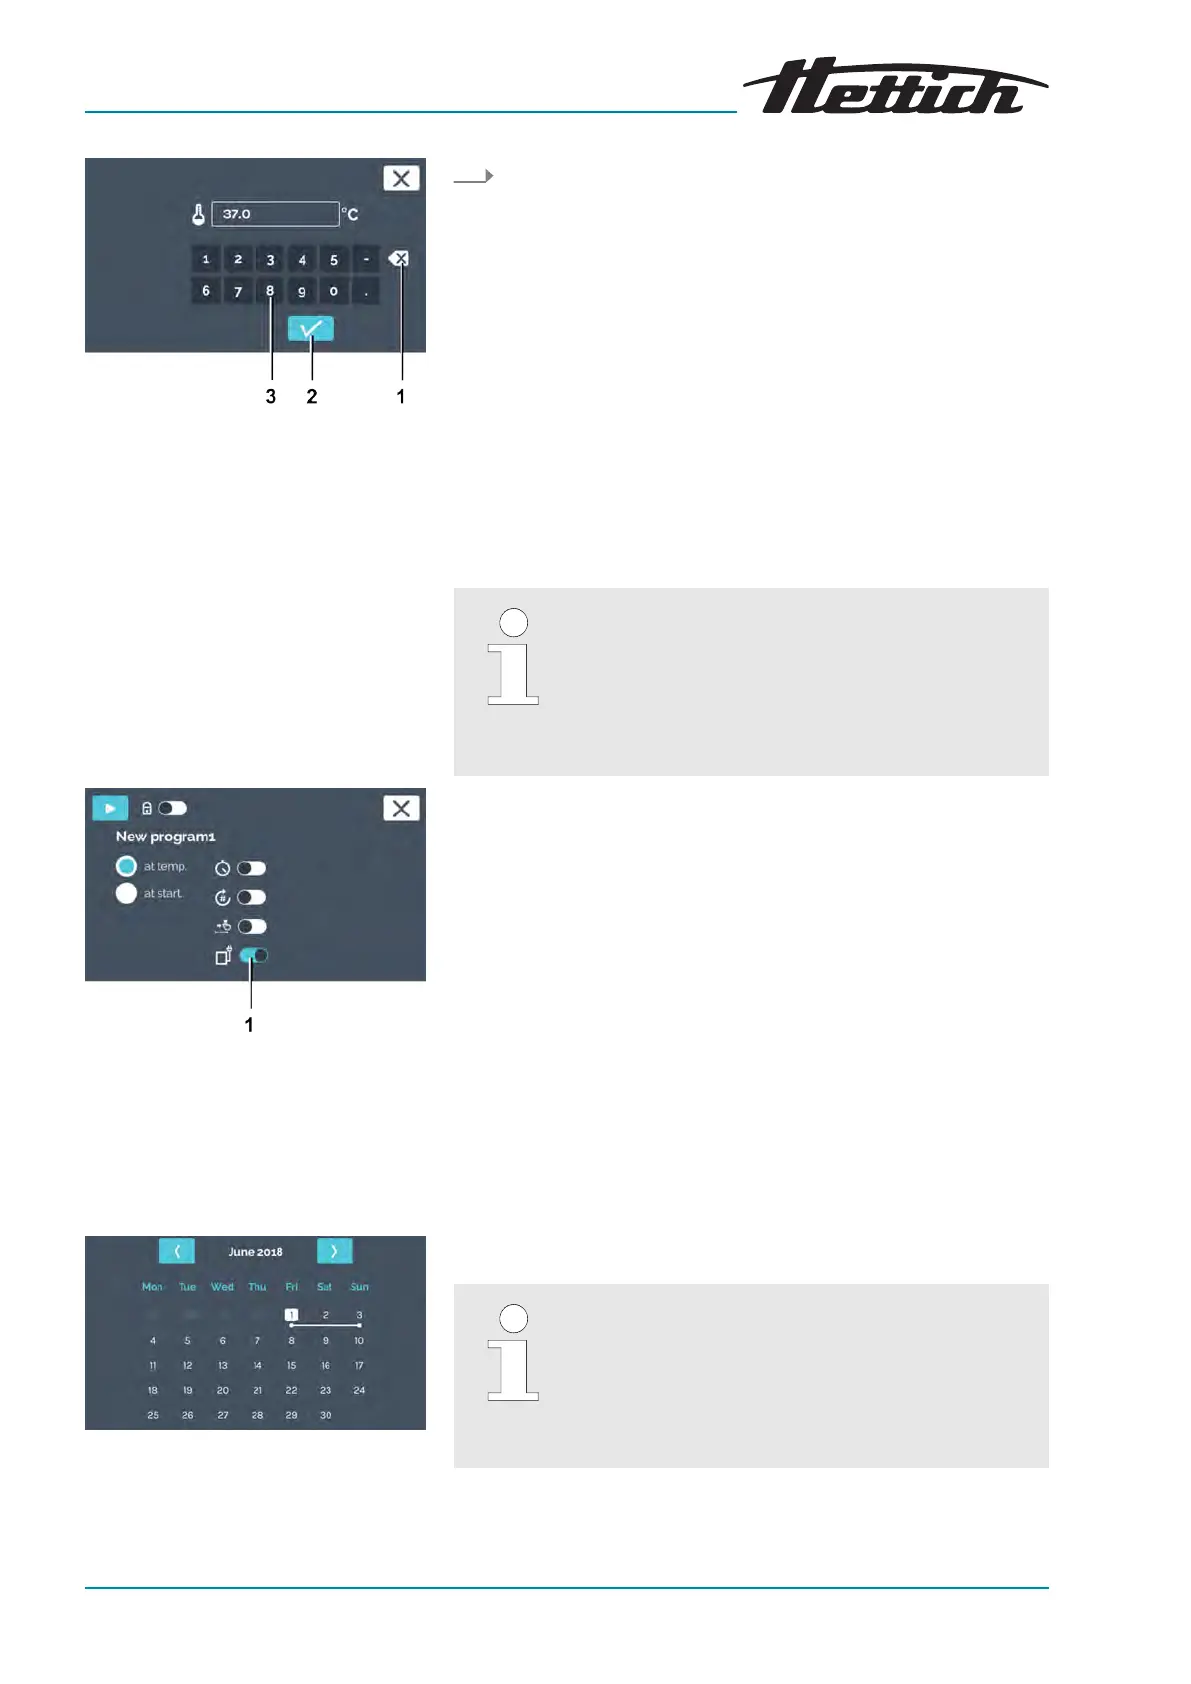
Fig. 134: ‘Holding temperature
Program temperature setpoint input’
1
[Clear input]
button
2
[Conrmation]
button
3 Keypad
3.
Control contact (option)
Fig. 135: Start settings — Control
contact
1
[Control contact]
switch
Program run-time overview
Fig. 136: Calender — Program run-
time overview
You can now either
■ select the existing value by tapping it and entering a new
value via the keypad or
■ delete the existing value with the
[Delete entry]
button and
entering a new value via the keypad.
Conrm the entry with the
[Conrmation]
button.
The control contact button is only available on incu-
bators with the Switchboard option
Chapter 6.13.6.1 ‘Switchboard option’
on page 102or passive dehumidication option
Chapter 6.13.6.2 ‘Passive dehumidication option’
on page 104.
The control contact can be activated or deactivated in every program
segment. The control contact switches devices on/off which are con-
nected to the Switchboard (option). In the case of the passive dehu-
midication option, the ventilation opening is opened or closed by the
control contact.
If the control contact should be switched during the program run, the
[Control contact]
switch must be activated here. If it is deactivated,
the program is run without consideration of the control contact. The
‘Control contact’
symbol is only displayed if the control contact is
activated in the device settings
Chapter 6.13.6 ‘Control contact
(option)’ on page 101
.
In the case of the passive dehumidication option
Chapter 6.13.6.2 ‘Passive dehumidication option’ on page 104
the
ventilation opening is opened or closed by the control contact.
The calendar is only displayed if the starting point
‘at start’
is acti-
vated. The planned program run is depicted as a white line in the cal-
endar.
When ‘at temperature’ is set, the incubator cannot
calculate the required time for this in advance. The
temperature depends on many process-dependent
variables, such as the load type, amount and place-
ment of the load, door openings, ambient conditions,
etc.