8.1 Connecting a Printer (to print captured screen images)
124
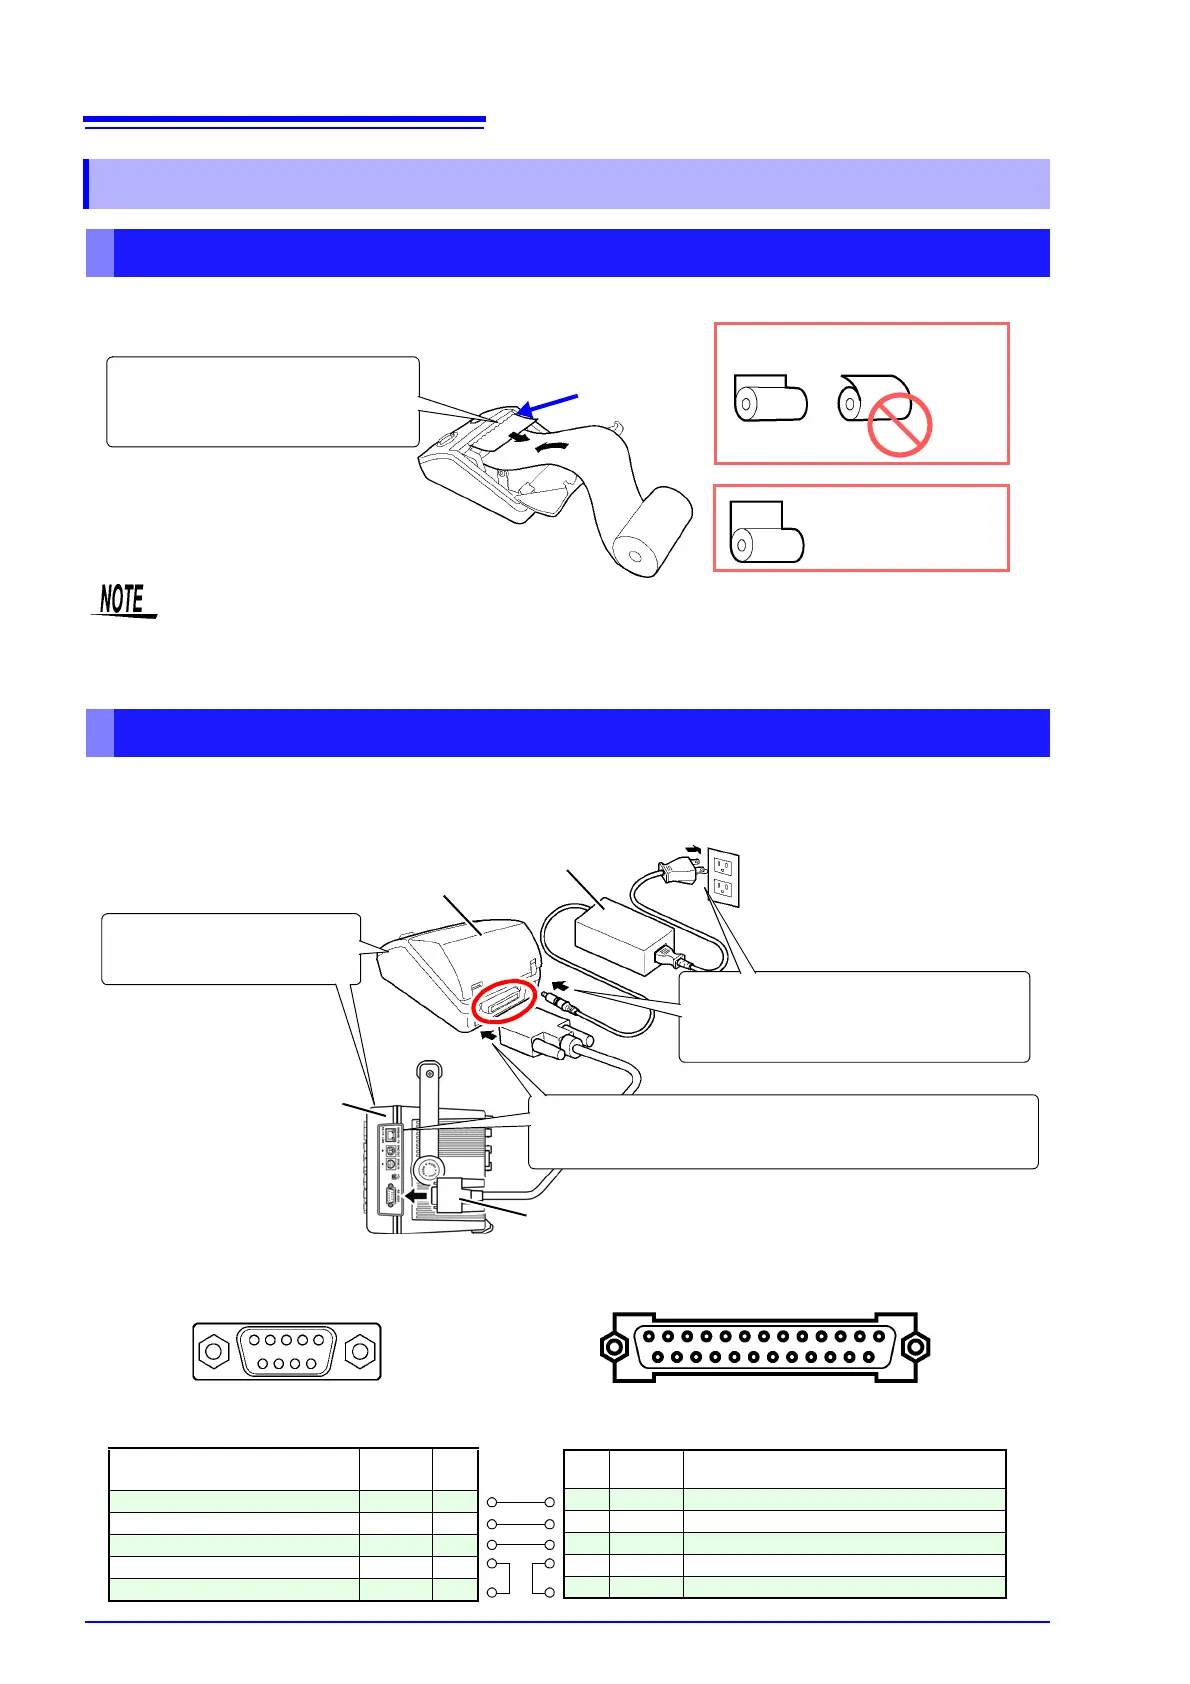
Required items: Hioki 9237 Recording Paper
Required items: Hioki 9671 AC Adapter (for Hioki 9670; not needed for battery pack operation), and
9638 RS-232C Cable
8.1.1 Printer Preparation and Connection
Loading Hioki 9237 Recording Paper in the Printer
Cut the paper straight
horizontally.
Note the proper paper
orientation!
OK
• Use only Hioki-specified recording paper. Other papers may degrade performance or prevent
printing.
• Paper jams may occur if the paper is skewed in the roller.
• Printing is not possible if the front and back of the recording paper are reversed.
Paper insertion slot
Lift the printer head cover and
load the paper through the
insertion slot.
Procedure
Connecting the Printer to the Instrument
9671 AC Adapter
1
Connect the AC adapter to the
printer, and plug it into an outlet.
(except for battery pack operation)
Turn on the instrument
and the printer.
3
9670 Printer
Procedure
9638 RS-232C Cable
2
Connect the RS-232C cable between the instrument's
RS-232C interface and the printer.
Hioki 3390
25 . . . . . . . . . . . . . . . . . . . . 14
Printer Interface (25-pin)
1 2 3 4 5
6 7 8 9
Instrument Interface (9-pin)
Pin
No.
Signal Circuit
2 TxD Transmit data
3 RxD Receive data
7 GND Common ground for signal return
4 RTS Request to send
5 CTS Clear to send
13. . . . . . . . . . . . . . . . . . . . . . . . .1
Circuit Signal
Pin
No.
Receive data RxD 2
Transmit data TxD 3
Common ground for signal return GND 5
Request to send RTS 7
Clear to send CTS 8
RS232C Interface Pin-Out