8.3 Connecting Multiple 3390 (Synchronized Measurements)
130
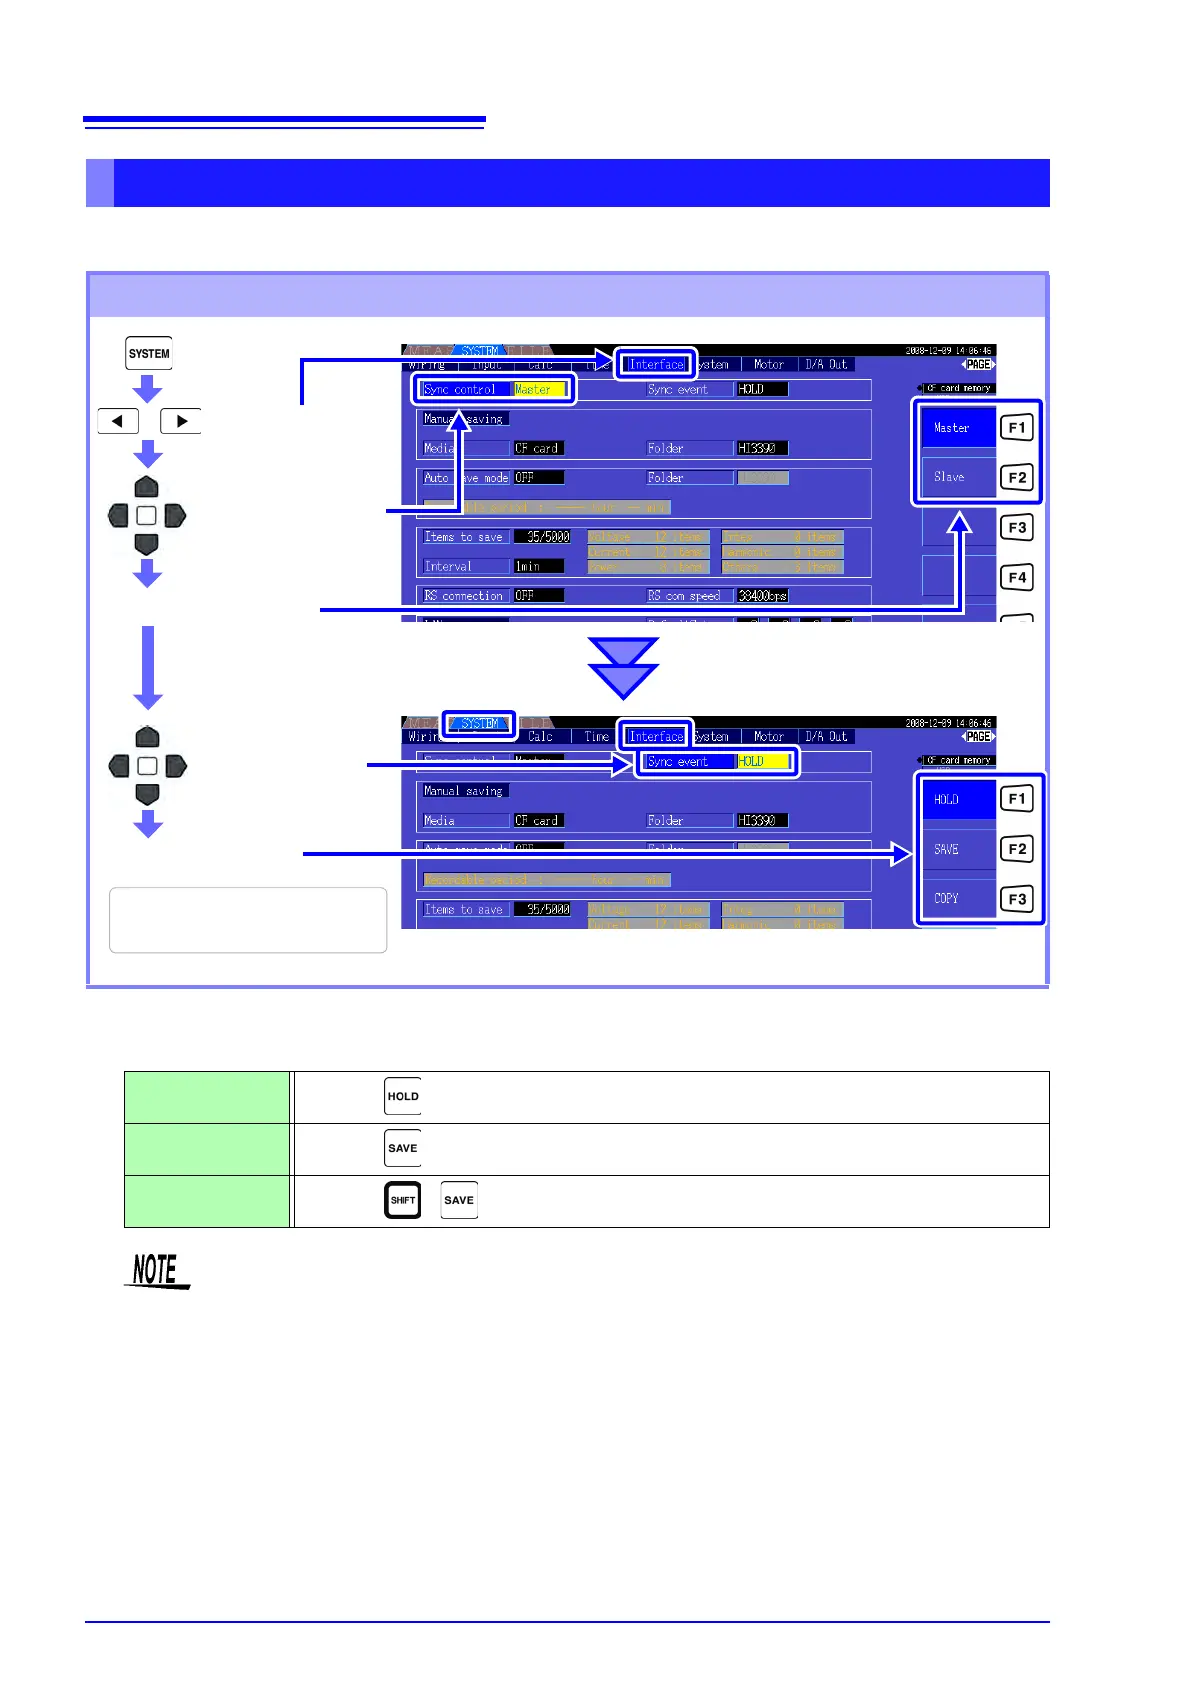
Set each instrument to be either the master or a slave.
These settings are made on the [Interface] page of the Setting screen.
Sync event Select the events to be synchronized
(master settings are reflected on the slaves)
Instrument Settings for Synchronous Measurement
Setting Procedure
Display the
[Interface] page
Select with the F keys
Select [Sync event]
Select with the F keys
Reboot the instrument when changing
from master to slave.
Select [Sync control]
HOLD Pressing on the master activates Data Hold on all instruments.
SAVE Pressing on the master executes manual saving on all instruments.
COPY Pressing + on the master captures the screen image on all instruments.
• The RTC clock time, timer, and clock control start and stop times cannot be set on the slave
instruments.
• Selecting [SAVE] or [COPY] as a synchronized event sets the manual save destination
folder appropriately and records data on each 3390.
See"7.5.1 Manually Saving Measurement Data" (p. 108), "7.7 Saving Screen Capture Images" (p. 114)
• To save measurement data to storage media with an interval time control combination, set
the same interval setting on the master and all slaves, and enable auto-saving (set to ON). In
this case, selecting [SAVE] as a synchronous event has no effect.
See"5.1 Timing Control Functions" (p. 91), "7.5.2 Auto-Saving Measurement Data" (p. 110)
• Confirm no error display on the slave unit's screen when executing the synchronization
event.