EasyManuals Logo

HPE Apollo 2000 User Manual

HPE Apollo 2000
187 pages
To Next Page IconTo Next Page
To Previous Page IconTo Previous Page
Page #129 background imageLoading...
Page #129 background image
Hardware options installation 129
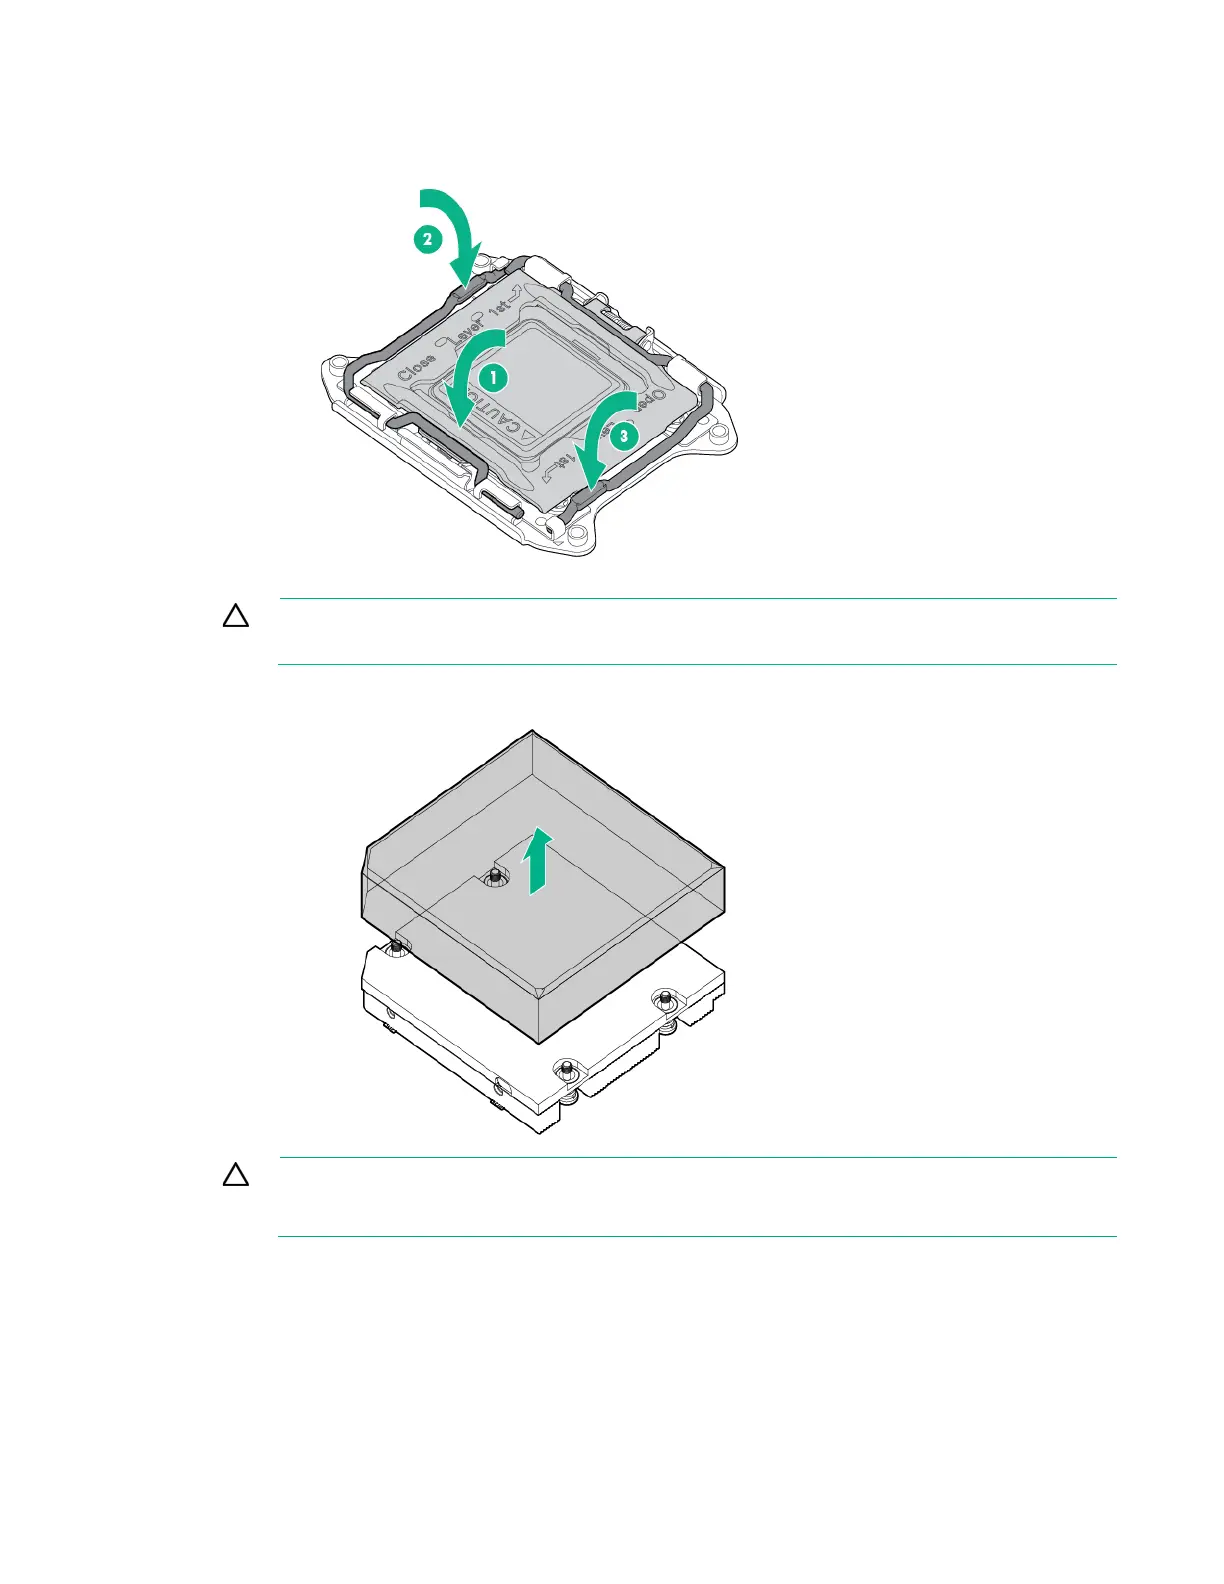
12.
Press and hold the processor retaining bracket in place, and then close each processor locking
lever. Press only in the area indicated on the processor retaining bracket.
CAUTION: Always use a new heatsink when replacing processors. Failure to use new
components can cause damage to the processor.
13. Remove the thermal interface protective cover from the heatsink.
CAUTION:
Heatsink retaining screws should be tightened or loosened in diagonally opposite
pairs (in an "X" pattern). Do not overtighten the screws as this can damage the board,
connectors, or screws.
14. Install the heatsink:
a. Position the heatsink on the processor backplate.
b. Tighten one pair of diagonally opposite screws halfway, and then tighten the other pair of screws.

Table of Contents

Questions and Answers:

Question and Answer IconNeed help?

Do you have a question about the HPE Apollo 2000 and is the answer not in the manual?

HPE Apollo 2000 Specifications

General IconGeneral
Form Factor2U
Memory TypeDDR4
Max Processors2
Memory Slots16 DIMM slots per server tray
Storage OptionsSAS, SATA
NetworkingFlexibleLOM
Network1/10/25/40/100 GbE options
Power SupplyRedundant Power Supplies
Power Supply Options1600W
Operating System SupportMicrosoft Windows Server, Red Hat Enterprise Linux, SUSE Linux Enterprise Server, VMware
StorageUp to 24 drives

Related product manuals