Hardware options installation 130
c.
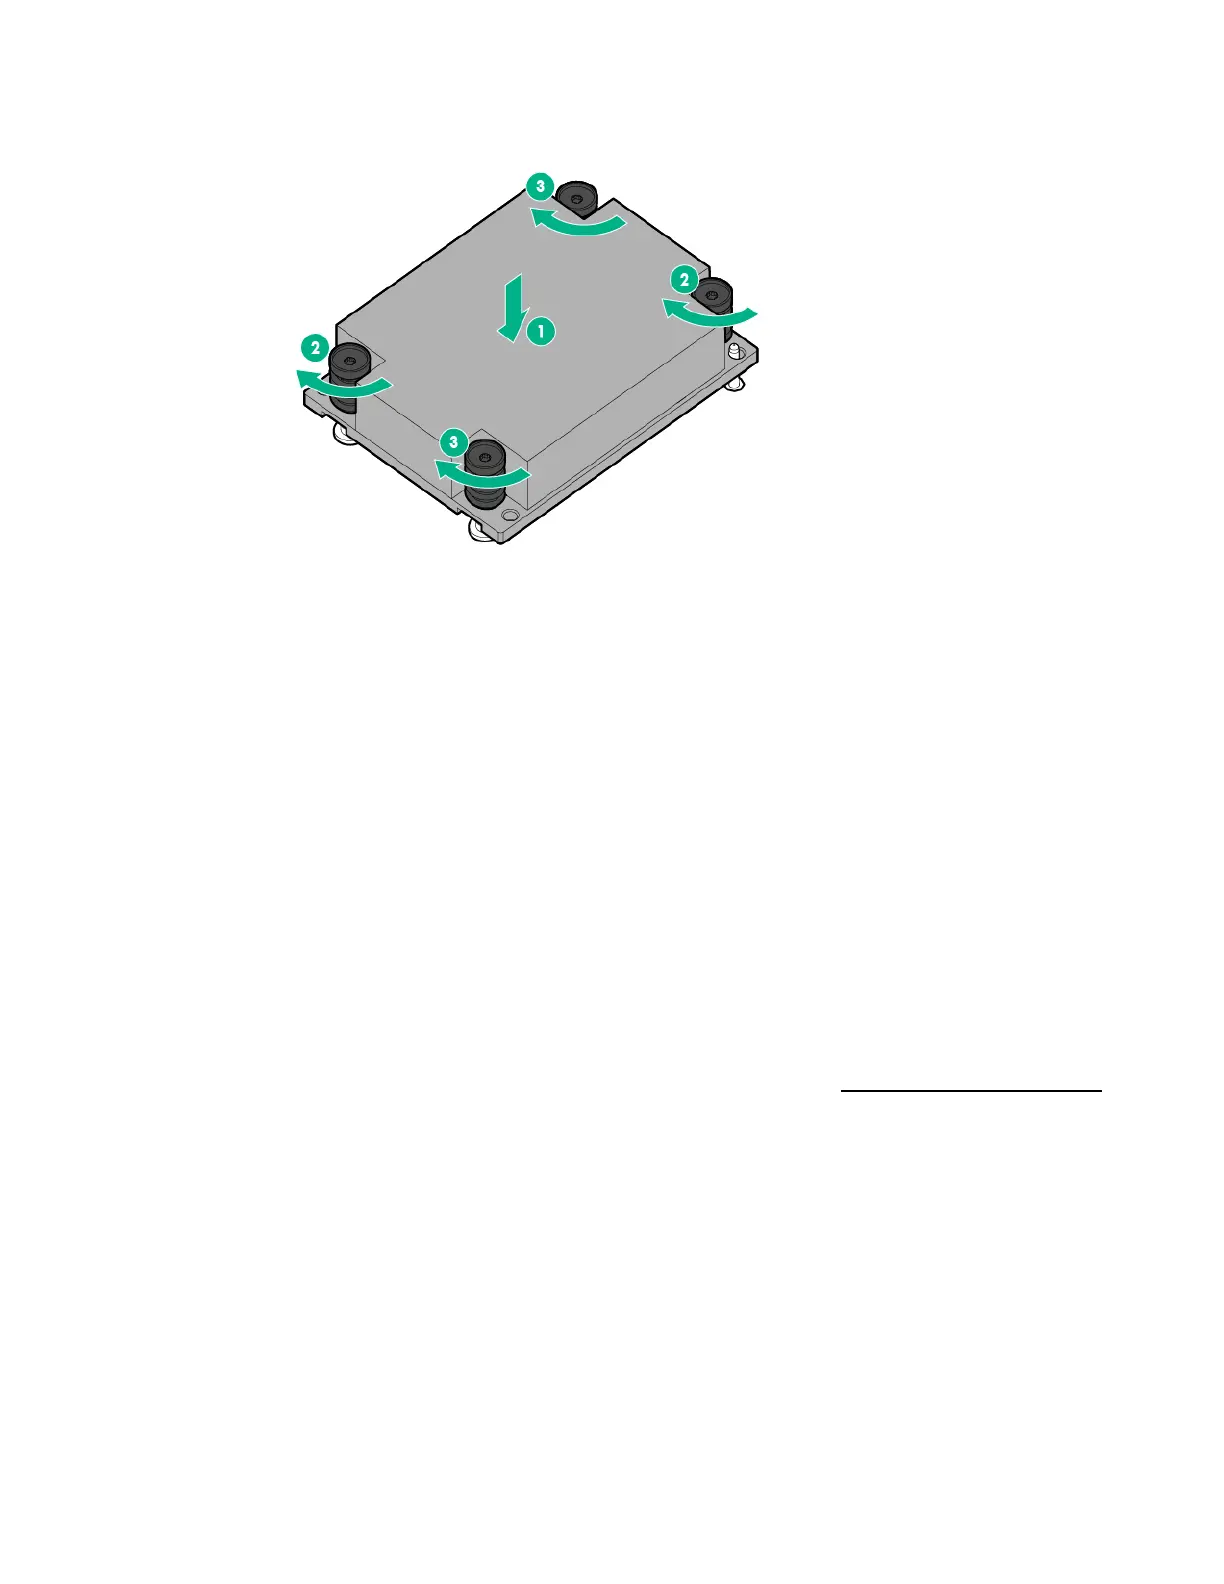
Finish the installation by completely tightening the screws in the same sequence.
15. Install the air baffle (on page 42).
16. Install any removed PCI riser cage assemblies ("PCI riser cage assembly options" on page 84).
17. Install the node into the chassis ("Installing a node into the chassis" on page 60).
18. Connect all peripheral cables to the nodes.
19. Power up the node ("Power up the nodes" on page 32).
Dedicated iLO management port module option
Observe the following rules and limitations when installing an dedicated iLO management port module:
• If a dedicated iLO management port module is installed in a node, the node can only connect to a
network through the dedicated iLO management port module.
• If a dedicated iLO management port module is installed in a node, the node cannot be accessed
through the RCM module (on page 70).
• If using the RCM module iLO ports or the dedicated iLO management port module to connect to a
network, the network must operate at a speed of 1 Gb/s. The server cannot connect to the network if
the network is operating at a speed of 10/100 Mb/s or 10 Gb/s.
For more information about product features, specifications, options, configurations, and compatibility,
see the product QuickSpecs on the Hewlett Packard Enterprise website (http://www.hpe.com/info/qs).
To install the component:
1. Power down the node (on page 32).
2. Disconnect all peripheral cables from the node.
3. Remove the node from the chassis (on page 32).
4. Place the node on a flat, level surface.
5. Remove any installed PCI riser cage assemblies ("Remove the PCI riser cage assembly" on page
48).
6. Remove all rear I/O blanks ("Remove the rear I/O blank" on page 39).
7. Remove the knockout.
a. Insert a flat screwdriver into the knockout.