Hardware options installation 82
The Processor Information screen shows detailed information about the processors installed in the
server.
4. Press Esc until the main menu is displayed.
5. Select Reboot the System to exit the utility and resume the boot process.
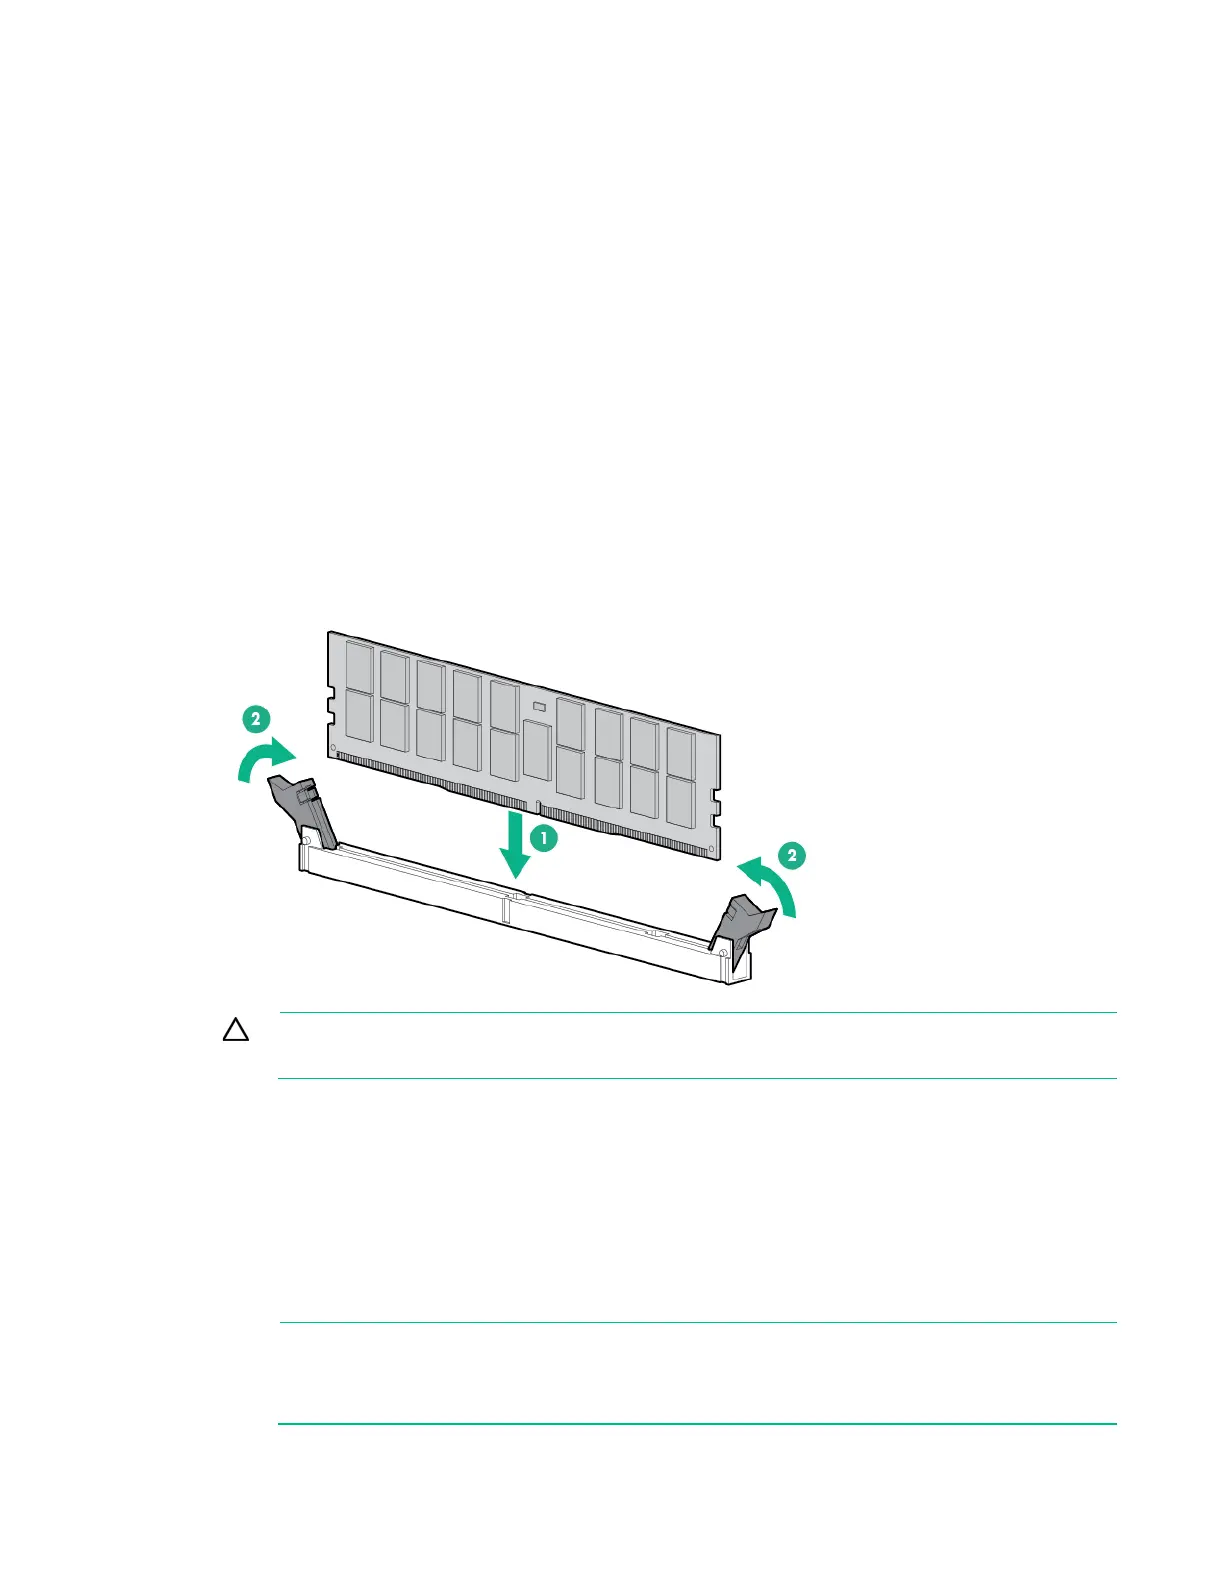
Installing a DIMM
1. Power down the node (on page 32).
2. Disconnect all peripheral cables from the node.
3. Remove the node from the chassis (on page 32).
4. Place the node on a flat, level surface.
5. If installed in a 2U node, remove the FlexibleLOM 2U node riser cage assembly ("FlexibleLOM 2U
node riser cage assembly" on page 52).
6. If installed in a 2U node, remove the three-slot riser cage assembly ("Three-slot riser cage
assemblies" on page 52).
7. Remove the air baffle (on page 41).
8. Open the DIMM slot latches.
9. Install the DIMM.
CAUTION: To prevent damage to the server, ensure that all DIMM latches are in closed and
locked position before installing the air baffle.
10. Install the air baffle (on page 42).
11. Install any removed PCI riser cage assemblies ("PCI riser cage assembly options" on page 84).
12. Install the node into the chassis ("Installing a node into the chassis" on page 60).
13. Connect all peripheral cables to the nodes.
14. Power up the node ("Power up the nodes" on page 32).
SATA and Mini-SAS cable options
IMPORTANT: The HPE Apollo r2800 Chassis does not support nodes using the HPE
Dynamic Smart Array B140i Controller or the HPE P840 Smart Array Controller. Hewlett
Packard Enterprise recommends installing an HPE H240 Host Bus Adapter or HPE P440
Smart Array Controller.