EasyManuals Logo

HPE Apollo 2000 User Manual

HPE Apollo 2000
187 pages
To Next Page IconTo Next Page
To Previous Page IconTo Previous Page
Page #131 background imageLoading...
Page #131 background image
Hardware options installation 131
b.
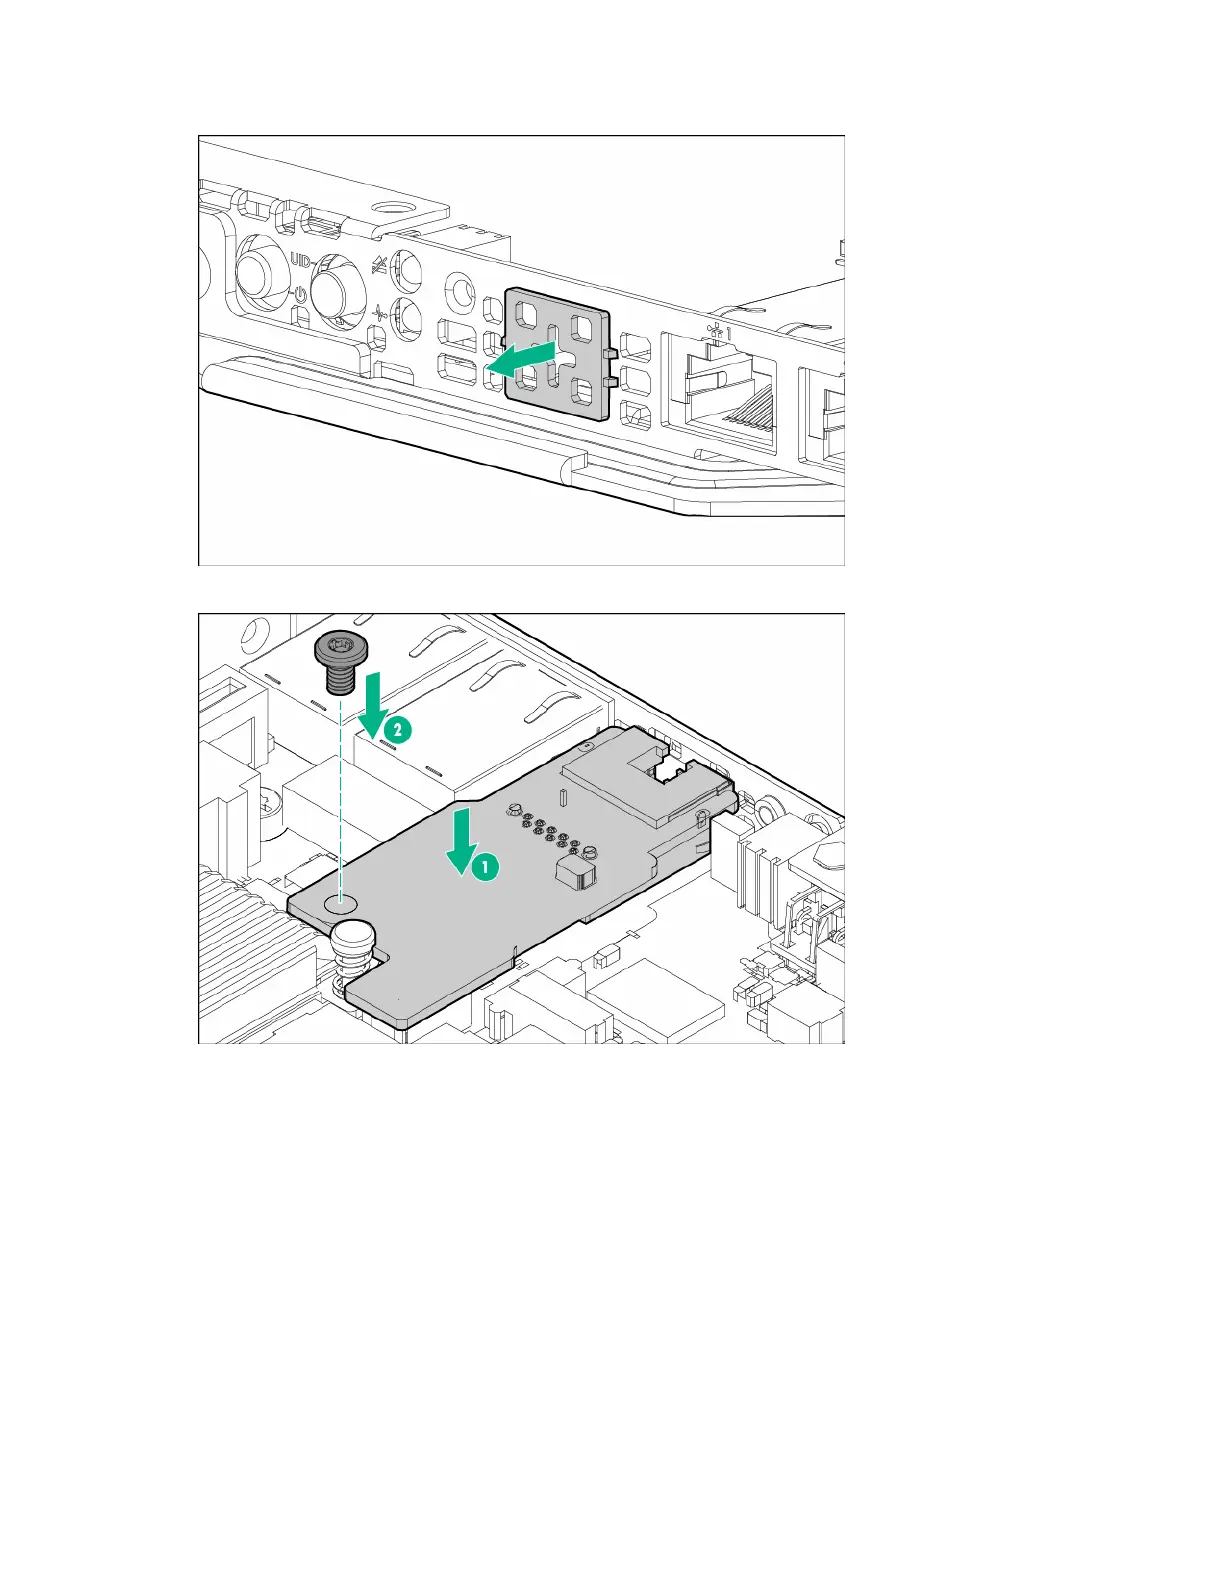
Twist and pull to remove the knockout from the node.
8. Install the dedicated iLO management port card into the node.
9. If removed, install all rear I/O blanks ("Install the rear I/O blank" on page 40).
10. Install any removed PCI riser cage assemblies.
11. Install the node into the chassis ("Installing a node into the chassis" on page 60).
12. Connect all peripheral cables to the nodes.
13. Power up the node ("Power up the nodes" on page 32).
Enabling the dedicated iLO management module
To enable the dedicated iLO management module:
1. During the server startup sequence after installing the module, press F9 in the POST screen.
The System Utilities screen appears.
2. Select System Configuration | iLO 4 Configuration Utility.
The iLO 4 Configuration Utility screen appears.

Table of Contents

Questions and Answers:

Question and Answer IconNeed help?

Do you have a question about the HPE Apollo 2000 and is the answer not in the manual?

HPE Apollo 2000 Specifications

General IconGeneral
Form Factor2U
Memory TypeDDR4
Max Processors2
Memory Slots16 DIMM slots per server tray
Storage OptionsSAS, SATA
NetworkingFlexibleLOM
Network1/10/25/40/100 GbE options
Power SupplyRedundant Power Supplies
Power Supply Options1600W
Operating System SupportMicrosoft Windows Server, Red Hat Enterprise Linux, SUSE Linux Enterprise Server, VMware
StorageUp to 24 drives

Related product manuals