Hardware options installation 133
Installing the Trusted Platform Module board
WARNING: To reduce the risk of personal injury from hot surfaces, allow the drives and the
internal system components to cool before touching them.
1. Power down the node (on page 32).
2. Disconnect all peripheral cables from the node.
3. Remove the node from the chassis (on page 32).
4. Place the node on a flat, level surface.
5. Remove any installed PCI riser cage assemblies ("Remove the PCI riser cage assembly" on page
48).
CAUTION: Any attempt to remove an installed TPM from the system board breaks or
disfigures the TPM security rivet. Upon locating a broken or disfigured rivet on an installed
TPM, administrators should consider the system compromised and take appropriate measures
to ensure the integrity of the system data.
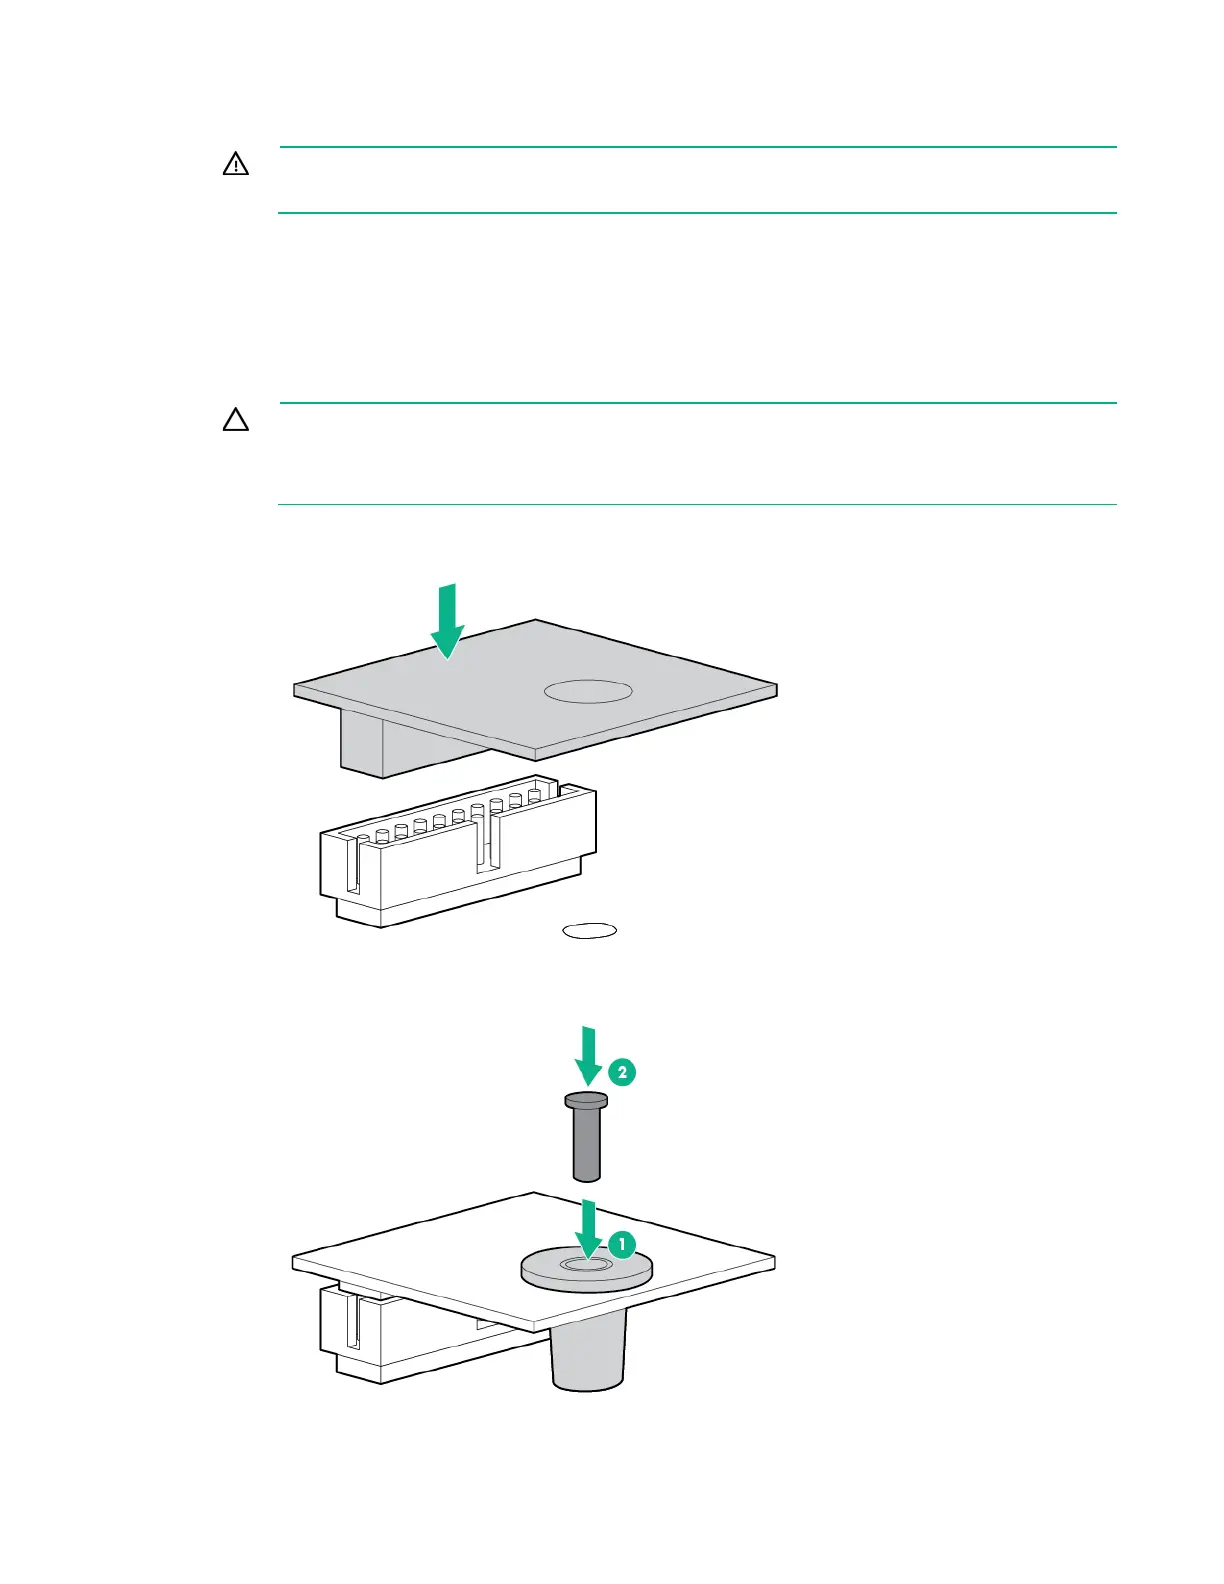
6. Install the TPM board. Press down on the connector to seat the board ("System board components"
on page 15).
7. Install the TPM security rivet by pressing the rivet firmly into the system board.