EasyManuals Logo

HPE Apollo 2000 User Manual

HPE Apollo 2000
187 pages
To Next Page IconTo Next Page
To Previous Page IconTo Previous Page
Page #43 background imageLoading...
Page #43 background image
Operations 43
a.
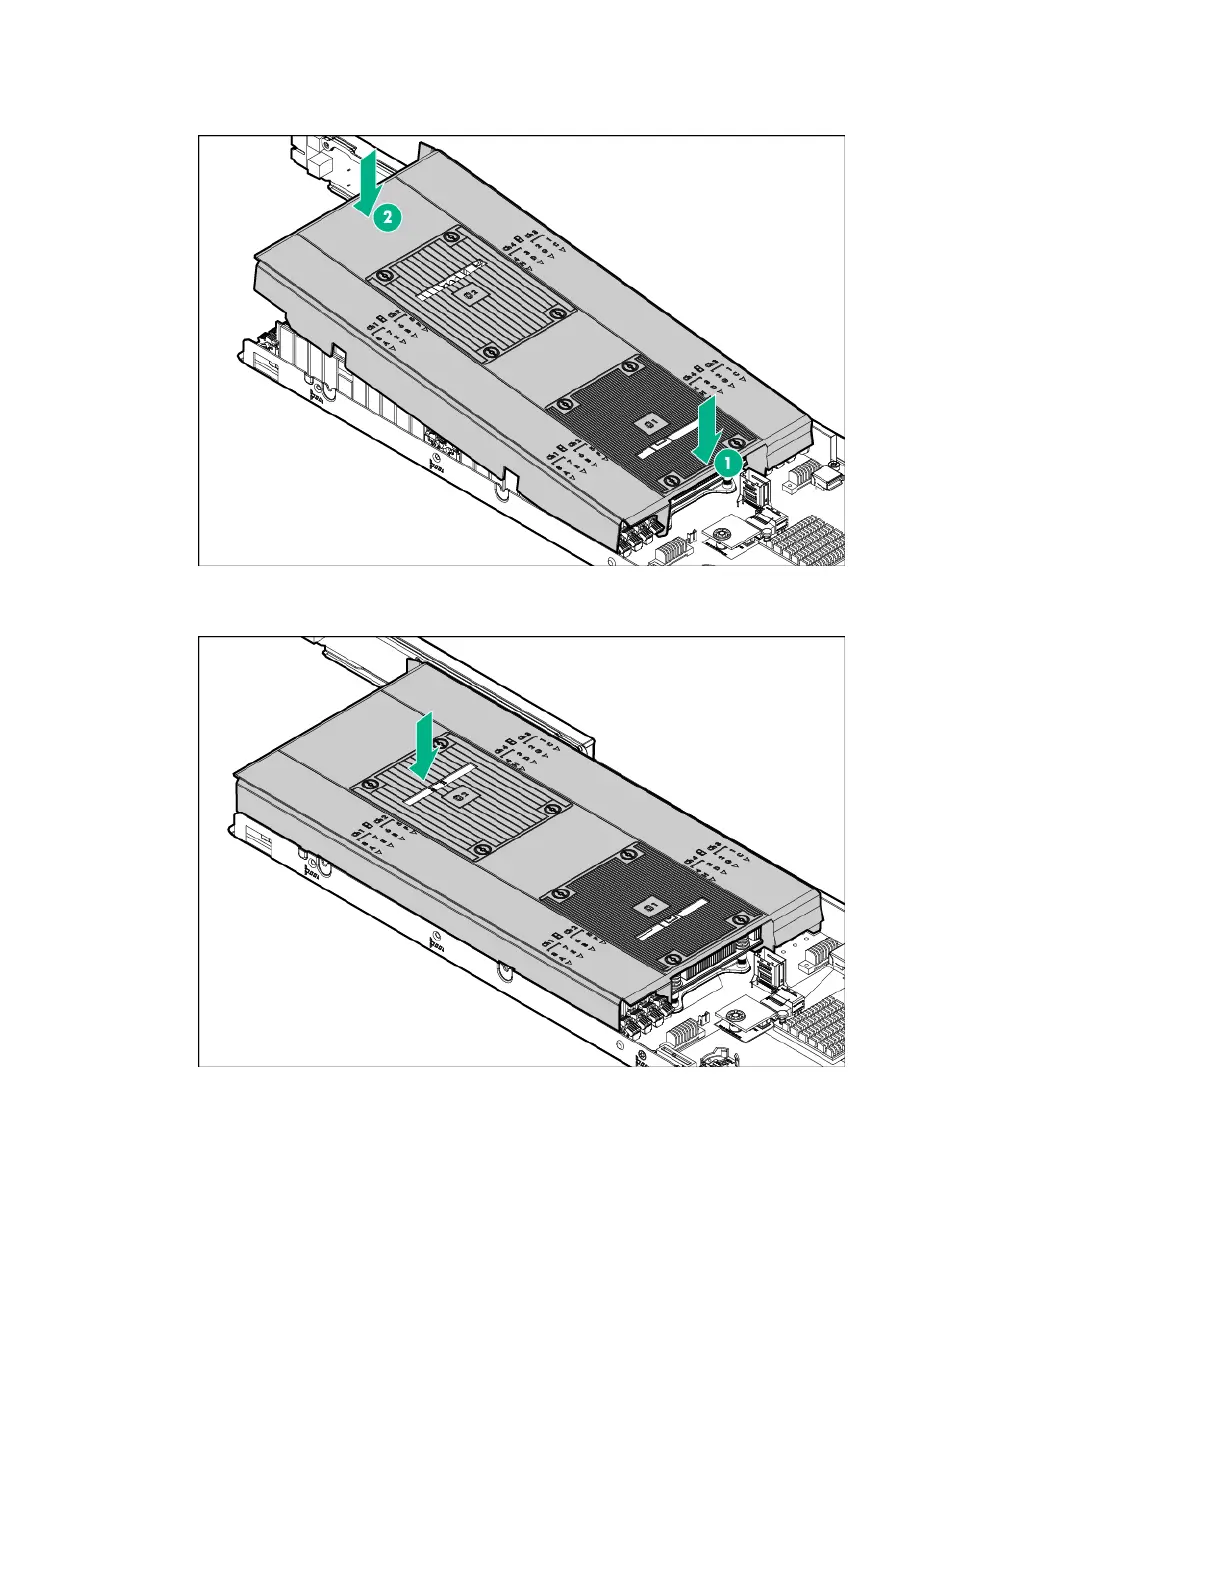
Align the air baffle over the DIMM slot latches and lower the air baffle.
b. If a second processor and heatsink are installed, press down on the rear of the air baffle until it
snaps into place on the heatsink.
2. Install any removed PCI riser cage assemblies ("PCI riser cage assembly options" on page 84).
3. Install the node into the chassis ("Installing a node into the chassis" on page 60).
4. Connect all peripheral cables to the node.
5. Power up the node ("Power up the nodes" on page 32).
Remove the bayonet board assembly
1. Power down the node (on page 32).
2. Disconnect all peripheral cables from the node.
3. Remove the node from the chassis (on page 32).
4. Place the node on a flat, level surface.

Table of Contents

Questions and Answers:

Question and Answer IconNeed help?

Do you have a question about the HPE Apollo 2000 and is the answer not in the manual?

HPE Apollo 2000 Specifications

General IconGeneral
Form Factor2U
Memory TypeDDR4
Max Processors2
Memory Slots16 DIMM slots per server tray
Storage OptionsSAS, SATA
NetworkingFlexibleLOM
Network1/10/25/40/100 GbE options
Power SupplyRedundant Power Supplies
Power Supply Options1600W
Operating System SupportMicrosoft Windows Server, Red Hat Enterprise Linux, SUSE Linux Enterprise Server, VMware
StorageUp to 24 drives

Related product manuals