Hardware options installation 93
b.
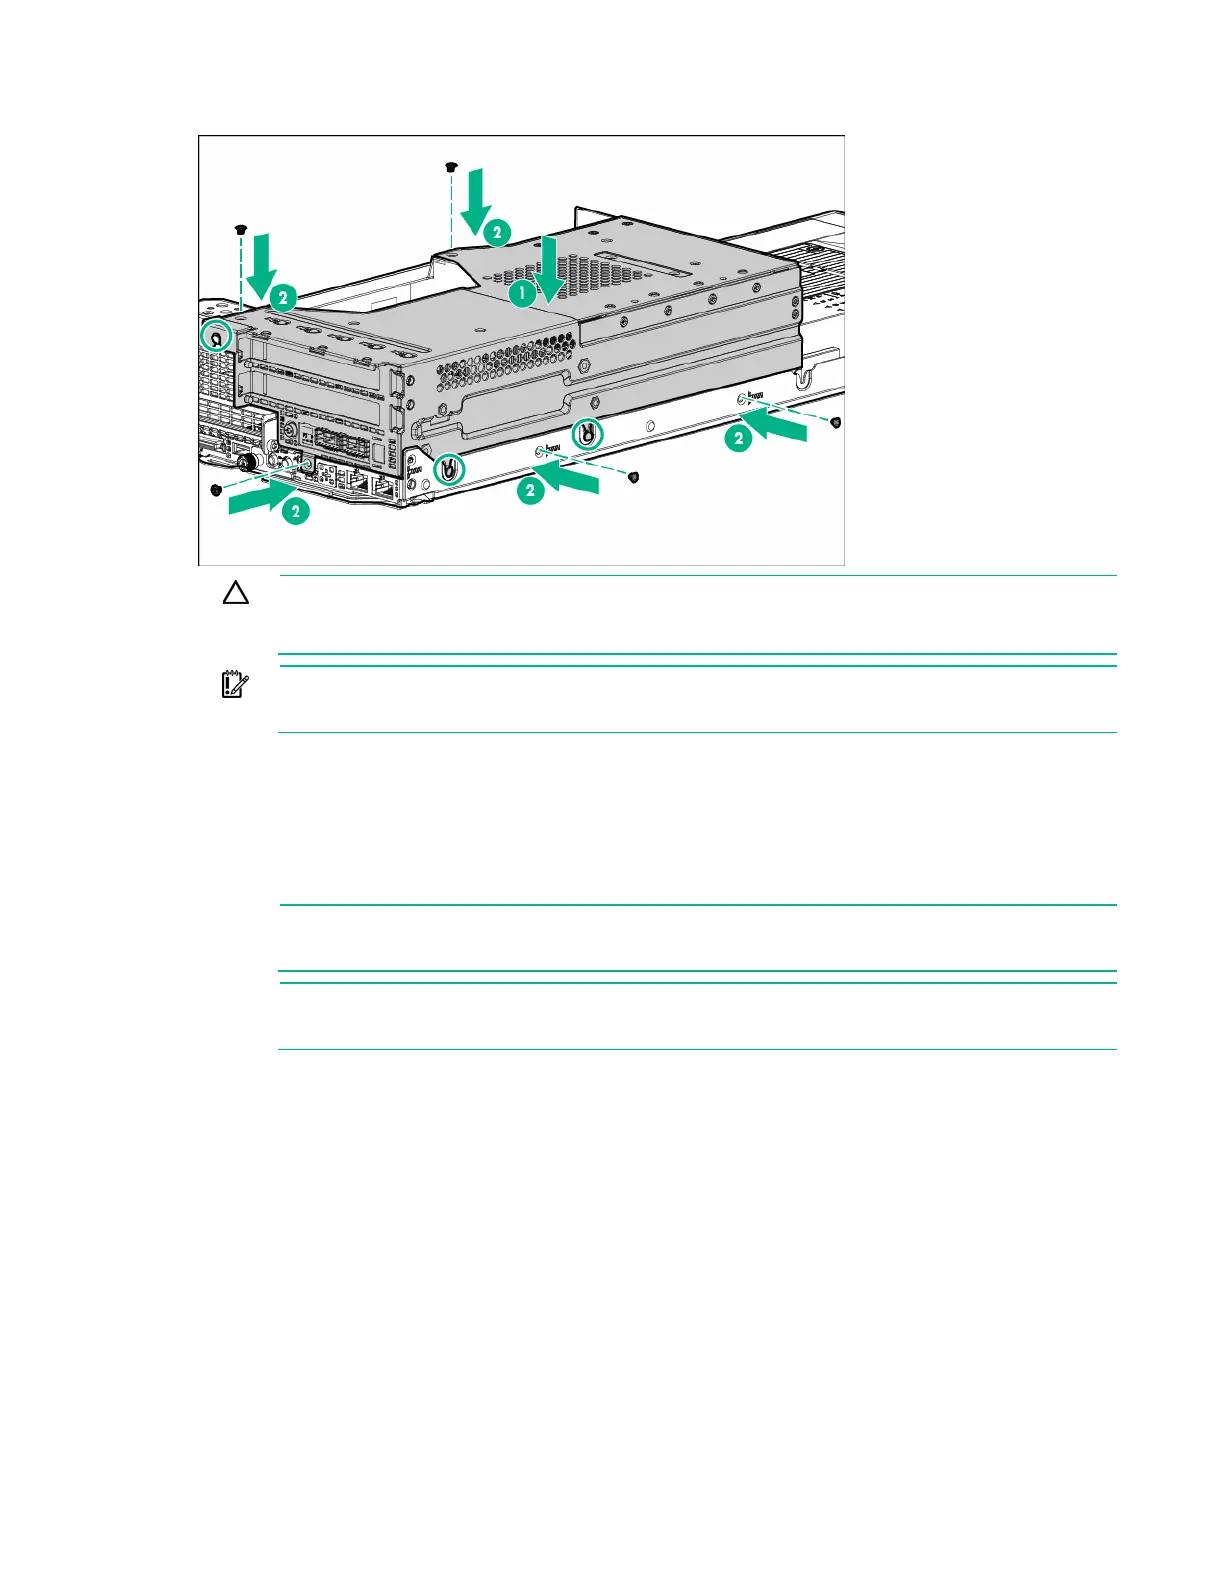
Install the FlexibleLOM 2U node riser cage assembly and secure it with five T-10 screws.
CAUTION: To prevent improper cooling and thermal
damage, do not operate the node unless
all PCI riser cages or rear I/O blanks are installed, and do not operate the node unless all PCI
slots have either an expansion slot cover or an expansion board installed.
IMPORTANT: If the PCIe riser cage assembly is not seated properly, then the server does
not power up.
9. Install the node into the chassis ("Installing a node into the chassis" on page 60).
10. Connect all peripheral cables to the nodes.
11. Power up the node ("Power up the nodes" on page 32).
Three-slot riser cage assembly options
NOTE: A second processor is required to install a three-slot riser cage assembly.
NOTE: Three-
slot riser cage assemblies feature different riser boards. For more information
on the riser board slot specifications, see "PCIe riser board slot definitions (on page 26)."
To install the component:
1. Power down the node (on page 32).
2. Disconnect all peripheral cables from the node.
3. Remove the node from the chassis (on page 32).
4. Place the node on a flat, level surface.
5. Remove the 2U rear I/O blank ("Remove the rear I/O blank" on page 39).