Hardware options installation 96
11.
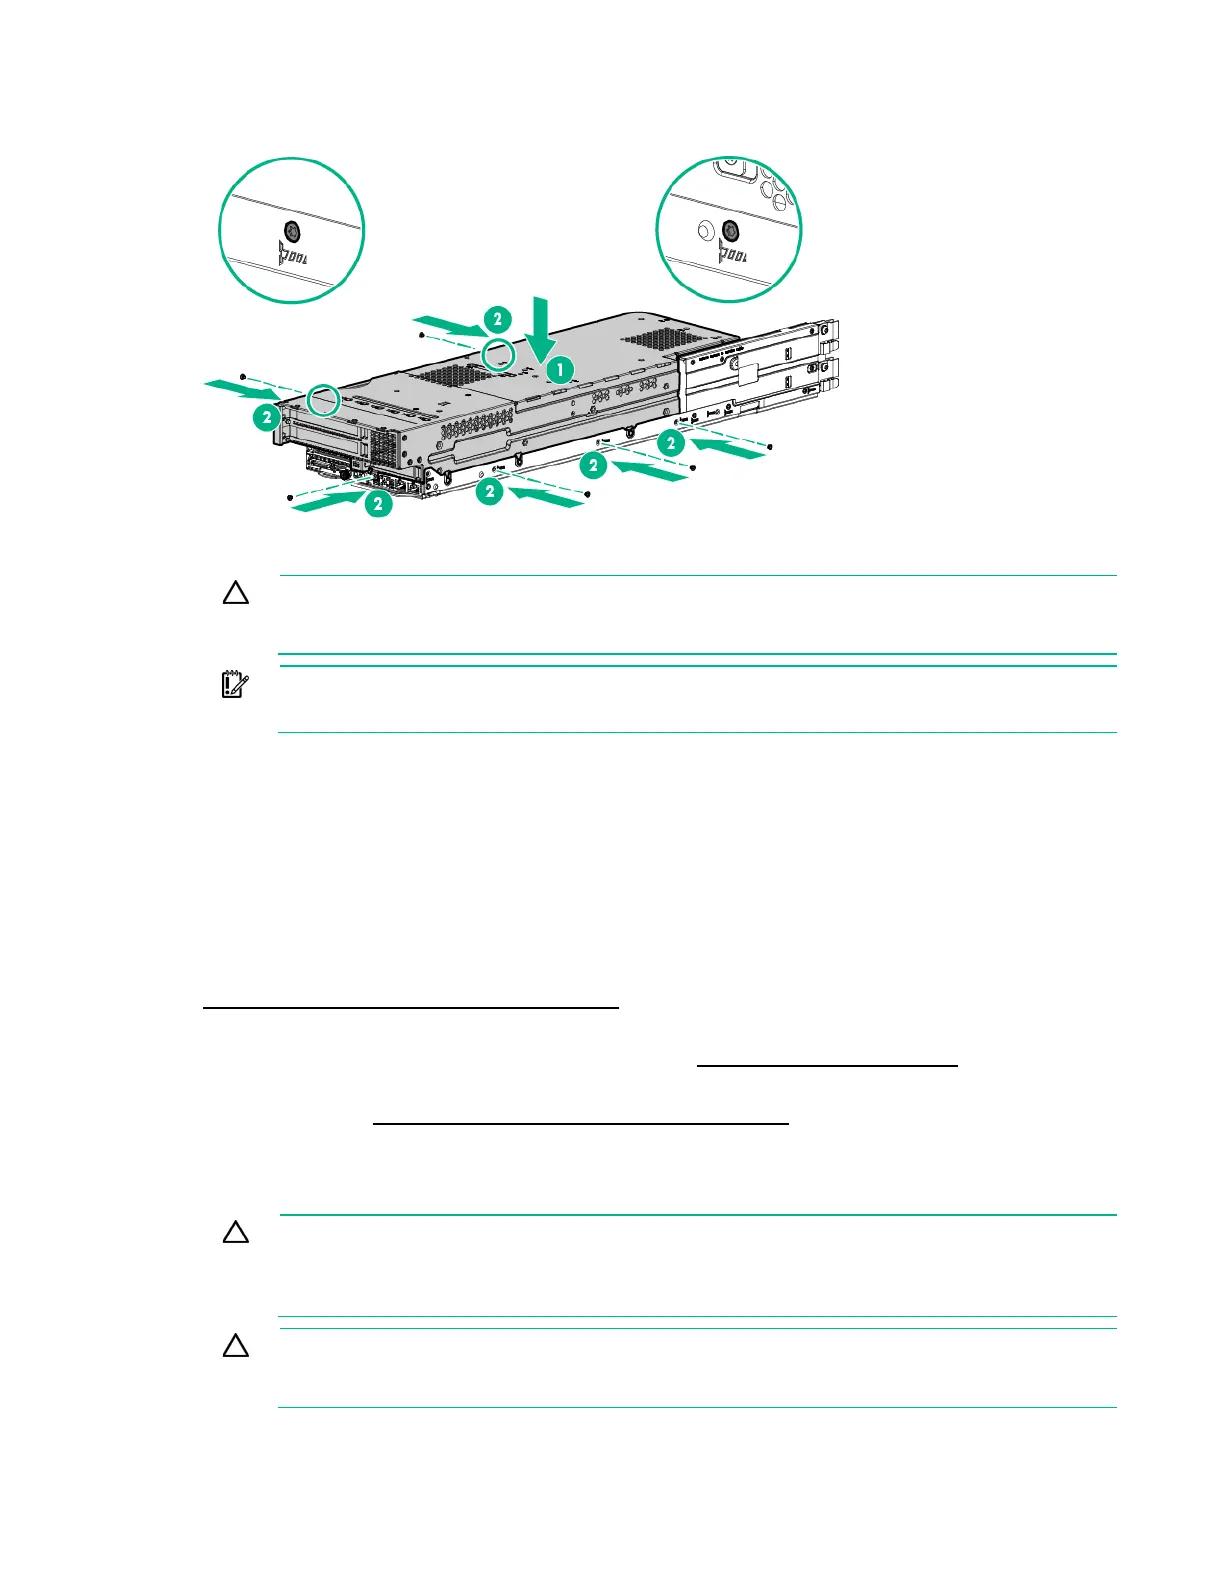
Install the three-slot riser cage assembly and then secure it with six T-10 screws.
CAUTION: To prevent improper cooling and thermal damage, do not operate the node
unless
all PCI riser cages or rear I/O blanks are installed, and do not operate the node unless all PCI
slots have either an expansion slot cover or an expansion board installed.
IMPORTANT: If the PCIe riser cage assembly is not seated properly, then the server does
not power up.
12. Install the node into the chassis ("Installing a node into the chassis" on page 60).
13. Connect all peripheral cables to the nodes.
14. Power up the node ("Power up the nodes" on page 32).
Controller options
The node ships with an embedded Dynamic Smart Array B140i Controller. This embedded controller is
supported in UEFI Boot Mode only. For more information about the controller and its features, see the
HPE Dynamic Smart Array B140i RAID Controller User Guide on the Hewlett Packard Enterprise website
(http://www.hpe.com/info/smartstorage/docs).
Upgrade options exist for an integrated array controller. For a list of supported options, see the product
QuickSpecs on the Hewlett Packard Enterprise website (http://www.hpe.com/info/qs).
To configure arrays, see the HPE Smart Storage Administrator User Guide on the Hewlett Packard
Enterprise website (http://www.hpe.com/info/smartstorage/docs).
The node supports FBWC. FBWC consists of a cache module and a Smart Storage Battery Pack. The
DDR cache module buffers and stores data being written by an integrated Gen9 P-series Smart Array
Controller.
CAUTION: The cache module connector does not use the industry-standard DDR3
mini-DIMMs. Do not use the controller with cache modules designed for other controller
models, because the controller can malfunction and you can lose data. Also, do not transfer
this cache module to an unsupported controller model, because you can lose data.
CAUTION: To prevent a node malfunction or damage to the equipment, do not add or
remove the battery pack while an array capacity expansion, RAID level migration, or stripe size
migration is in progress.