Setup 61
CAUTION: Do not mix power supplies with different efficiency and wattage in the chassis.
Install only one type of power supply in a single chassis.
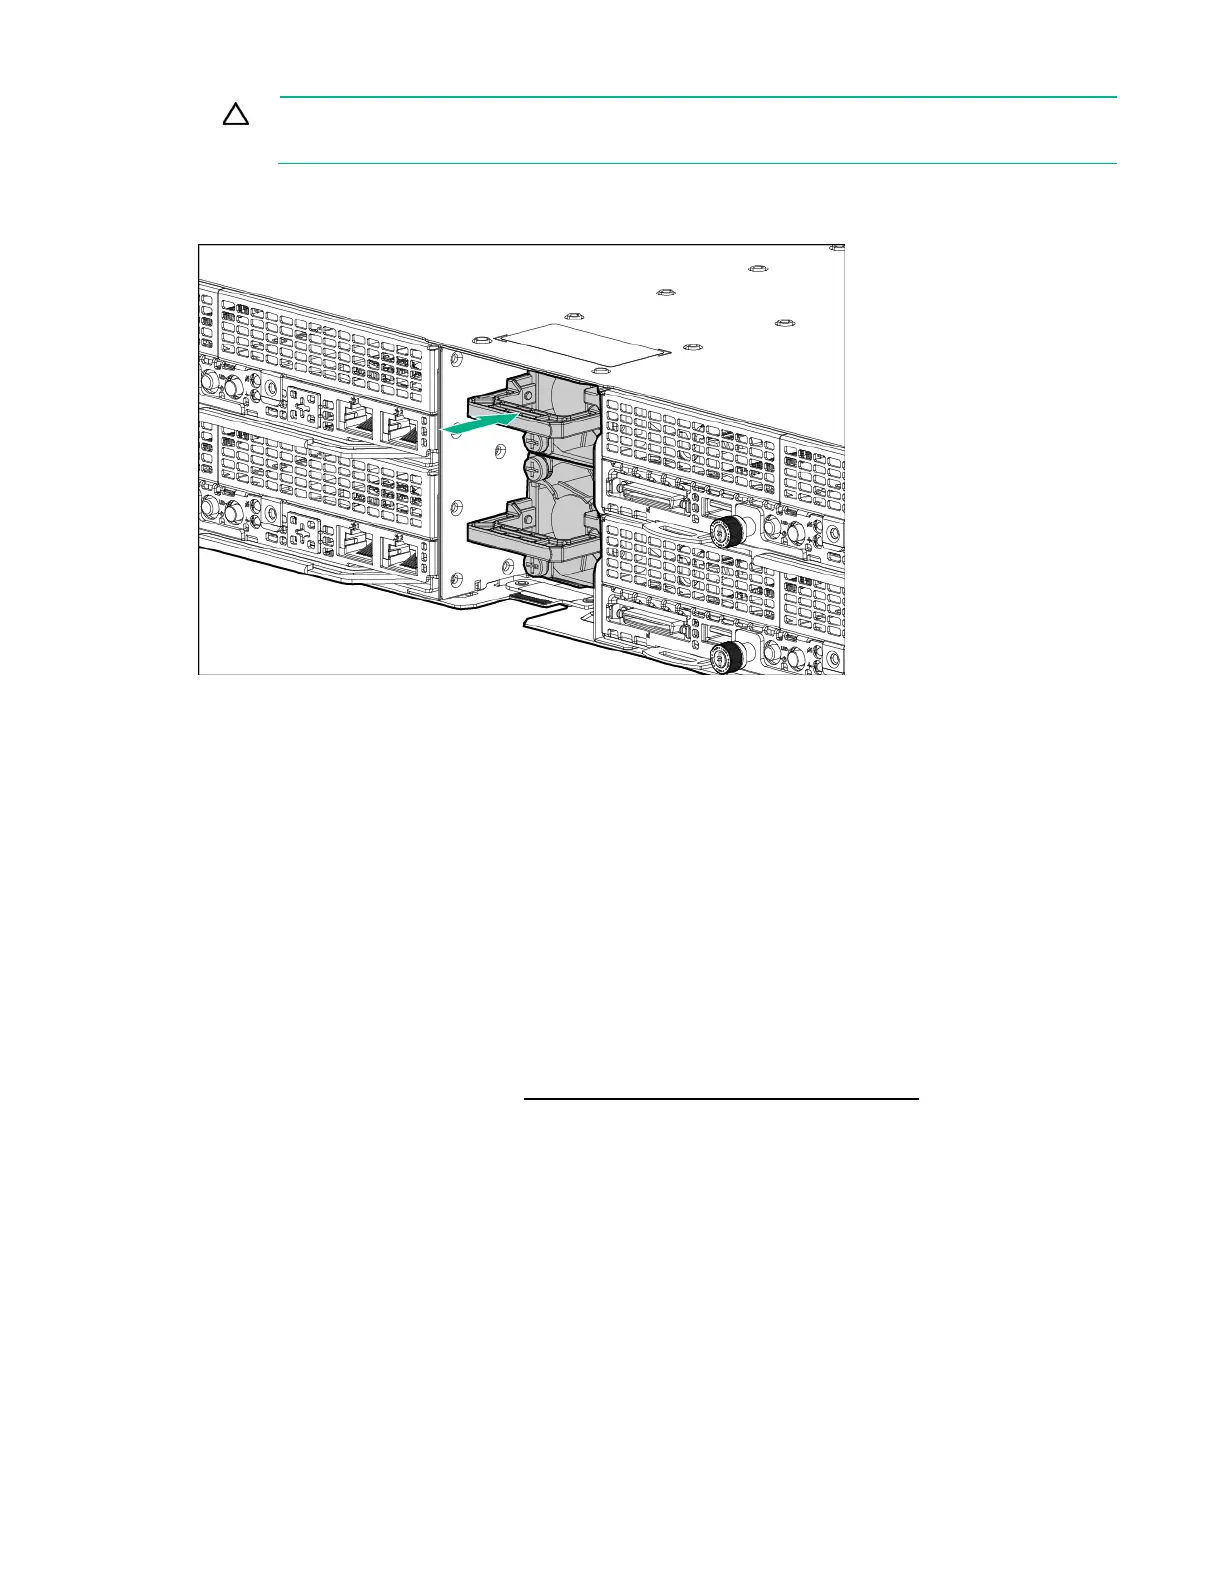
1. If installing a second power supply, remove the power supply blank.
2. Slide the power supplies into the power supply bays until they click into place.
3. If planning to install a RCM module, install it now ("RCM module" on page 70).
4. Connect all power cords and secure them with the strain relief strap.
Powering up the chassis
Connect the AC or DC power cables, depending on the power configuration.
When the circuit breakers are powered, the chassis and Advanced Power Manager have power. By
default, each installed component also powers up. Examine the Advanced Power Manager for any errors
which may prevent installed components from powering up.
HPE Advanced Power Manager (optional)
HPE APM is a point of contact for system administration.
To install, configure, and access APM, see the HPE Advanced Power Manager User Guide on the
Hewlett Packard Enterprise website (http://www.hpe.com/support/APM_UG_en).
Connecting the optional HPE APM module
1. Connect the APM to the network (shown in red).