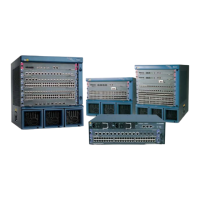
Figure 3-18 Networking diagram for implementing communication between VLANs through
VLAN switching
Switch
GE1/0/1 GE1/0/2
VLAN 10
SwitchA SwitchB
PC1
PC3
VLAN 20
PC2
PC4
Configuration Roadmap
The configuration roadmap is as follows:
1. Add the uplink and downlink interfaces of Switch A and Switch B to VLANs.
2. Configure the VLAN switching function on the Switch.
Data Preparation
To complete the configuration, you need the following data:
l VLAN that the uplink interface of Switch A belongs to: VLAN 10 (tagged mode)
l VLAN that the downlink interface of Switch A belongs to: VLAN 10 (default mode)
l VLAN that the uplink interface of Switch B belongs to: VLAN 20 (tagged mode)
l VLAN that the downlink interface of Switch B belongs to: VLAN 20 (default mode)
NOTE
VLAN 10 and VLAN 20 cannot be created on the Switch; otherwise, the VLAN switching function
cannot be configured.
Procedure
Step 1 Configure the Switch.
# Configure the VLAN switching function on the Switch.
<Quidway> system-view
[Quidway] vlan-switch name1 interface GigabitEthernet 1/0/1 vlan 10 interface
GigabitEthernet 1/0/2 switch-vlan 20
Step 2 Verify the configuration.
After the configuration, PCs in VLAN 10 and PCs in VLAN 20 can communicate with each
other.
----End
Quidway S7700 Smart Routing Switch
Configuration Guide - Ethernet 3 VLAN Configuration
Issue 01 (2011-07-15) Huawei Proprietary and Confidential
Copyright © Huawei Technologies Co., Ltd.
141
 Loading...


