Page 66 - CEAST 9340 - Instructions for Use and Maintenance 7510.000MN1r ed. 1 rev. 1
8.6.2 REPLACEMENT OF THE SPECIMEN FIXTURES
Authorized Personnel: Operator
X
X
Clamping
ring
Screw
X
X
CAUTION ! (for environmental chamber only): before replace the fixtures make sure
that the environmental chamber is at room temperature.
When this is not possible, use a pair of thermally insulating gloves.
Note: for the specimen fixtures list refer to the Appendix A at the end of this document.
8.6.2.1 SPECIMEN FIXTURES FOR FIXED HEIGHT STAND
DISASSEMBLY
8.6.2.1.1
FIXTURES FOR PLATES AND FILMS
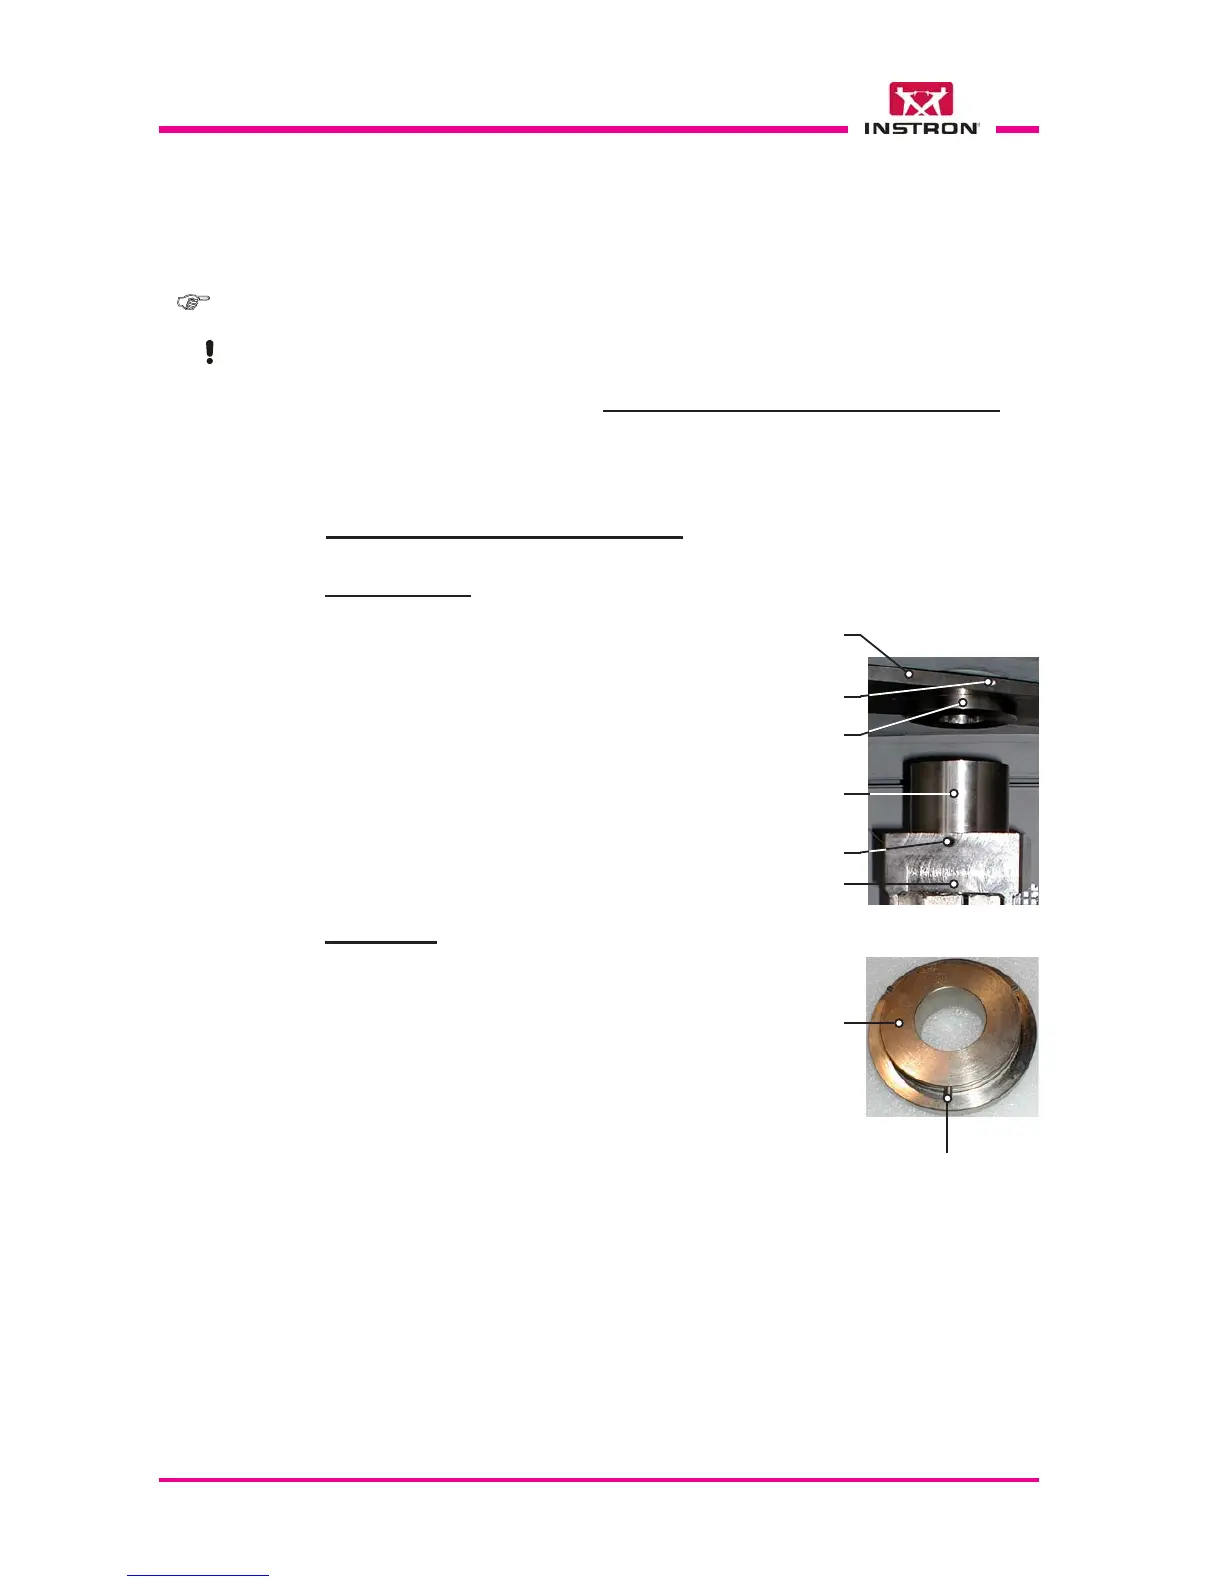
Screw
Fixed height
stand
Specimen
fixture
Clamping
plate
Clamping ring
(face toward the
clamping plate)
Pin (x3)
a) Choose the correct specimen fixture
and clamping ring according to the
specimen shape, dimension and stan-
dard of reference (see Appendix A).
b) Open the door of the chamber.
c) Place the clamping ring against the
clamping plate inserting the pins in the
slots.
d) Turn the clamping ring of a quarter of
turn approx..
e) Fasten the clamping ring with screw.
f) Place the specimen fixture on top of
the fixed height stand and fasten it
with the screw.
g) Place and visually center the speci-
men onto the specimen fixture on top
of the fixed height stand.
a) Open the door of the chamber.
b) Loosen the screw on the fixed height
stands.
c) Lift and remove the specimen fixture.
d) Loosen the screw on the clamping
plate.
e) Turn the clamping ring until the pins are
aligned with the slots and remove it from
its seat.
ASSEMBLY
X
X
X
X
X
X
X
X