Page 96 - CEAST 9340 - Instructions for Use and Maintenance 7510.000MN1r ed. 1 rev. 1
X
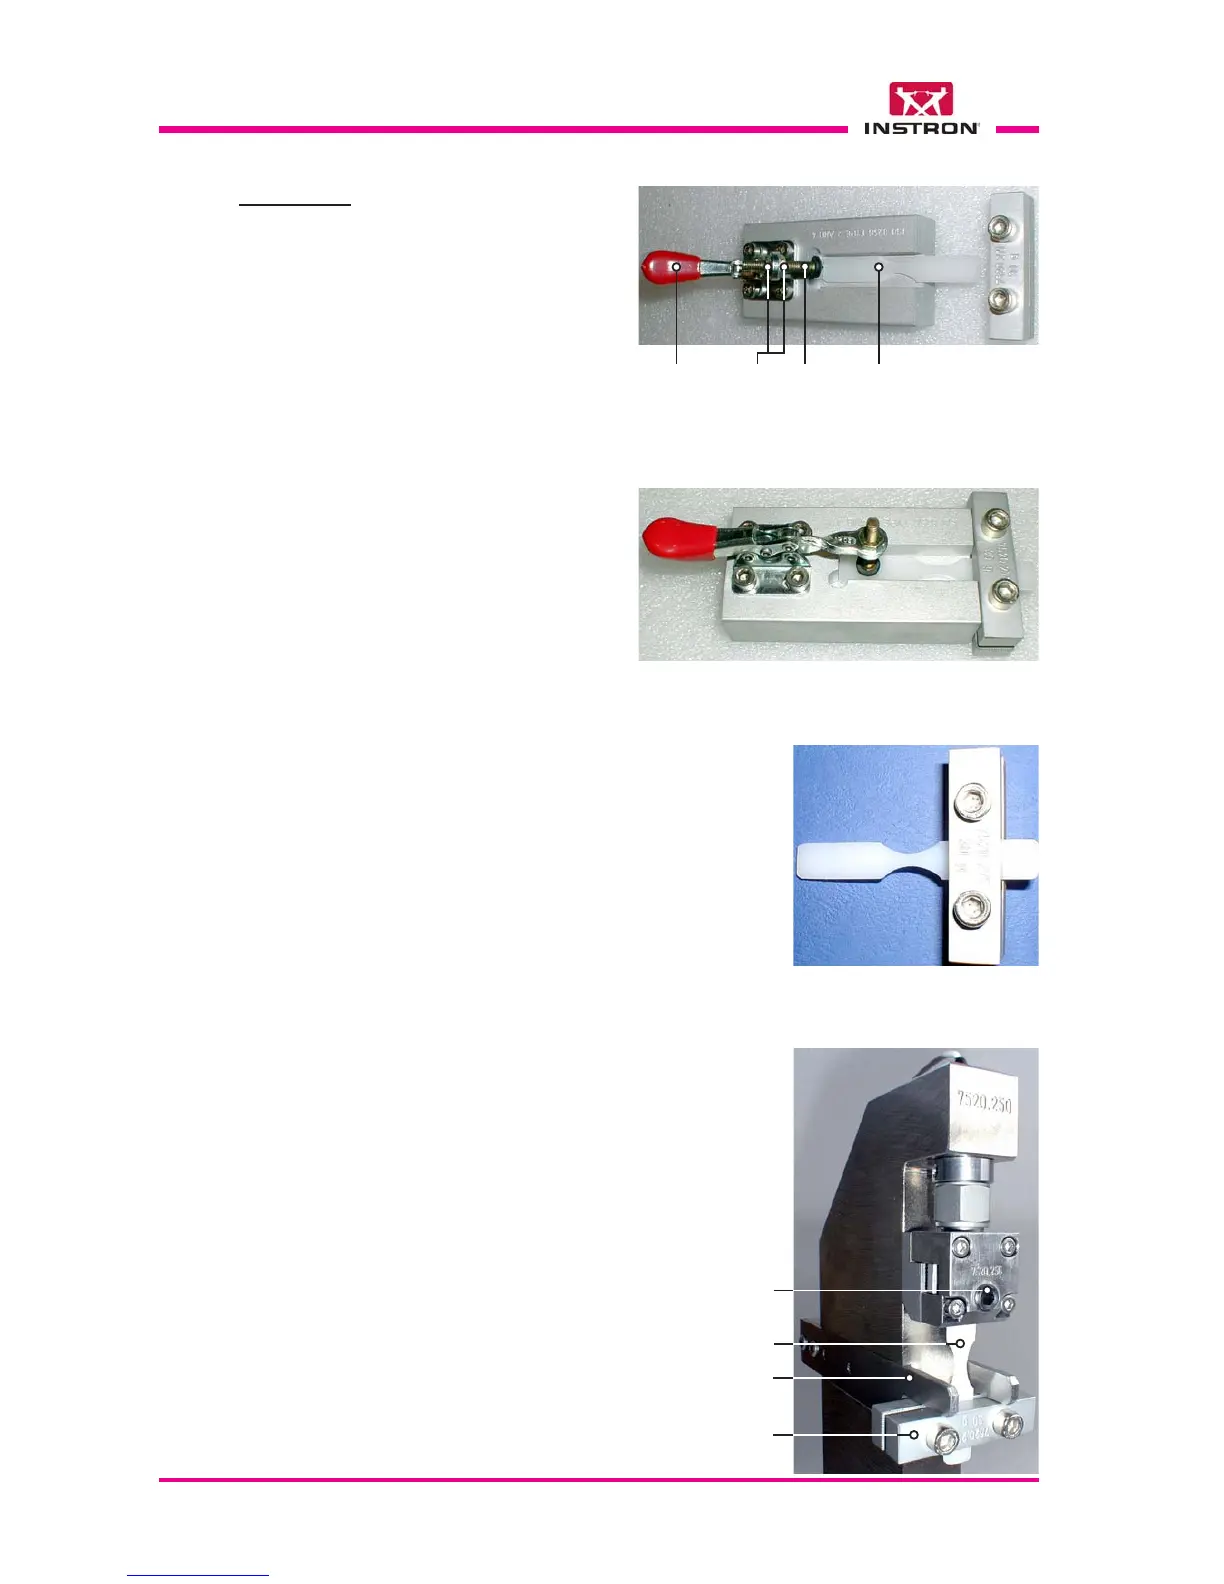
a) Choose the specimen holding fixture
H and the calibrated free tensile grip I
according to the specimen type and
thickness (see Appendix G).
b) Open the clamping lever.
c) Place the specimen in the proper seat
of the fixture and push it to the left until
it stops against the fixture.
d) Close the clamping lever and check
that the specimen is clamped.
If the specimen is not clamped, unlock
the lock nuts, adjust the screw and lock
the nuts again. Make sure that the
clamping pressure does not damage
the specimen surface.
e) Loosen the screws of the calibrated
free tensile grip I.
f) Insert the specimen end through the
calibrated free tensile grip I.
g) Move the calibrated free tensile grip I
against the specimen holding fixture
H and check that it is visually centered
with the fixture.
h) Tighten the screws of the calibrated
free tensile grip I fastening the speci-
men.
i) Open the clamping lever and remove
the specimen from the fixture H.
j) Loosen the clamping screw without
remove it.
k) Insert the free specimen end from the
bottom between the adapter and the
knurled plate until the calibrated free
tensile grip stops against the sliding
stop plate.
l) Check that the calibrated free tensile
grip is visually centered with the stop
plates.
m)Tighten the clamping screw.
ASSEMBLY
H
I
Clamping
lever
ScrewLock
nuts
Specimen
H
I
Specimen
Clamping
screw
Calibrated free
tensile grip
Sliding
stop plate
X
X
X
X
X
X
X
X
X
X
X
X