To configure the device from the management console, see “Connecting and Configuring
an EX Series Switch (CLI Procedure)” on page 139 or “Connecting and Configuring an EX
Series Switch (J-Web Procedure)” on page 142 or Connecting and Configuring an OCX1100
Switch (CLI Procedure).
NOTE: EX2200-24T-4G-DC and OCX1100 switches do not support switch
connection and configuration through the J-Web interface.
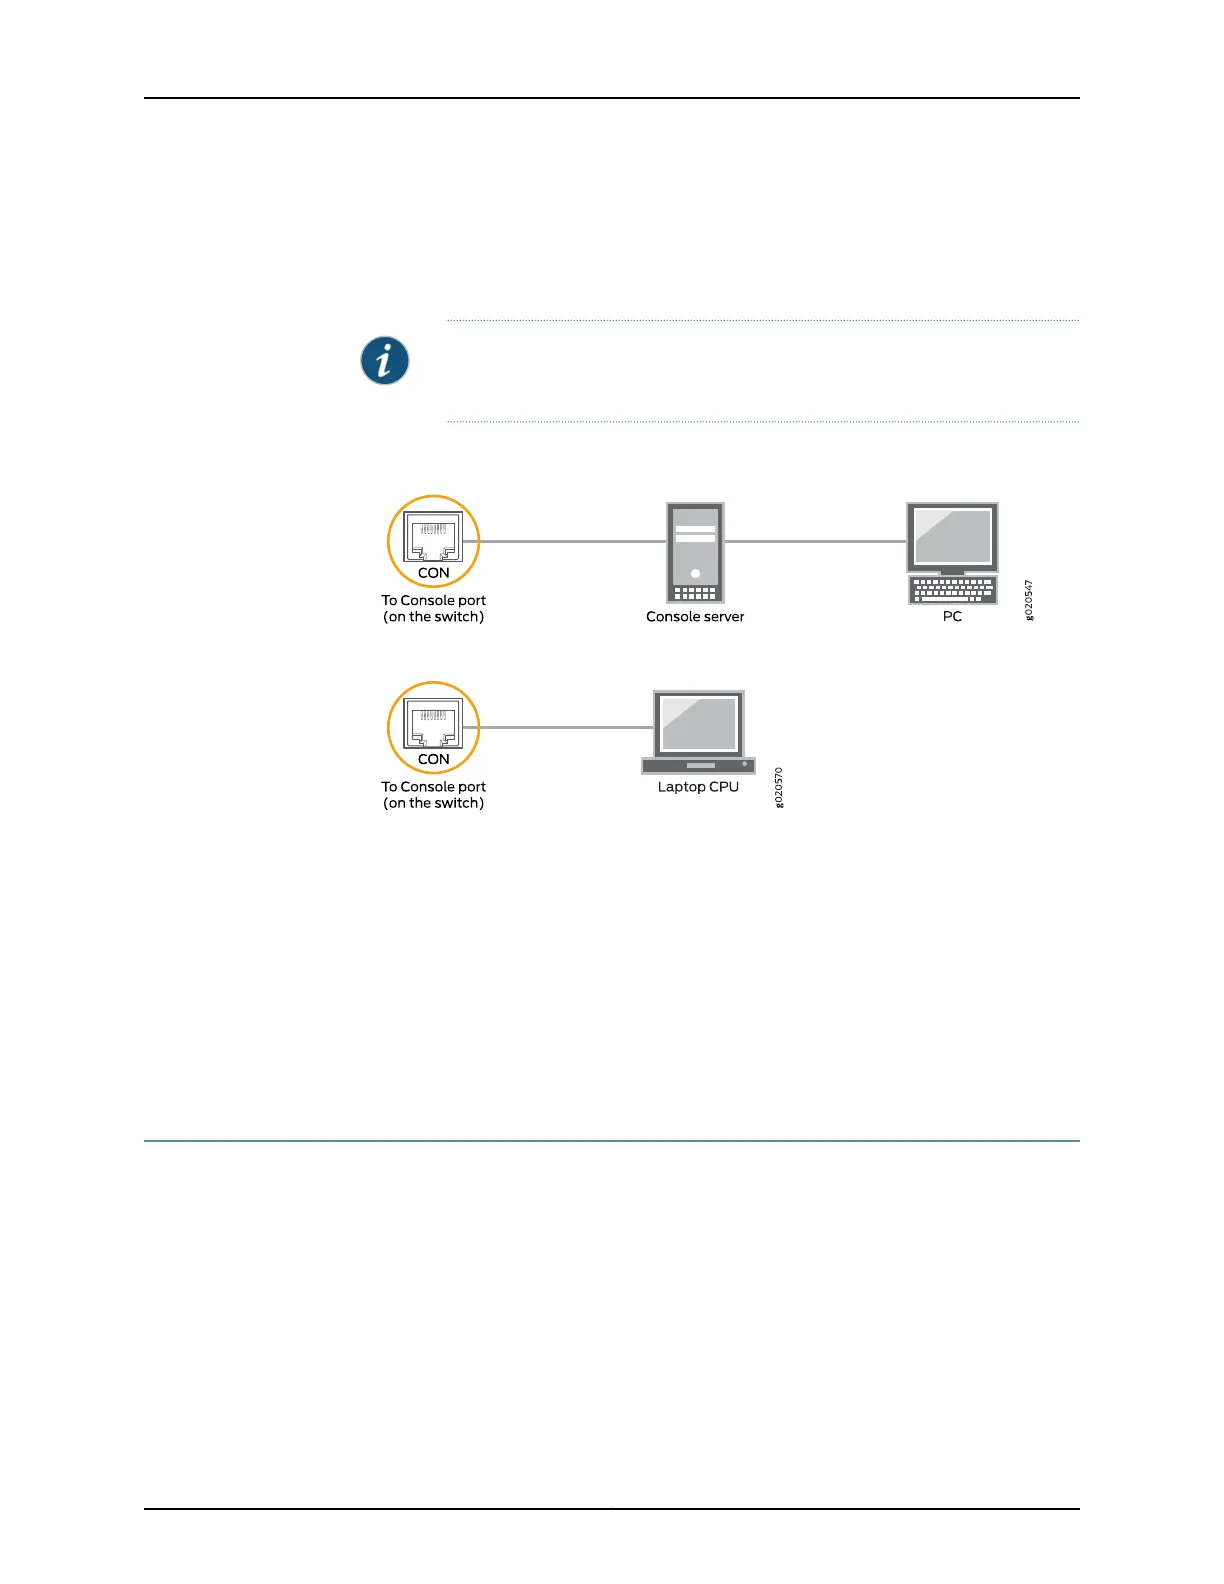
Figure 53: Connecting a Switch to a Management Console Through a
Console Server
Figure 54: Connecting a Switch Directly to a Management Console
Related
Documentation
Configuring the Console Port Type (CLI Procedure)•
• Connecting a Switch to a Network for Out-of-Band Management on page 127
• Console Port Connector Pinout Information for an EX Series Switch on page 23
• Cables Connecting the EX6200 Switch to Management Devices
• Cables Connecting the EX8200 Switch to Management Devices
• Console Port Connector Pinout Information for an OCX1100 Switch
Connecting an EX2200 Switch to a Management Console Using Mini-USB Type-B
Console Port
You can configure and manage EX2200–C switches by using the RJ-45 console port or
the Mini-USB Type-B console port. However, the console input will be active only on one
port at a time, that is, only one port will be set active at a time.
If your laptop or PC does not have a DB-9 male connector pin or RJ-45 connector pin,
you can connect your laptop or PC directly to an EX2200–C switch using a mini-USB
cable that has a Standard-A USB connector on one end and a Mini-USB Type-B (5 pin)
connector on the other end.
Thissection describes the process of connecting an EX2200–C switch to the management
console using the Mini-USB Type-B console port.
131Copyright © 2015, Juniper Networks, Inc.
Chapter 10: Connecting the Switch