LDI Intellectual Property.
Not for secondary distribution or replication, in part or entirety.
DIGISONDE-4D
SYSTEM MANUAL
VERSION 1.2.11
SECTION 6 - MAINTENANCE 6-7
FRONT PANEL CONNECTORS AND CONTROLS
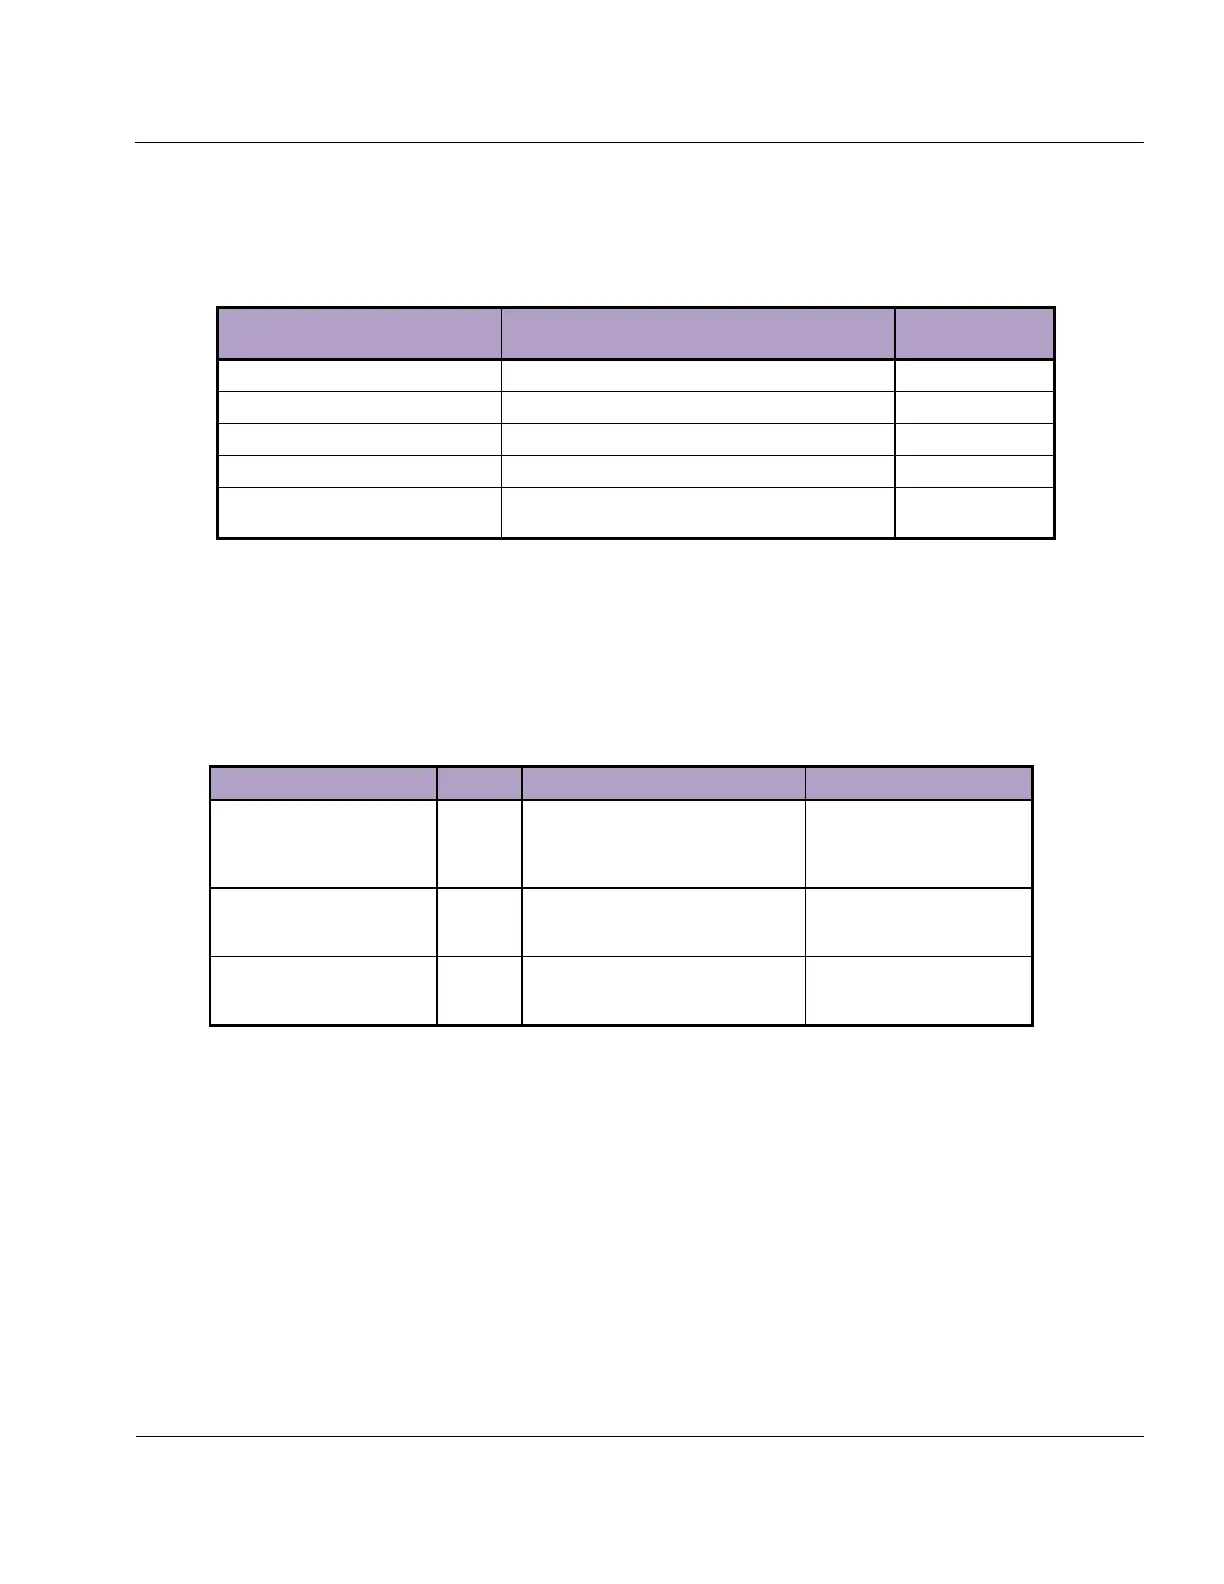
6:6. The functions of and circuit references for the front panel coaxial connectors and controls are listed in
Table 6-2.
Table 6-2: Front Panel Connectors And Controls
Scope Trigger Signal for RF transmissions
Digital Transmitter Channel 1 to RF Amp
Digital Transmitter Channel 2 to RF Amp
Output transmitter ON pulse
Momentary push button. Triggers Control computer
reset pulse
ROUTINE MAINTENANCE TASKS SUGGESTED AT YEARLY INTERVALS
6:7. Except for routine attention to cleanliness of the air intake system, adjustment of the reference clock,
and tracker calibration no periodic maintenance tasks are required. The six air filters should be maintained as
shown in Table 6-3.
Table 6-3: Air Filter Maintenance
Sounder enclosure
Expanded metal type.
Inspect twice a year if possible and
during every site visit.
Examine for build-up of dust.
If present, wash the filters
with mild detergent solution,
and dry and refit.
Rear of main chassis.
Synthetic foam type.
Inspect twice a year if possible and
during every site visit.
Wash in mild detergent solu-
tion or discard and replace if
damaged.
Rear of PA chassis.
Synthetic foam type.
Inspect twice a year if possible and
during every site visit..
Wash in mild detergent solu-
tion or discard and replace if
damaged.
6:8. To remove the expanded metal air filters:
Pull the RF Amp chassis forward or remove it entirely (see section 6:75). Remove the three nuts on
the front side of the filter carrier and slide the filter out. The filters fit in the carrier somewhat tight-
ly and a screwdriver may be necessary to assist in the filter removal.
6:9. To remove the main chassis foam filter:
Remove the rear cover of the DPS chassis by turning the four fastener knobs counter-clockwise.
Locate the fan filter on the rear panel. Unclip the plastic filter holder that clips over the edges of the
fan. Remove the holder and take the filter out.