PCWS 2015 Setup Guide - 2nd Edition 4-21
Installing and Operating the Workstation 2015
Operation
Revision C System Board - BIOS Version O1201r
With this combination of System Board and BIOS you can enter the BIOS
Boot Menu and temporarily move the Recovery CF to the top of the boot order,
restore the image, then manually remove it after recovery is complete.
• Connect a USB Keyboard to the Workstation.
• With the Recovery CF installed, start the workstation.
• When the Blue Splash Screen with MICROS logo appears, press [F2] to
enter the BIOS Setup Menu.
• Select Boot from the Main Menu.
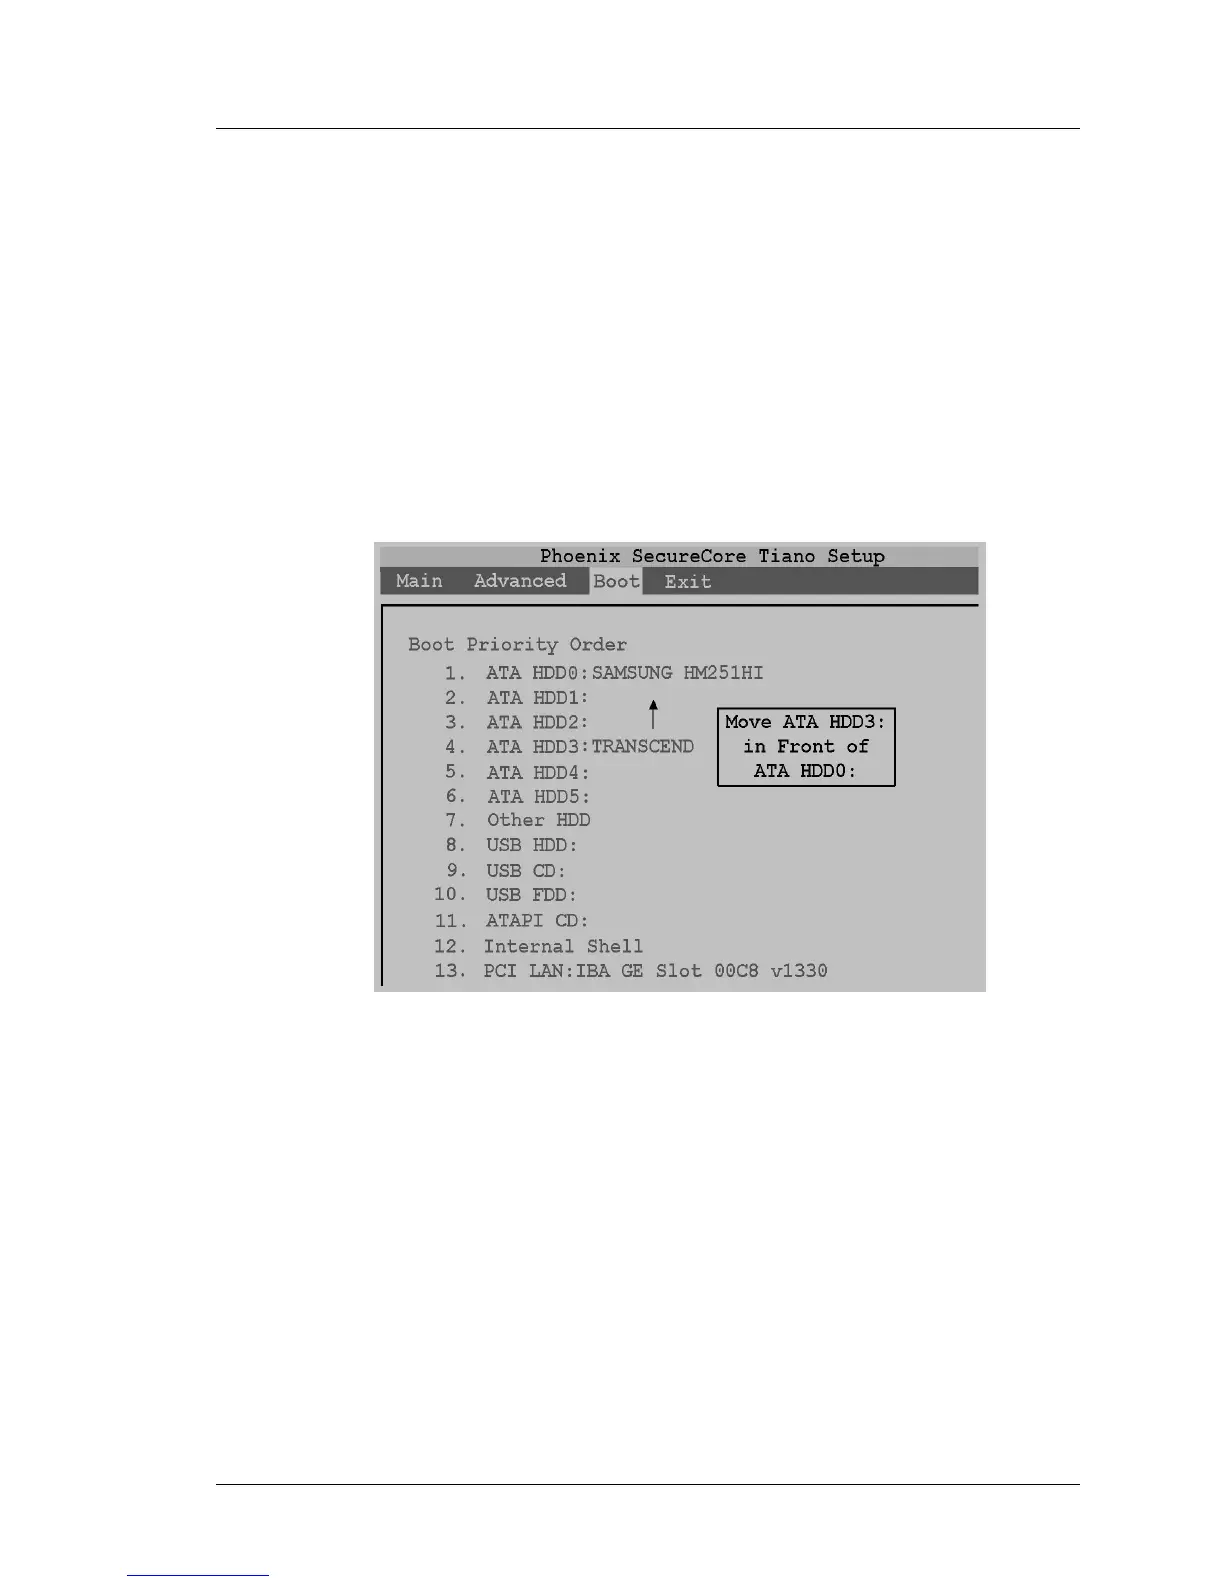
• An example of the Boot Menu is shown in the Figure below.
Figure 4-12: Using the BIOS Boot Menu to Boot from the Recovery CF
• The Recovery CF when installed, occupies the ATA HDD3 slot.
• As shown the figure above, select the ‘ATA HDD3:’ field place it in front
of the of the ATA HDD0: selection.
• Press [F10], then [Y] to save the new boot order and restart the
workstation.
• After the image transfer completes, you can remove the Recovery CF from
the workstation and the workstation will boot to the SATA Disk Drive. If
the recovery CF will remain installed, enter the BIOS, proceed to the Boot
tab and move the ATA HDD0: selection to the top of the boot order.