Morgana DocuMaster MFC - Service Manual 177
4. Service Procedures - Replace Components - Electrical Cabinet
4.12.6 Replace the 24V PSU
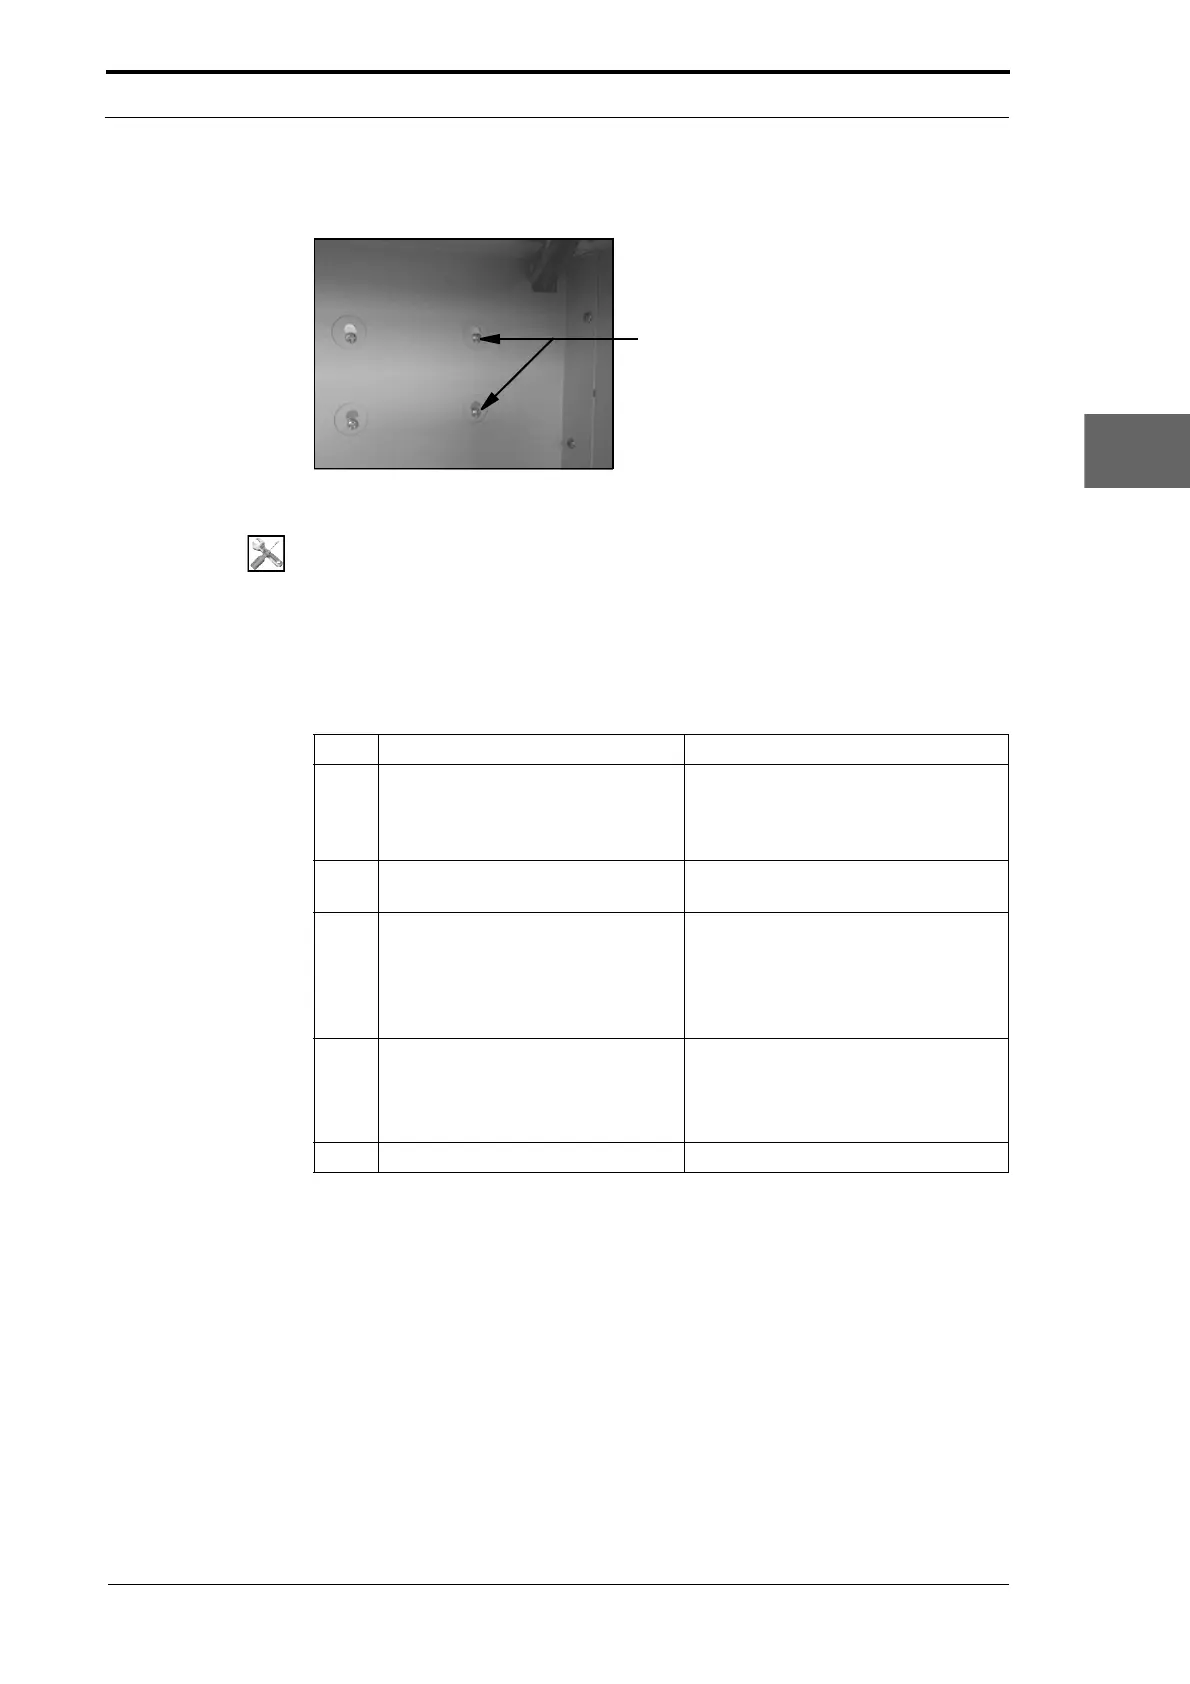
Figure 4.187 24V PSU Screws (Below the Gathering Area)
Tools:
• Screwdriver: Pozidriv No. 1 and No. 2.
Before you start:
• Remove the Bookletmaker from the MFC (Refer to the MFC User Operating
Instructions Manual).
• Remove the electrical cabinet cover (See Section 4.2.12).
Step Action Information
1 Loosen the two screws that attach
the 24V PSU to the electrical
cabinet.
The screws pass through a key-hole
in the electrical cabinet. The screws
are found below the gathering area
(see Figure 4.187).
2 Remove the long trunking cover
from
below the 24V PSU..
3 Disengage the 24V PSU from the
electrical cabinet.
• Lift the PSU and move it away
from the electrical cabinet.
• Pull the wires out of the trunking
and turn the PSU so that you can
see the terminals.
4 Disconnect the wires from the
PS
U.
• Disengage the terminal cover
from the PSU.
• Loosen the terminal screws and
disconnect the wires.
5 Install the replacement 24V PSU.