H-4 Rack-Mount Kit
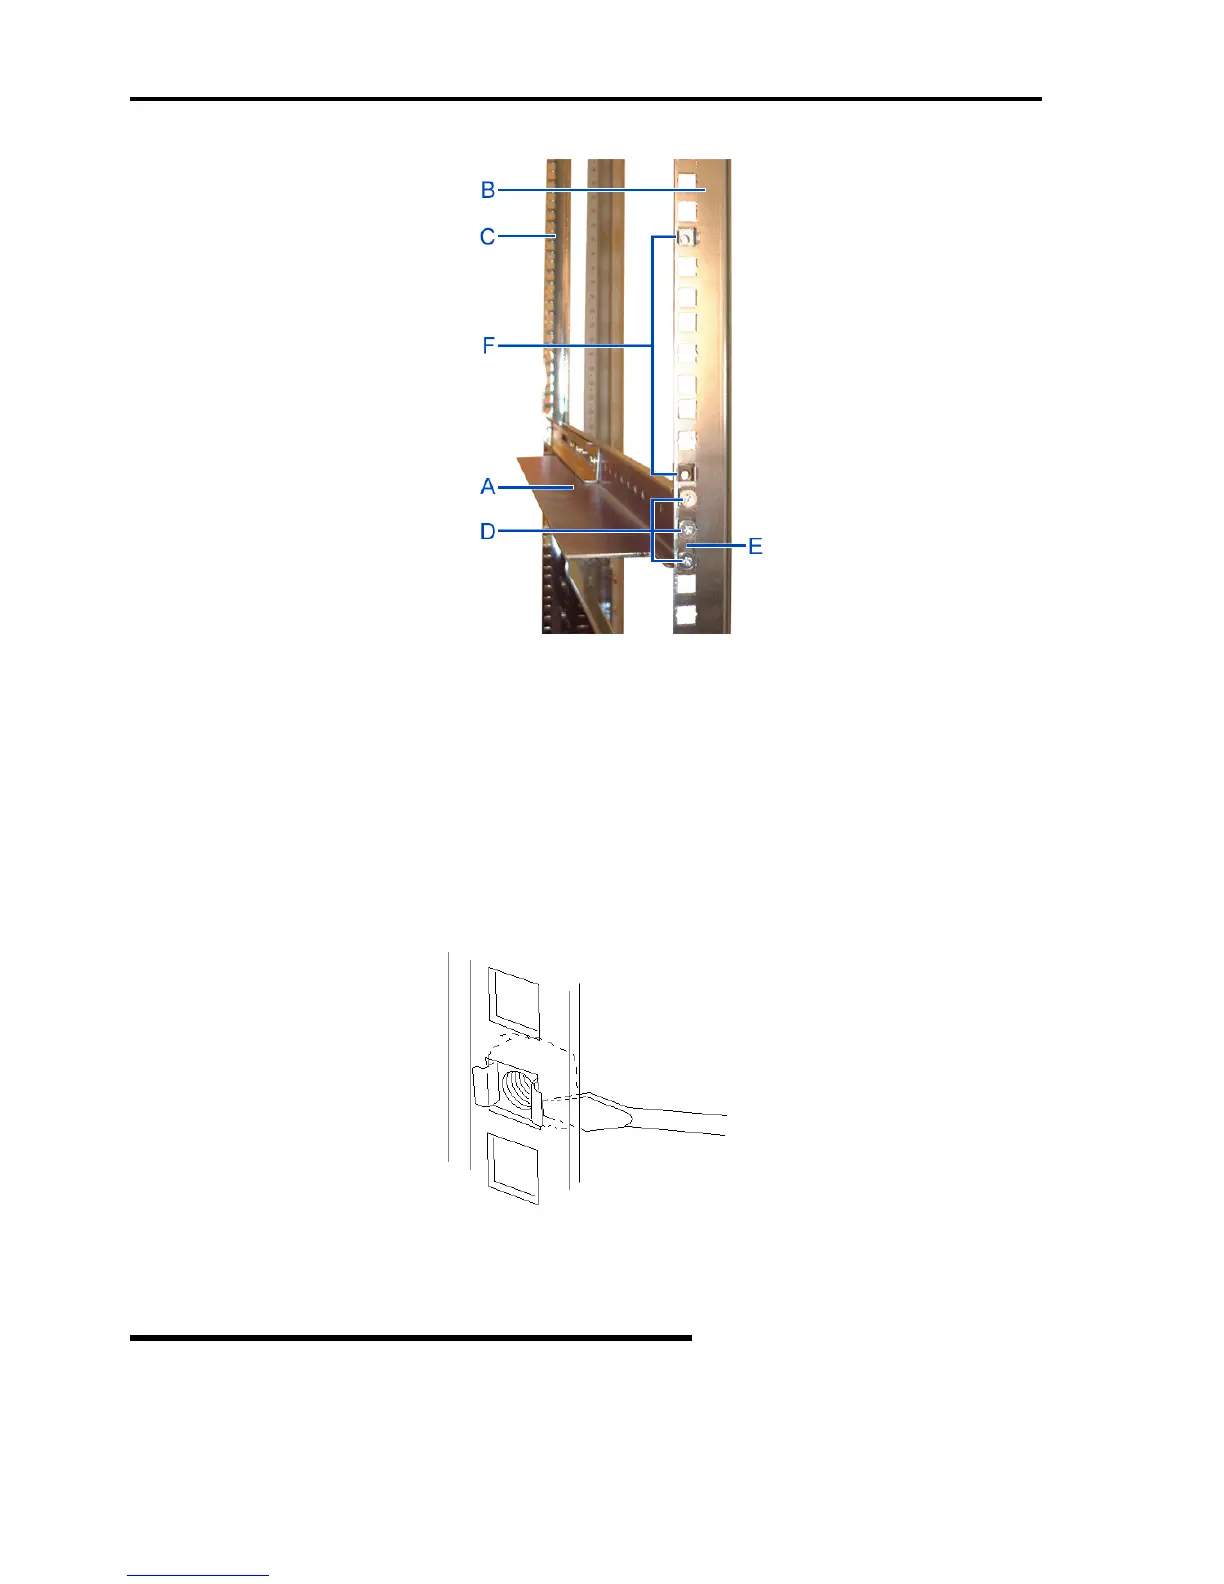
Figure 2: Installing the right support rail
3. Insert two caged nuts (F in figure 2) as shown in figure 2. One in the hole just above
the support rail, the other one eight holes above. Insert the caged nuts in the front
mounting rail as follows (see figure 3):
a. Position the caged nut on the inside of the front vertical mounting rails.
b. Hook the side lip of a caged nut into the square hole in the rail.
c. Push the other side lip of the caged nut into the square hole in the rail until it
is secured.
d. Repeat for each caged nut.
Figure 3: Inserting a caged nut
4. Repeat steps 1 to 3 for the left support rail.
Attaching the Handles to the Rack Mounting Frame
Two handles are attached to the rack mounting frame. The handles are used to easily slide
the server in and out of the rack.

 Loading...


