Section 10 Transferring Data 10-3 Data Transfer Using SPMA
NS-Designer Operation Manual
exiting the Screen Data Transfer Dialog Box.
If the YES Button is clicked, the PT will be restarted. If the NO Button is clicked, it will become
necessary to restart the PT directly. To return to the Screen Data Transfer Dialog Box, click the
Cancel Button.
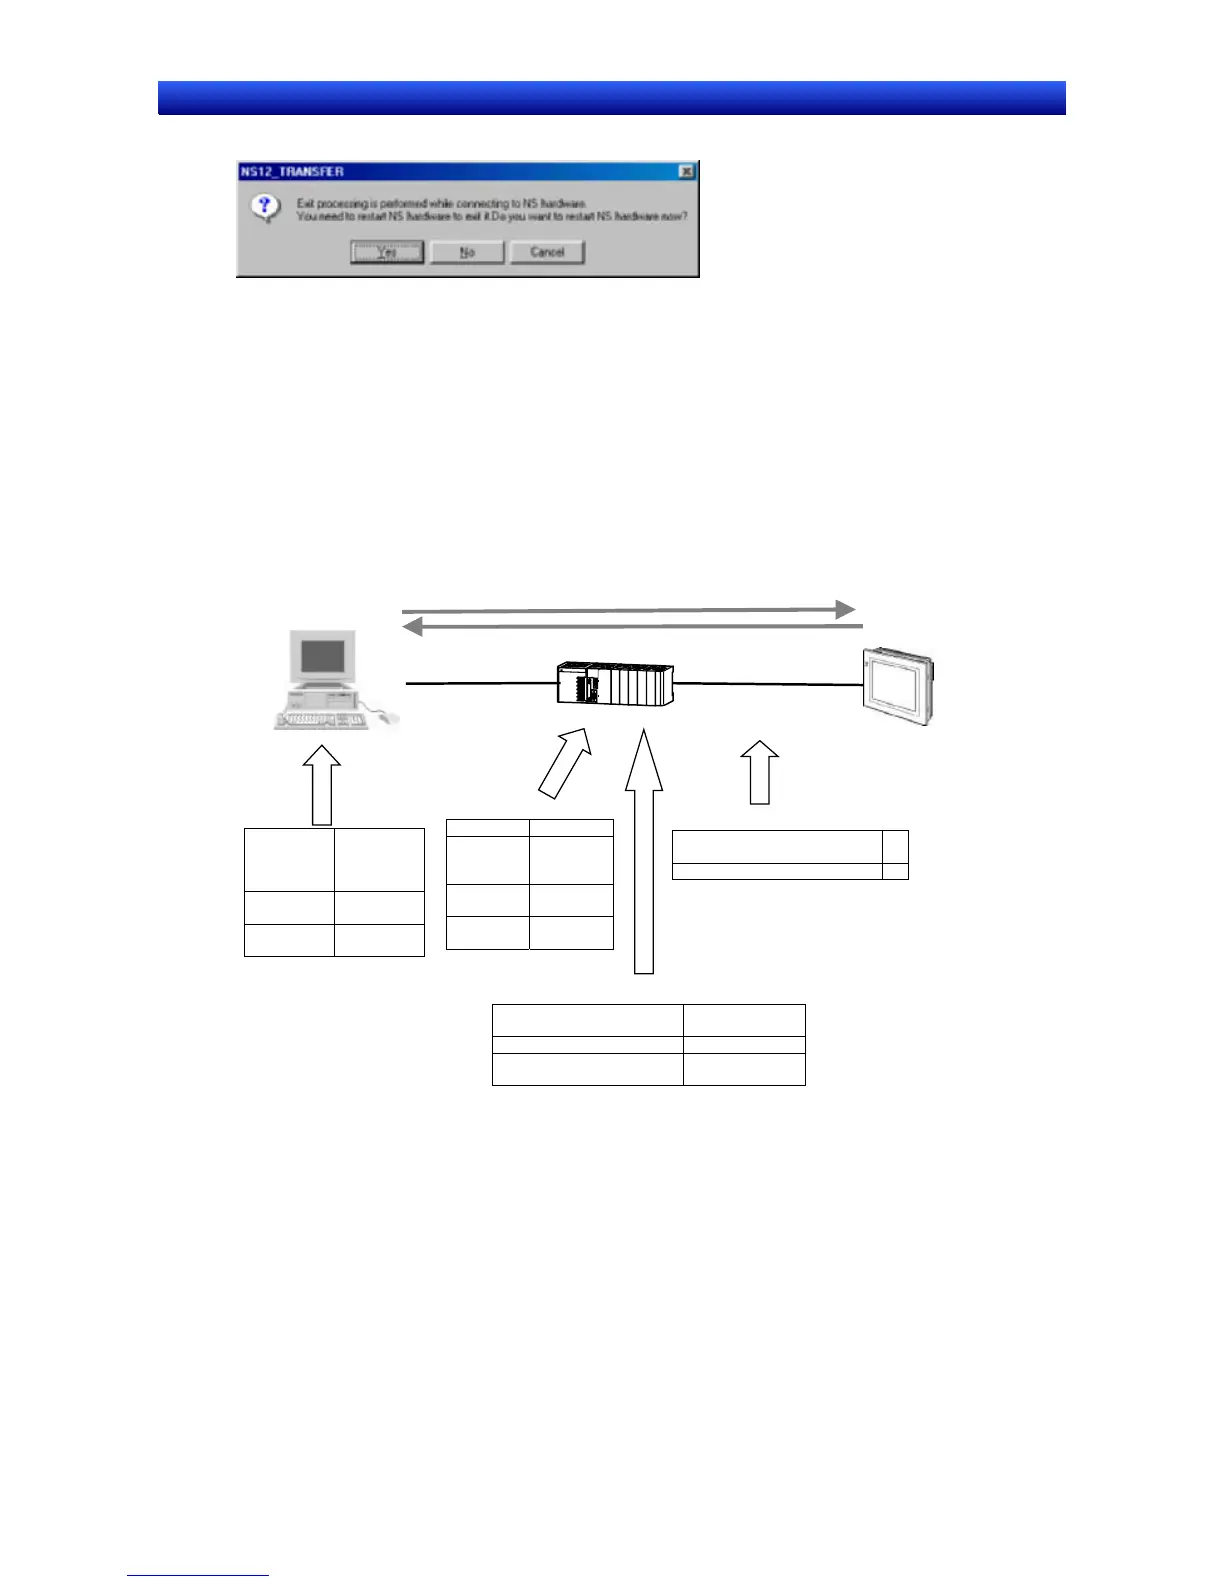
■ Ethernet between a Computer and a PLC and Serial 1:N NT Link be-
tween the PLC and a PT Set for Transferring Screen Data to the PT
through the PLC
This section describes data transfer from the NS-Designer to a PT connected with either the RS-232C
port or peripheral port in the PLC by a Serial connection through a PLC connected by Ethernet.
Communication Method
between computer and
PLC: Ethernet
Screen Data
Communication Method
between PT and PLC: Serial
Ethernet Unit Setting
IP Address 192.168.0.6
Local
Network
Address
1
Node
Address
6 (rotary
switch)
Unit No. 1 (rotary
switch)
Routing Table Setting
Local Network Table
Unit No. Local Network
Address
1 (Unit No. of the Ethernet Unit) 1
252: RS-232C Port
253: Peripheral Port
3
Serial Setting
Network Address for Serial
Communications
3
NT Link unit number of the PT 0
NS-Designer
PT
NS-Designer
IP Address
on the
computer
192.168.0.10
Network
Address
1
Node
Address
10
Settings on the PLC
Set the IP Address of the PLC Ethernet Unit (hardware or software setting) and Node Address (rotary
switch setting).
For instance, set values as follows:
IP Address: 192.168.0.6
Network Address: 1
Node Address: 6
Refer to the Chapter 9 Ethernet Connection- Setting an Ethernet Unit in the Tutorial Manual for details
on settings.
1. Create the routing tables using CX-Net in CX-Programmer Ver. 3.1 or later and transfer them to the
10-44