11-2
Procedure to Use the SNMP Agent
11-2-1
Procedures
1. Make the basic settings.
Refer to 2-2 EtherNet/IP Communications Procedures on page 2-6 for the basic operation flow.
2. Select Configurations and Setup - CPU/Expansion Racks - CPU Rack: X Bus - Unit No.: NX-
EIP201 () - EtherNet/IP Port Settings on the Sysmac Studio.
Make the following settings on the SNMP Settings Display or the SNMP Trap Settings Dis-
play.
• SNMP Service
• Recognition 1
• Recognition 2
3. Select Transfer to Controller from the Controller Menu and click the Yes Button. The EtherNet/IP
port settings are transferred to the Controller.
Precautions for Correct Use
If the Use Option is selected for Packet Filter of the EtherNet/IP port, allow packets from the
SNMP manager. If they are not permitted, communication with SNMP manager is not possible.
For the details on the settings, refer to Packet Filter on page 7-7.
11-2-2
Settings Required for the SNMP Agent
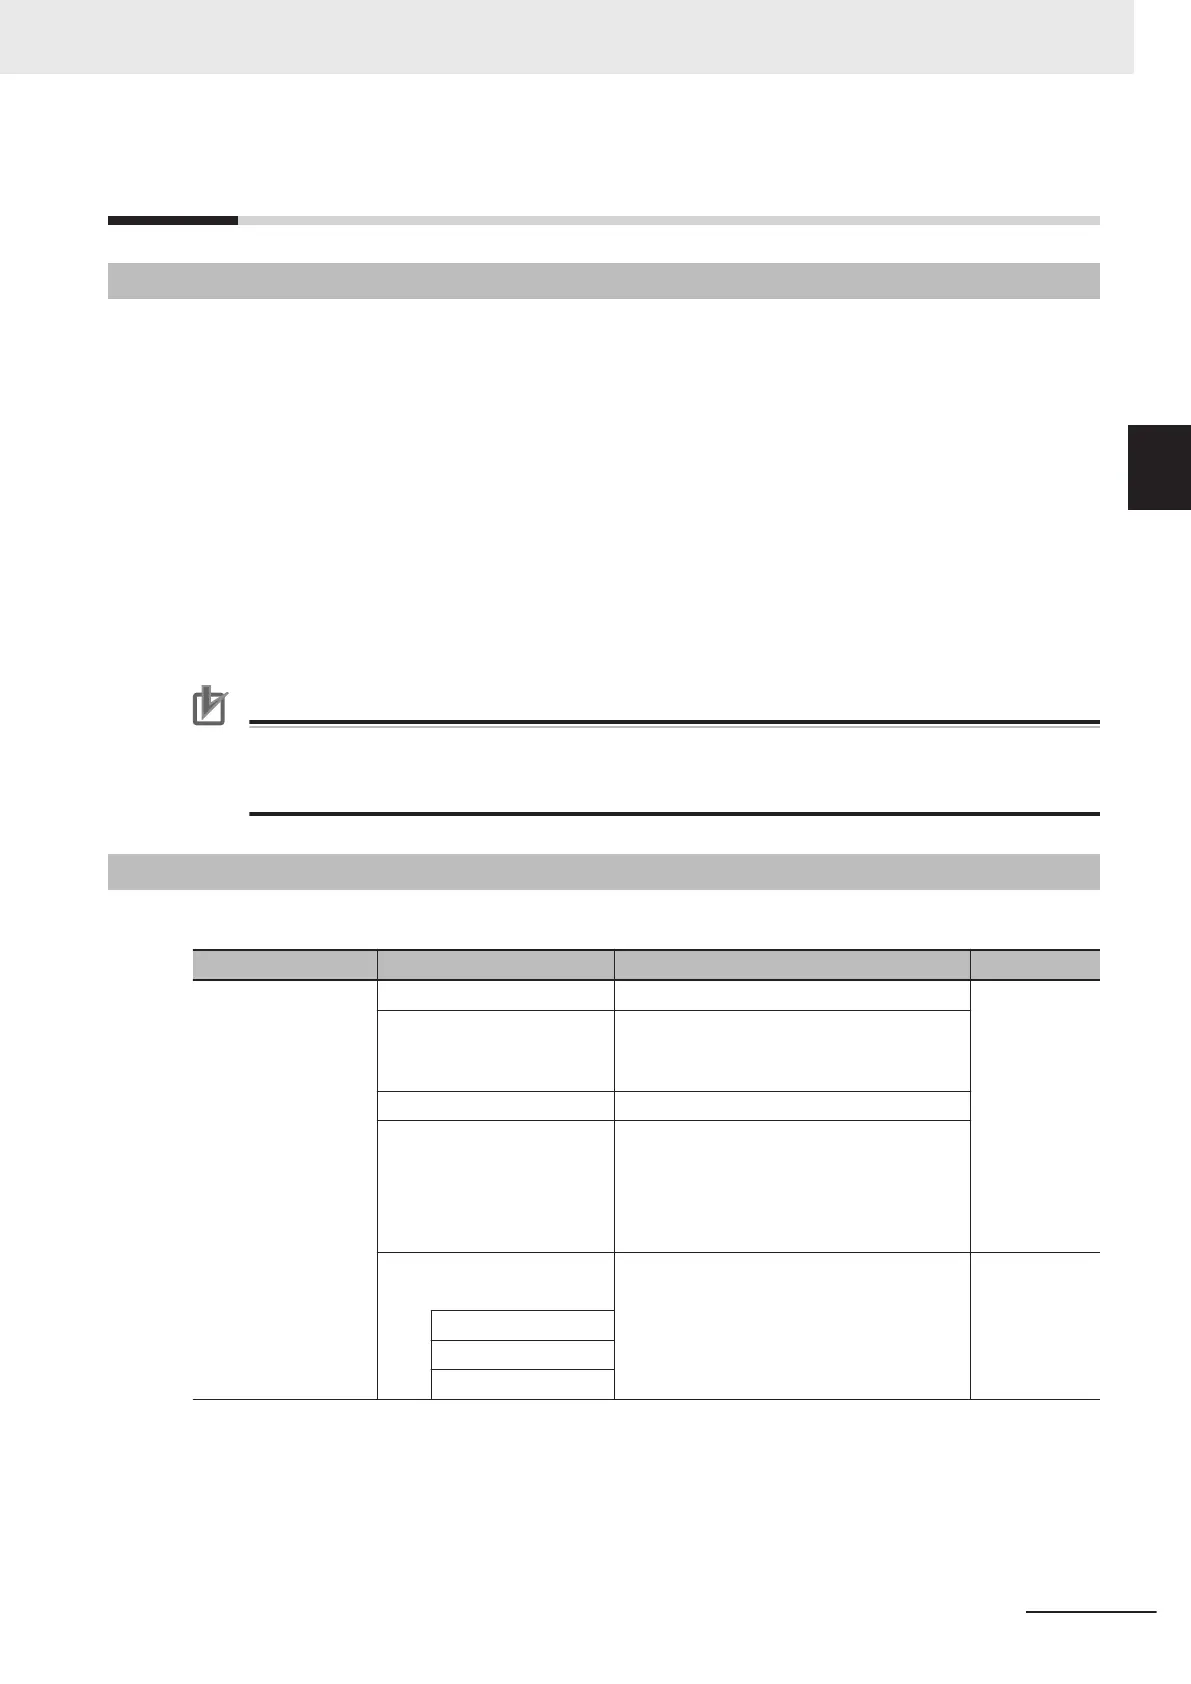
Make the following EtherNet/IP Port Settings from the Sysmac Studio to use the SNMP agent.
Tab page Setting Setting conditions Reference
SNMP Settings SNMP service Required 7-3 SNMP
Settings Dis-
play on page
7-1
1
Port No. Specified by user
.
Required to change from the default value
of 161.
Contact, location Specified by user.
Send a recognition trap Specified by user.
Select this check box to send a recogni-
tion trap if there is access from an SNMP
manager that is not specified (Access oth-
er than Recognition 1 and 2).
Recognition 1 and Recog-
nition 2
Specified by user.
Make these settings to permit access by
only certain SNMP managers.
Recognition 1
on page
7-12
Recognition 2
on page
7-12
IP address
Host name
Community name
11 SNMP Agent
11-25
NX-series EtherNet/IP Unit User's Manual (W627)
11-2 Procedure to Use the SNMP Agent
11
11-2-1 Procedures
 Loading...


