BOOKLET MAKER INSTALLATION
1. Remove the nisher rear cover ( x 2).
2. Open the nisher door and pull out the stapling tray.
3. Remove black plastic covers [A] at the bottom of the nisher (
x 2).
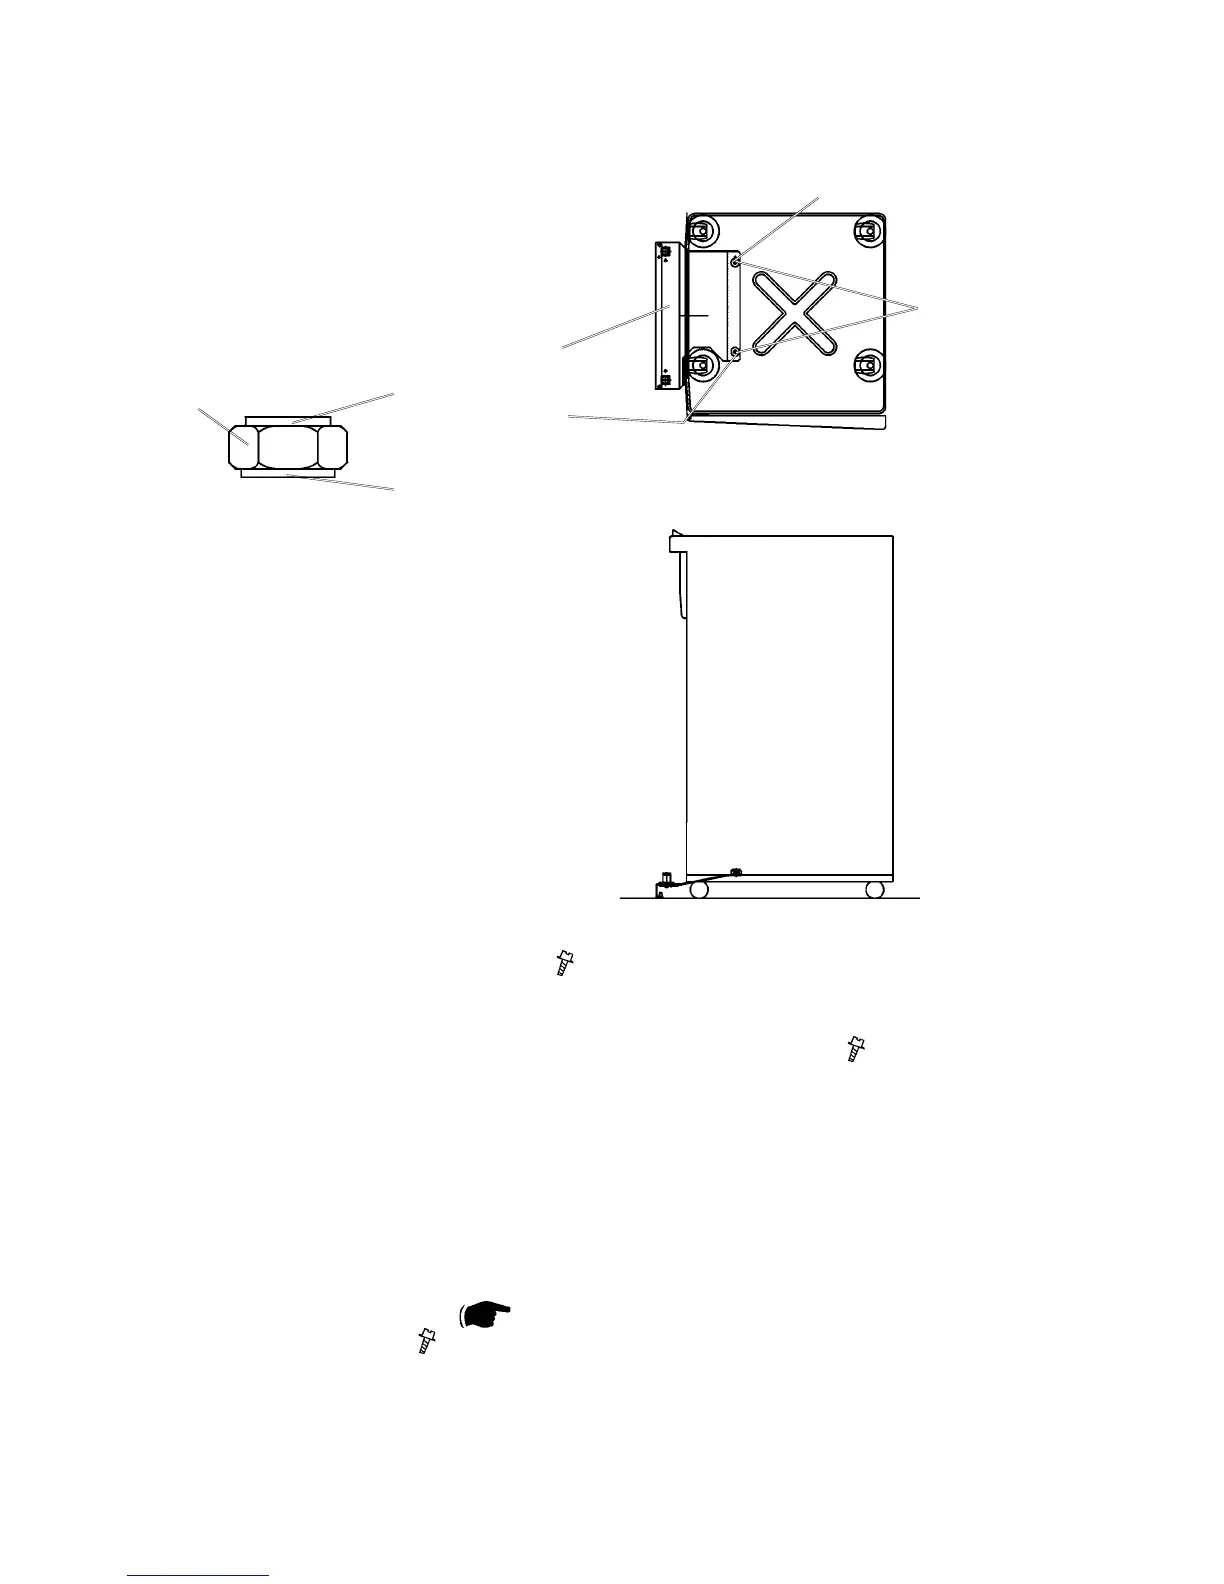
4. Install the docking assembly [B] in the holes under the black plastic covers [A].
NOTE: Both nuts [C], installed on the docking assembly, have different
diameters on each side of the nut. A big diameter [D] on one side,
and a smaller diameter [E] on the other.
5. Secure the docking assembly with the two nuts [C], using the multi tool.
Mounted correctly, there shall be less than 1mm play in the Docking assembly.
NOTE: The Multi tool ( 3.2 ) is located behind the rear cover of the Book-
let maker ( x 5).
NOTE: Makesuretotthenutsinthecorrectposition.Thebiggerdiam-
etershouldtintheholenearesttherearside[F]ofthenisher.
Thesmallerdiametershouldtintheholenearestthefrontside
[G]ofthenisher.
Docking assembly
[A]
[B]
[C]
[D]
[E]
[F]
[G]
Finisher seen from front side
Finisher seen from above