The AWM 2 antenna wall mount
172
Connecting and mounting the AWM 2
Instead of the rod antennae, you can connect the optional AWM 2 antenna
wall mount to the receiver. The AWM 2 is suitable for all applications where
the antennae are to be positioned further away from the receiver.
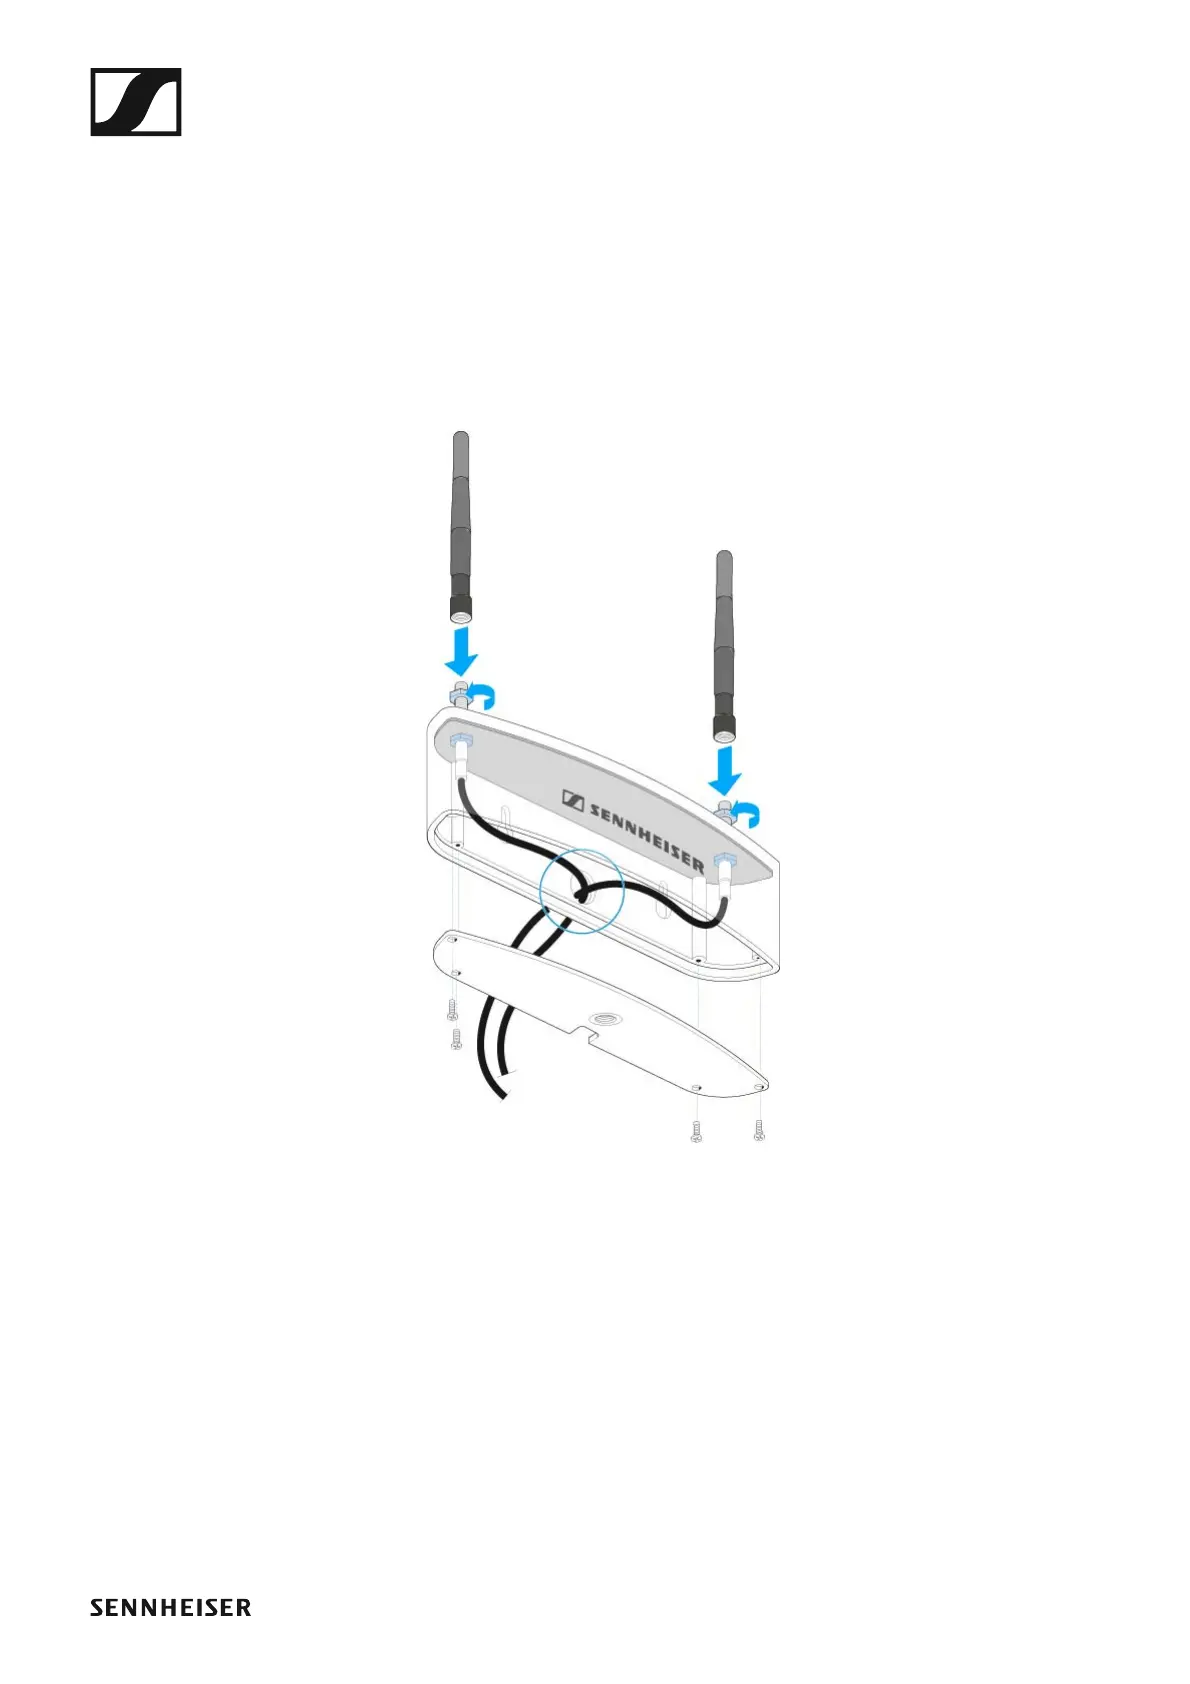
▷ Unscrew and remove the four screws from the base of the antenna wall
mount and remove the cover.
To mount the antenna wall mount to a wall
▷ Pass the antenna cable ends fitted with the R-SMA sockets from be-
hind through the cable hole located at the rear of the antenna housing.
►
▷ Do not kink the antenna cables and, when running the cables, make
sure not to bend them beyond a bend radius of 43 mm.
▷ Smaller bend radiuses can cause cracks and breaks in the cable, which
may not be visible from the outside. This can result in bad reception
quality.
▷ Screw the sockets to the antenna holes using the supplied washers and
nuts.
▷ Screw the cover back to the antenna housing. Observe correct cable
routing.
▷ Connect the two rod antennae of the antenna wall mount to the R-SMA
sockets.
▷ Use the elongated mounting holes to mount the antenna wall mount to
a wall or screw the antenna wall mount onto a microphone stand with
a 3/8" thread.
The antenna cables can be run from the rear panel of the antenna hous-
ing directly trough a wall. When wall mounting the antenna wall mount,