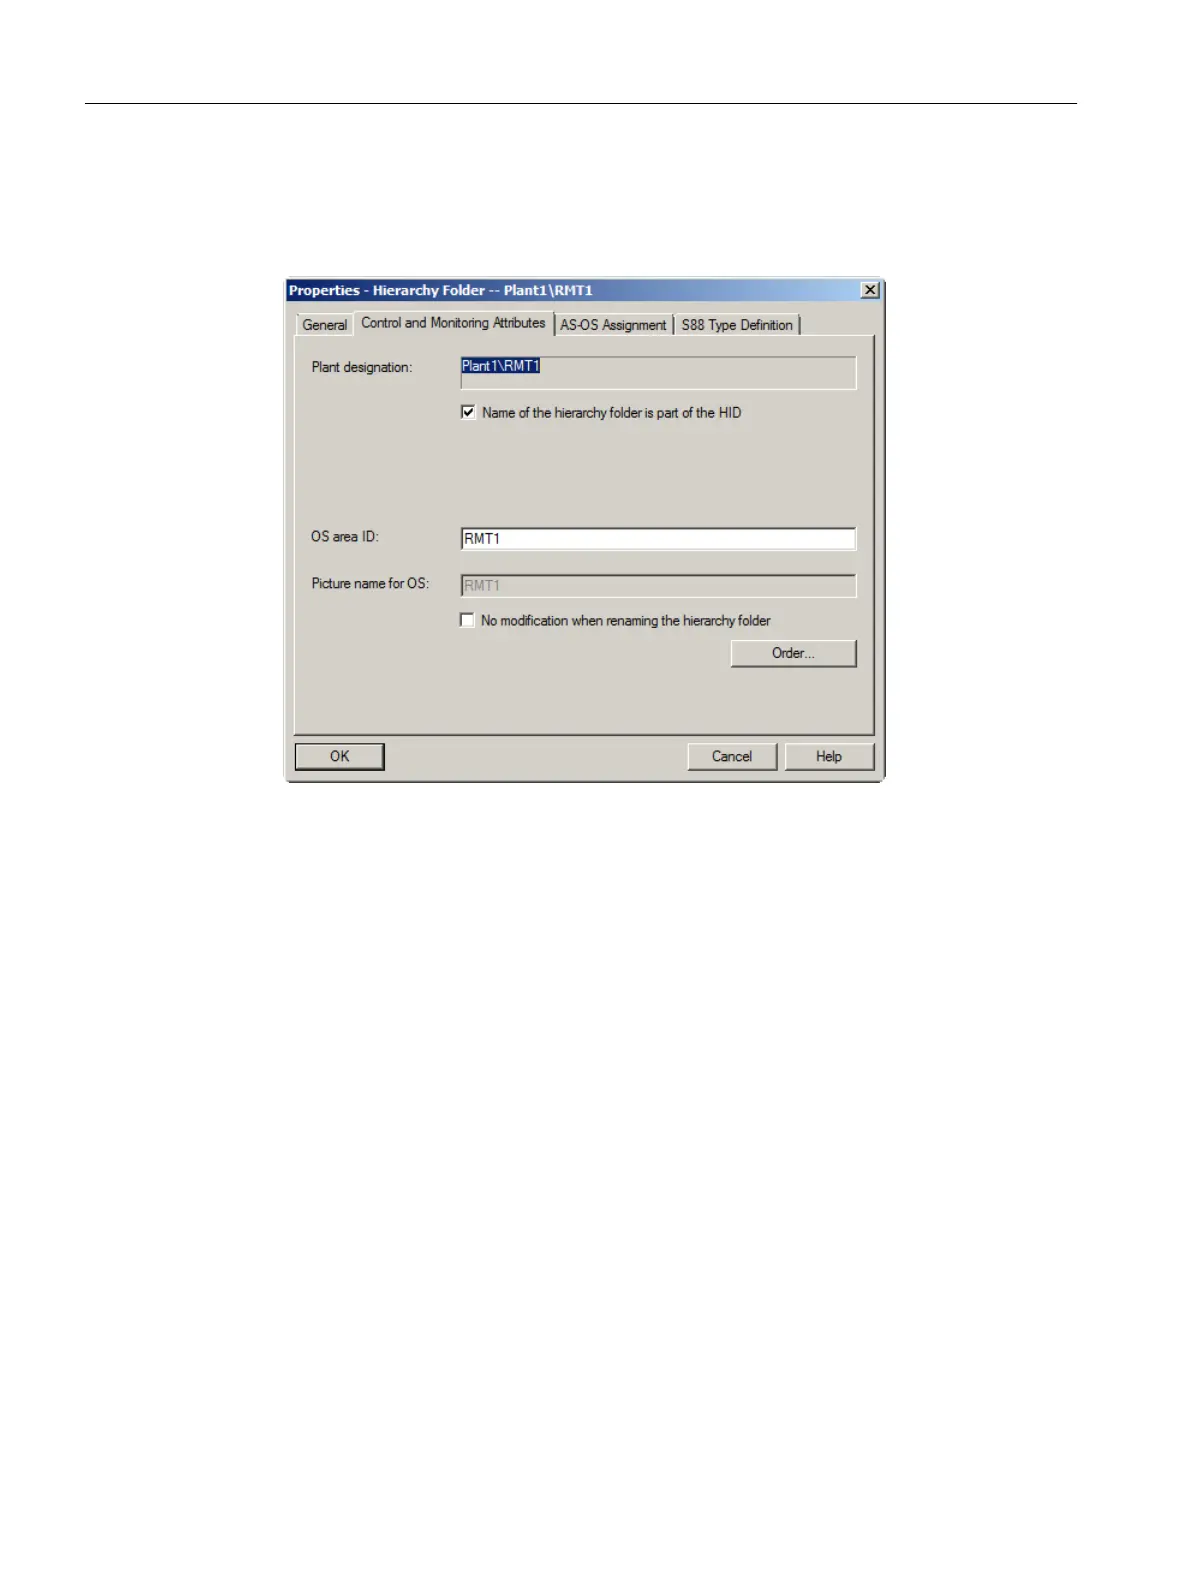
4. Switch to the "Control and Monitoring Attributes" tab.
The "No modification when renaming the hierarchy folder" check box is deactivated by
default. This ensures that the text for the OS area ID is always changed according to the
name of the hierarchy folder.
5. Click "OK" to apply your settings.
The dialog box closes and the name of the hierarchy folder is changed to "RMT1".
Procedure for renaming additional folders
1. Select the hierarchy folder "color_gs_prj_MP\color_gs_prj_Prj\Plant1\RMT1\Function(1)".
2. Select Edit > Object Properties.
The "Properties - Hierarchy Folder" dialog box opens.
3. Enter "FC111" in the "Name" input box.
4. Click "OK".
Your settings are applied and the dialog box closes.
5. Select "color_gs_prj_MP\color_gs_prj_Prj\Plant1\RMT1\FC111\Device(1)" folder.
6. Select Edit > Object Properties.
The "Properties - Hierarchy Folder" dialog box opens.
7. Enter "ADDIT" in the "Name" input box.
8. Click "OK".
Your settings are applied and the dialog box closes.
Initial work for the project
5.5 Working in the plant hierarchy
PCS 7 SMART Getting Started - Part 1 (V9.0 with APL)
56 Getting Started, 12/2017, A5E42181435-AA