9 3D Imaging
100 Basic User Manual
A
B
C
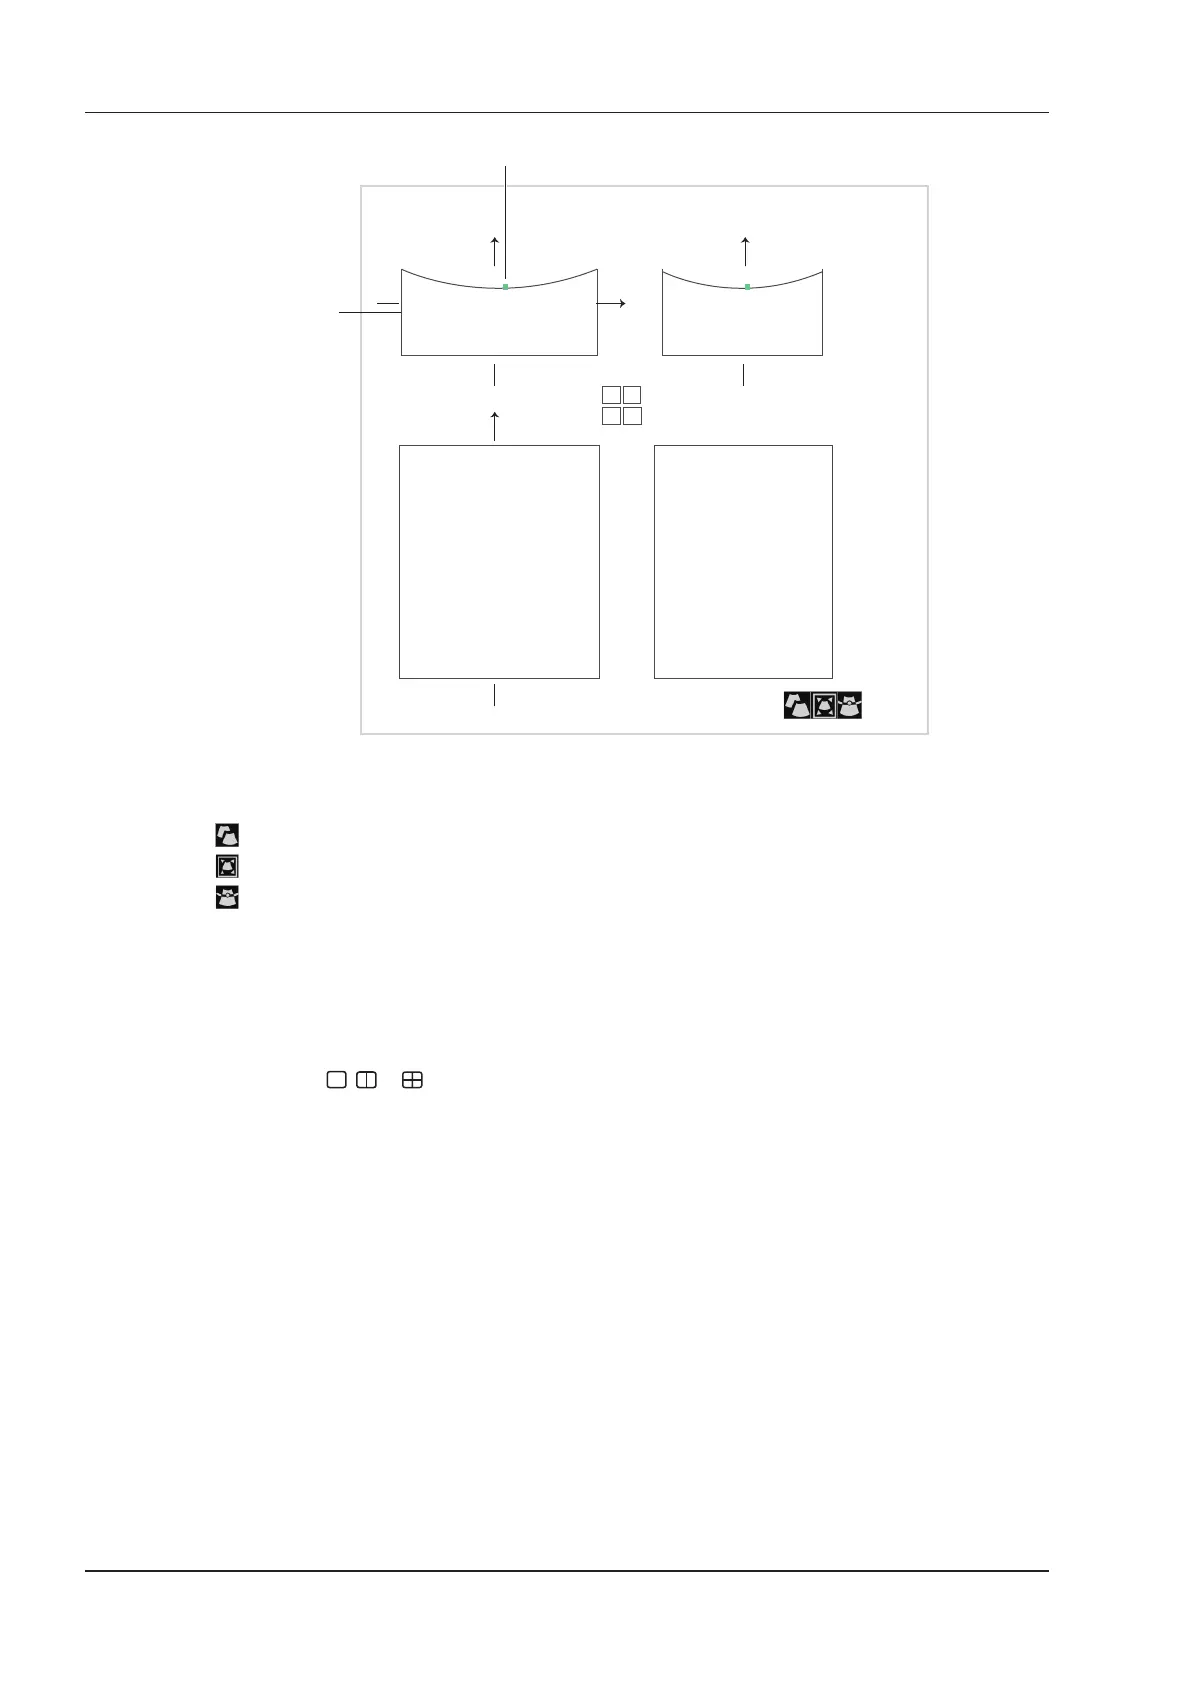
3D
Anchor
ROI
View A
View B
View C 3D Image
Figure 9-4 Cropping Review Screen
You can press the conrm key to select the desired status icon.
●
If is highlighted, use the trackball to position the ROI.
●
If is highlighted, use the trackball to resize the ROI.
●
If is highlighted, adjust the sample line by positioning the anchor with the trackball.
Only images inside the ROI are generated to a 3D image, and the real-time 3D image is also displayed when
cropping reviews.
9.2.2 Setting Display Format
To setting the display format in the following instructions.
●
Tap
3D/4D
, tap
, or to enter the full, dual or quad split screen display mode.
●
Tap
1
,
2
or
4
on the key panel of the touch screen to enter the full, dual or quad split screen display mode.
9.2.3 Using Auto Face
Fetal face can be automatically recognized by using the auto face feature even if fetal hands, placenta, umbilical
cord or other uterus adnexa block your view.
In the frozen mode, tap Auto Face to clear obstacles. Tap Auto Face again to restore the original image.
9.2.4 Setting Render Mode
Tap
3D/4D >
an item under
Render Mode
to select a render mode.
●
Surface
displays gray values of the surface structures. It is suitable for observing the contour (eyes, ears, nose,
lip) of fetus.
●
Grad. Light
displays the surface structures in a strengthen light intensity. It is suitable for observing the
contour (eyes, ears, nose, lip) of fetus.
●
Skeleton
displays the highest intensity of echo along the ultrasound beam. It is suitable for observing the
spinal column and skeleton of the fetus.