3 Preparing the System
24 Basic User Manual
■ To adjust the brightness and contrast
Adjusting the LCD monitor’s brightness and contrast is one of the most important factors for obtaining the
optimum image.
The proper setup displays a complete gray scale. The lowest level of black should just disappear into the
background and the highest white should be bright, but not saturated.
Use the buttons located on the bottom of the monitor to adjust the brightness and contrast settings of the monitor.
●
Press
Enter t
o enter the monitor menu.
●
Press
Enter
, press
–
or to
+
highlight
Auto Adjust
, and press
Enter
to automatically optimize the monitor
settings.
●
Press
–
to display the setting menu for
Contrast
. Pressing
+
can increase the value of the contrast; pressing
–
can decrease the value.
●
Press
+
to display the setting menu for
Brightness
. Pressing
+
can increase the value of the brightness;
pressing
–
can decrease the value.
3.6 Connecting the Probe
●
Disconnect the probe from the system after freezing an image or powering the system off. Otherwise, the probe
of the system could be damaged.
Do not pull the probe cable forcibly. Otherwise, the probe could be damaged.
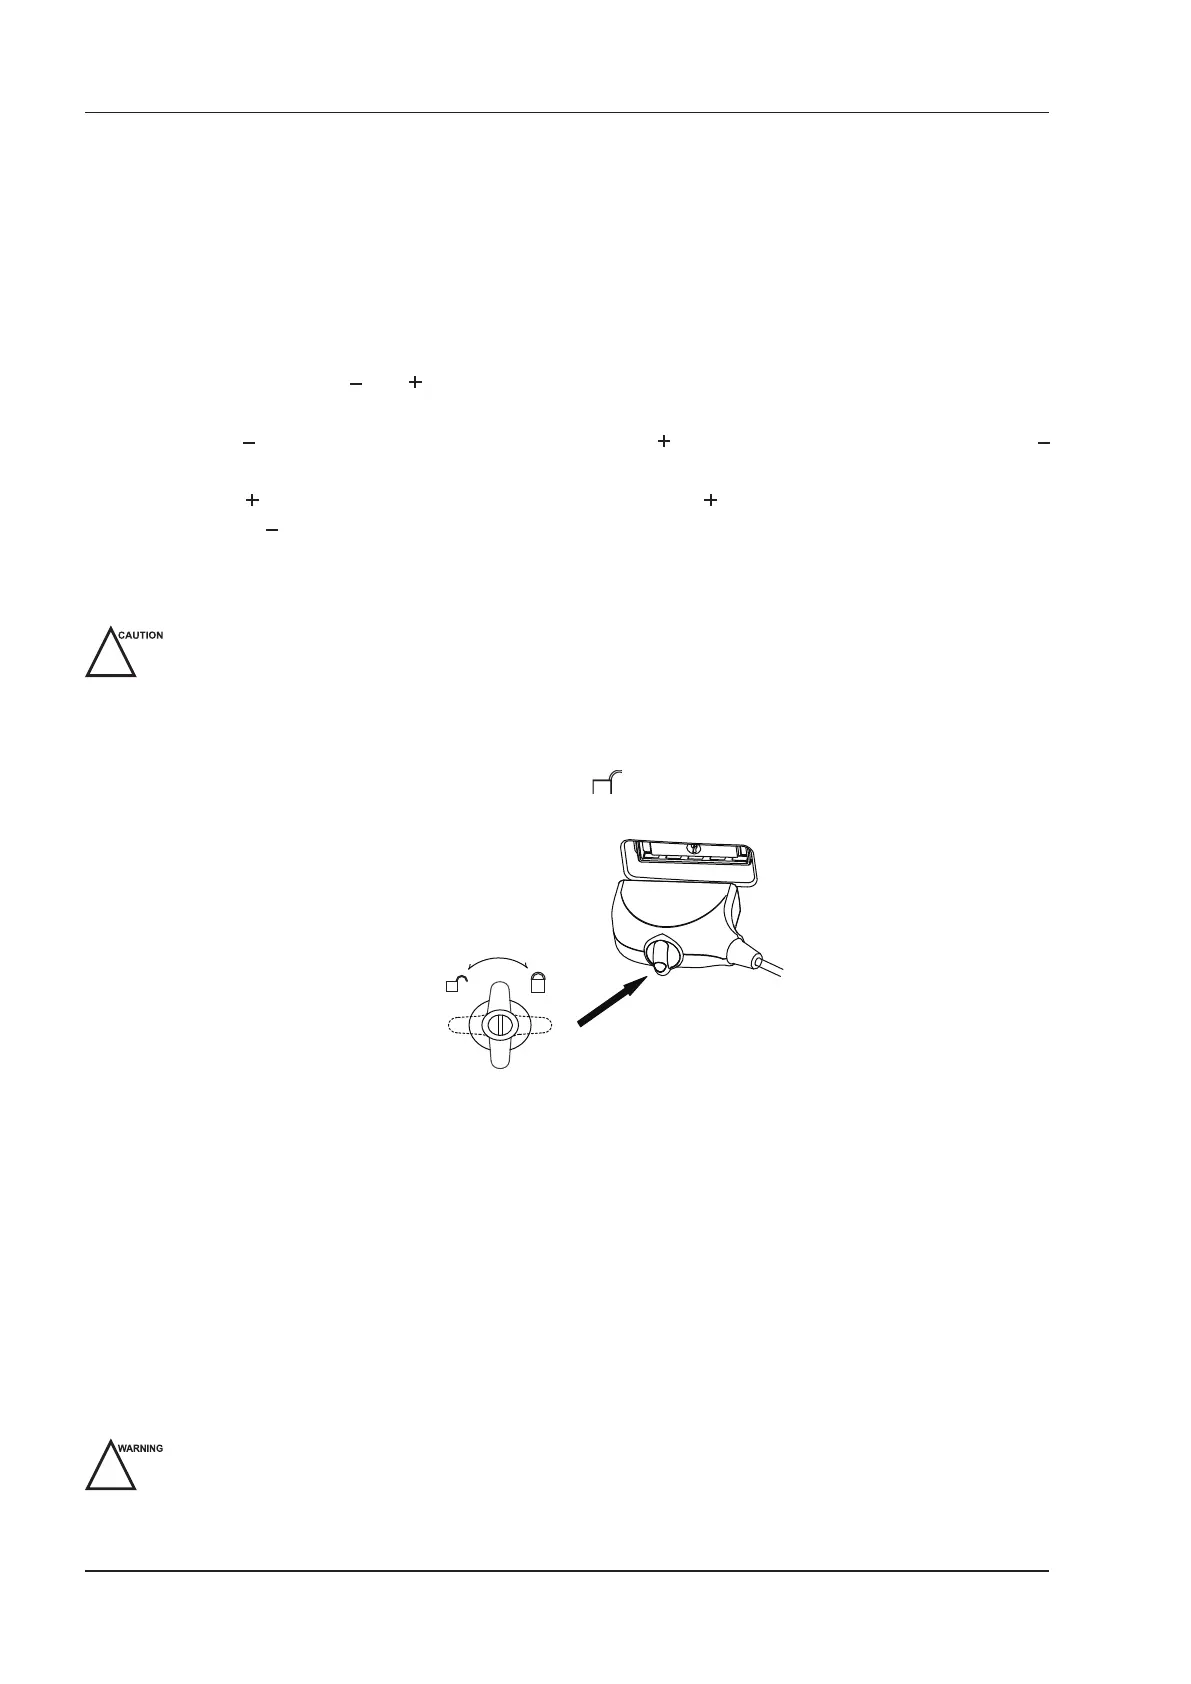
3.6.1 Connecting the Probe
1. Rotate the locking lever 90° anticlockwise to the position, and then insert the probe connector into the
probe port rmly.
2. Rotate the locking lever 90°clockwise to lock it securely.
3.6.2 Connecting the Pencil Probe
Connect the pencil probe to the port located on the front panel of the system.
3.6.3 Disconnecting the Probe
Rotate the locking lever 90°anticlockwise to the horizontal position, and then pull the probe connector straight out
vertically.
3.7 Connecting the Peripheral Device
3.7.1 Connecting the Foot Switch
To avoid damaging the foot switch, do not place the foot switch on the system.
Use only the foot switch provided by the manufacturer. Otherwise, the system or the foot switch may
malfunction..