4 Customizing Your System
32 Basic User Manual
Item Description
DICOM Send
Tick it and press the
P1
key to send the desired data to the DICOM storage server.
You can select the specic DICOM storage server from the drop-down list when dening the
P1
key.
DICOM Print
Tick it and press the Save or
P1
key to send the desired image to the DICOM storage server.
You can select the specic DICOM print server from the drop-down list when dening the
P1
key.
Activate new
patient
Tick it and the
New Patient
screen will automatically appear after you end the exam by
pressing the
End Exam
key.
The default
entry options
Set the default inactivated mode. After pressing the 3D/4D key, the system automatically
enters the inactivated 3D or 4D mode when using the volume probe selected from the drop-
down list beside Probe.
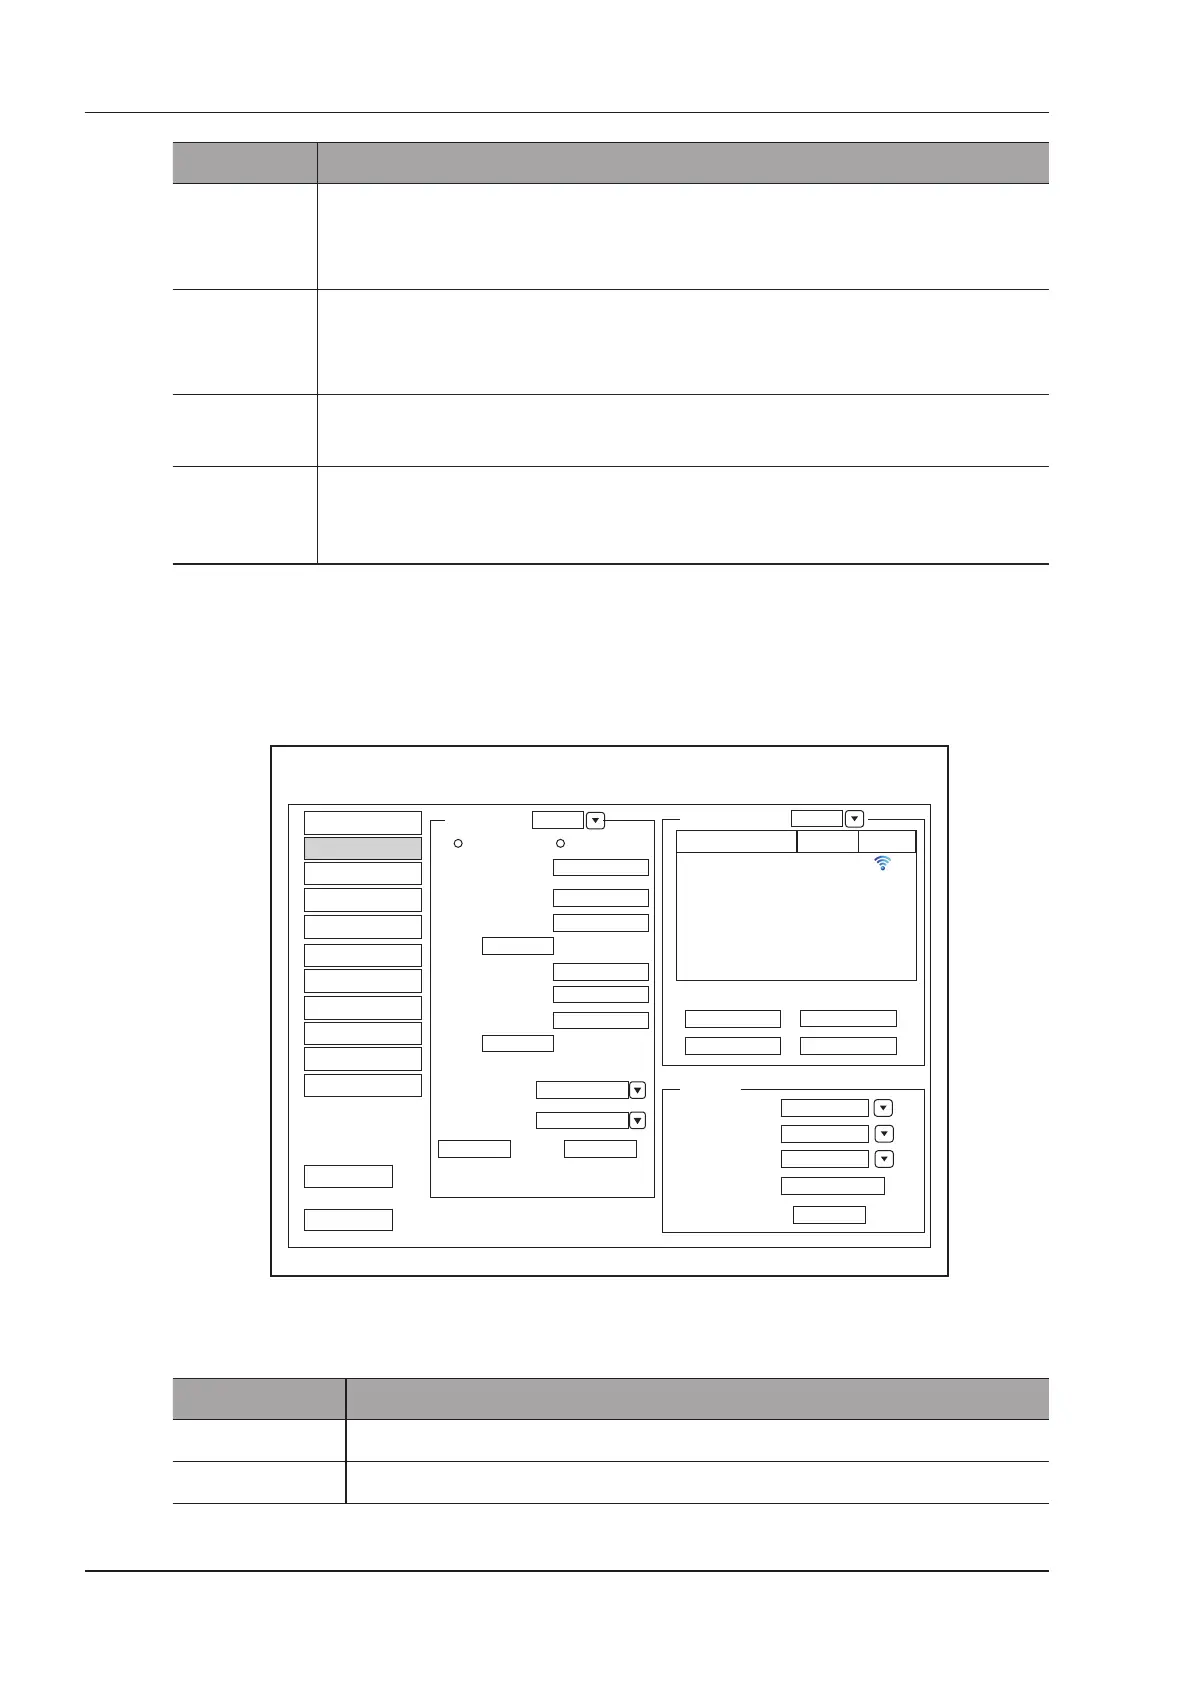
4.2 Peripheral Device Settings
You can make local network settings, wireless network settings and printer settings on the Peripheral Device
Settings menu. The wired network will take priority when wired network and wireless network are available at the
same time.
DHCP
LocalNetwork
IP Address
PrinterDriver
Mr.Wu Conn
Connect
Default Printer
Net Printer
Video Invert
OFF
Default Printer
Net Printer IP
Static IP
Netmask
Default Gateway
Disconnect
Refresh
Advance
DICOM AE Title
Mac Address
.
.
.
.
.
.
.
.
.
Ping IP Address
Ping
Advance
Add Printer
Printer
.
.
.
Wireless Network
Speed
Duplex
Search
Speed:100Mb/s Duplex:Full
Set
100M
Full Duplex
Enable
Enable
Name State
Level
System Setting
Peripheral
General
Comment
Measure
Bodymark
Touch Screen
Report
DICOM
Load Default
User Security
About
Exit
Save&Exit
Figure 4-6 Peripheral Device Settings Menu
■ Local Network Settings
Item Description
Address Mode Select an IP address mode.
IP Address Set the IP address of the system.