9 3D Imaging
Basic User Manual 105
-1 +1
+2
+3 +4
+0
-2
-4 +4
-3
Slice Area
Slice
Central Slice
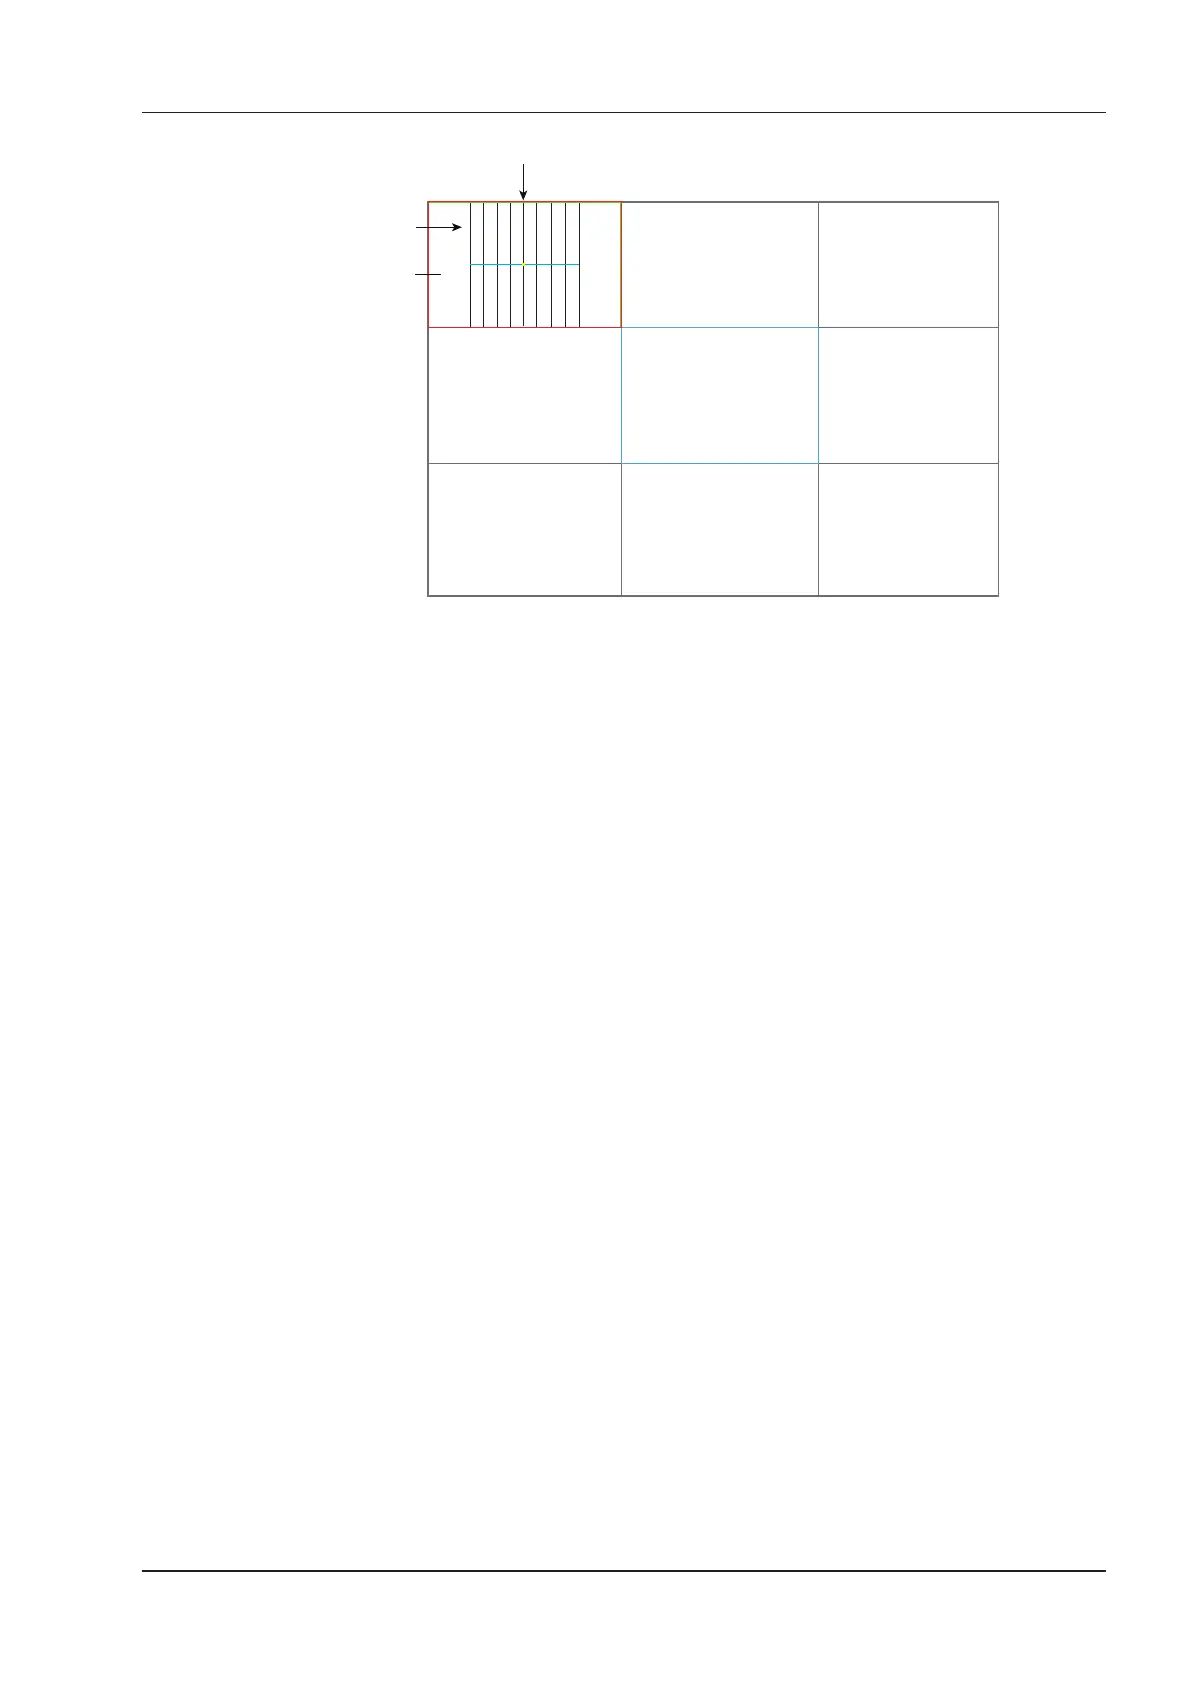
Figure 9-5 Multi-Slice Imaging Screen
Nine slices and the corresponding number are displayed on the slice imaging. The middle full line is the central
slice in the current slice axis, and it is numbered as 0.
Except for the central slice, the other eight slices are indicated by the number at the top left corner of the slice and
are displayed on the screen. Tap the Left/Right part of
Display
to move all the slices in the slice area left or right.
Move the cursor on the one slice by using the trackball to select it.
To adjust the slice position/slice distance/slice number,
●
Tap the Left/Right part of Adjust Pos. to ne-tune the selected slice position.
●
Tap the Left/Right part of Distance to adjust the distance among the slices. The span and content vary with this
setting.
●
Tap the Left/Right part of Slice Num to decrease or increase the number of slices.
After adjusting, the slice position, slice distance, the slice number, and the corresponding image of the slice will
change accordingly.
9.2.10 Setting the Scan Mode
Set
Scan Mode
in accordance with your preference.
Tap Linear or Sector to set the sweep mode.
NOTE:
This setting is only effective when entering 3D imaging from a frozen B mode image.
9.2.11 Adjusting ZAngle/ZScale
The image may be distorted if you perform the scan too quickly by using the probe. To acquire a vivid image, you
can adjust the value of
ZAngle
/
ZScale
before the scan.
●
If
Scan Mode
is set to
Sector
, you can adjust the sweep angle when performing the scan by the probe.
Tapping the left/right part of
ZAngle
can adjust the angle.
●
If
Scan Mode
is set to
Linear
, you can adjust the sweep span when performing the scan by the probe.
Tapping the left/right part of
ZScale
can adjust the scale.
NOTE:
This setting is only effective when entering 3D imaging from a frozen B mode image.