4 Customizing Your System
48 Basic User Manual
Item Description
Orientation Set the print orientation.
Color Set the color of the image.
Film Size Set the lm size.
Min Density Set the minimum density level of the lm.
Film Destination Set the lm destination.
Choose from:
MAGAZINE
or
PROCESSOR
●
Set it to
MAGAZINE
, the image will be stored in a lm magazine.
●
Set it to
PROCESSOR
, the image will be processed in a lm processor.
Max Density Set the maximum density level of the lm.
Magnication Set the method used for magnifying images during the print.
Congure
Information
Make special image quality settings.
Copies Set the number of copies to print.
Film Session Label Enter a name to be applied on a group of the lm labels.
Smoothing Type Set the value of magnication interpolation for the printer.
Click Echo to verify the connection between the system and the server after you input the settings. A summary
displays if the connection is veried.
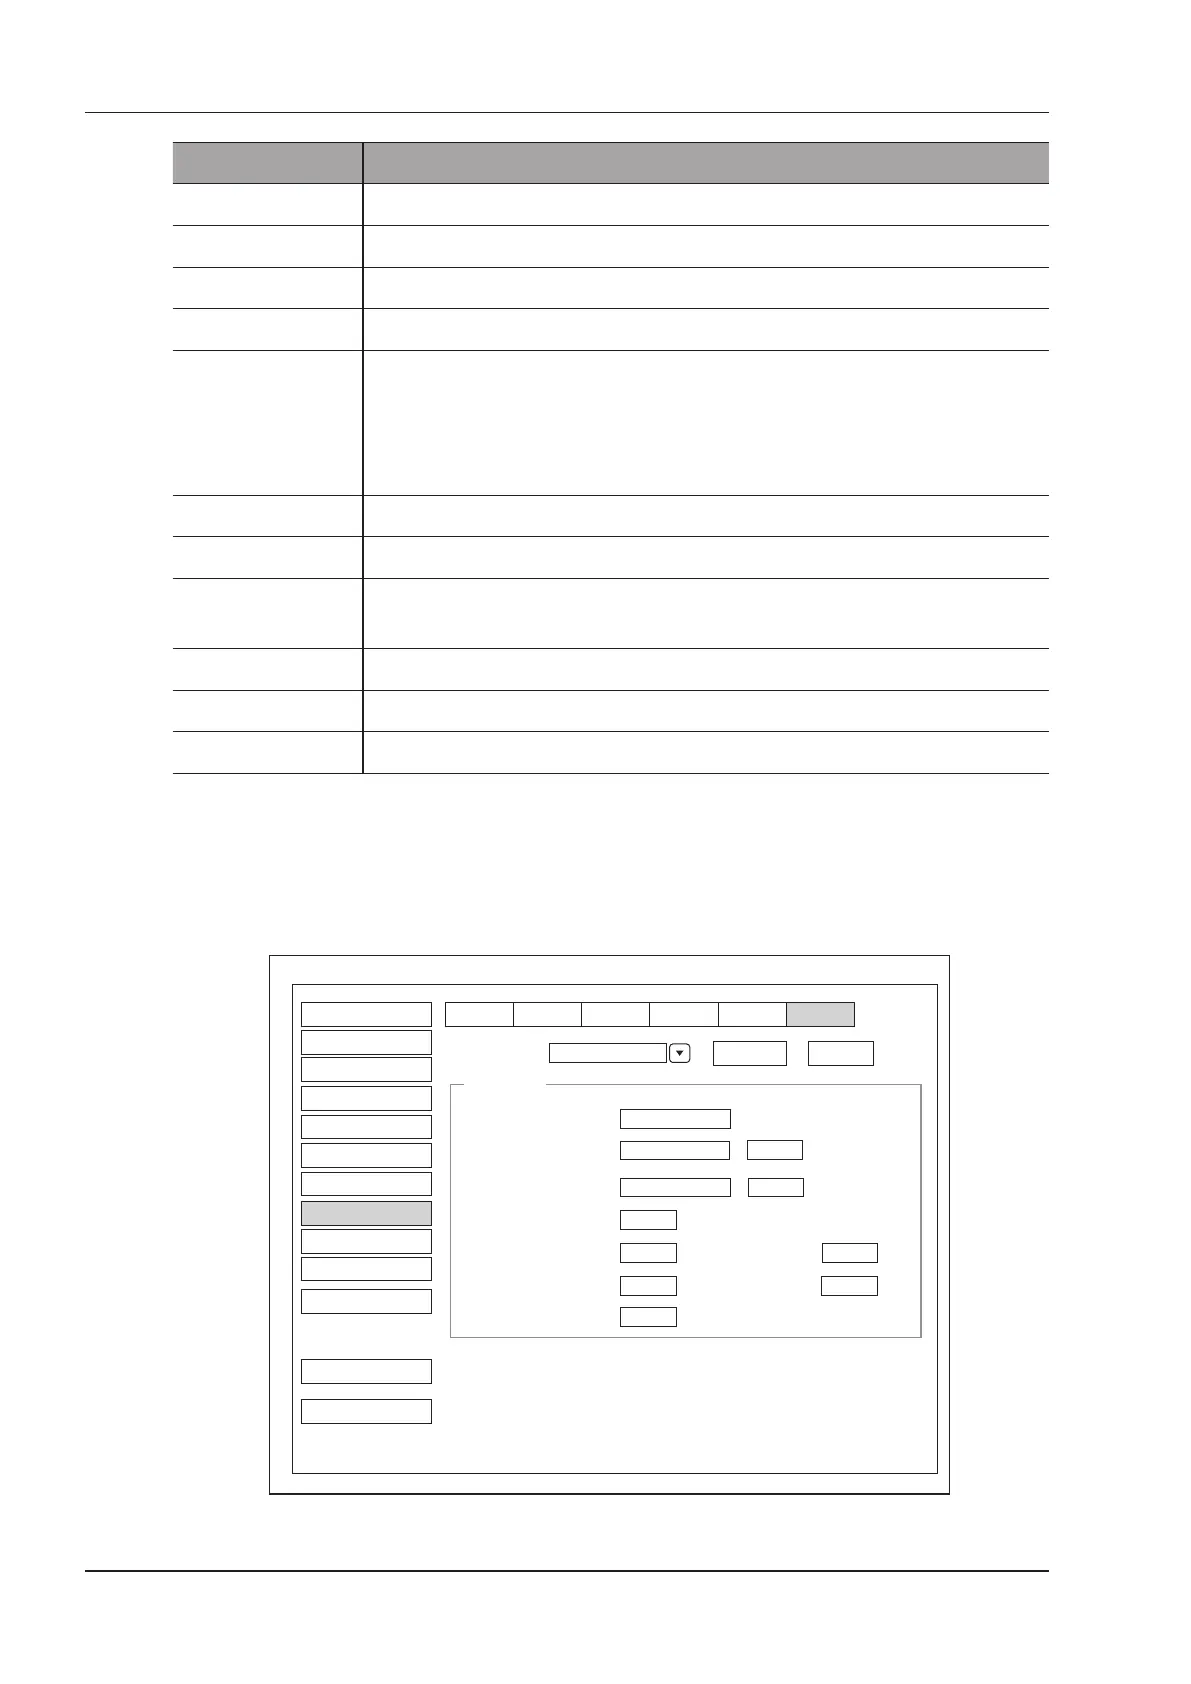
4.8.6 QR List
You can connect the system to the QR service server and adjust the relevant settings on the QR List tab.
Delete
Add
Dicom QR List
System Setting
Service List
QR
Remote HostName
QR
Port Number
104
Connect Timeout(sec)
10
Ping
Echo
IP Address
192.168.254.104
DICOM AE Title
AE
Peripheral
General
Comment
Measure
DICOM
Load Default
About
Bodymark
Store C-Store Worklist PrintMPPS
Report
Touch Screen
Exit
Save&Exit
User Security
QR List
Repeat Count
1
Dimse Timeout(sec)
10
Acse Timeout(sec)
30
Max.Result
100
Figure 4-21 DICOM Settings Menu - QR List Tab