4 Customizing Your System
Basic User Manual 47
Delete
Add
DicomPrint
System Setting
Service List
DicomPrint
Remote HostName
DicomPrint
Port Number
109
Connect Timeout(sec)
10
Ping
Echo
IP Address
192.168.254.104
DICOM AE Title
AE
Properties
Format
1×1
Trim
YES
Priority
MED
Border
WHITE
Medium
PAPER
Empty Image
WHITE
Orientation
PORTPAIT
Color Gray
Film Size
A4
Min Density 20
Film Destination
MAGAZINE
Max Density 320
Magnification
CUBIC
Configure Information
Copies 1
1
Film Session Label
Smoothing Type
Peripheral
General
Comment
Measure
DICOM
Load Default
User Security
About
Save&Exit
Exit
Bodymark
Store C-Store Worklist Print QR ListMPPS
Report
Touch Screen
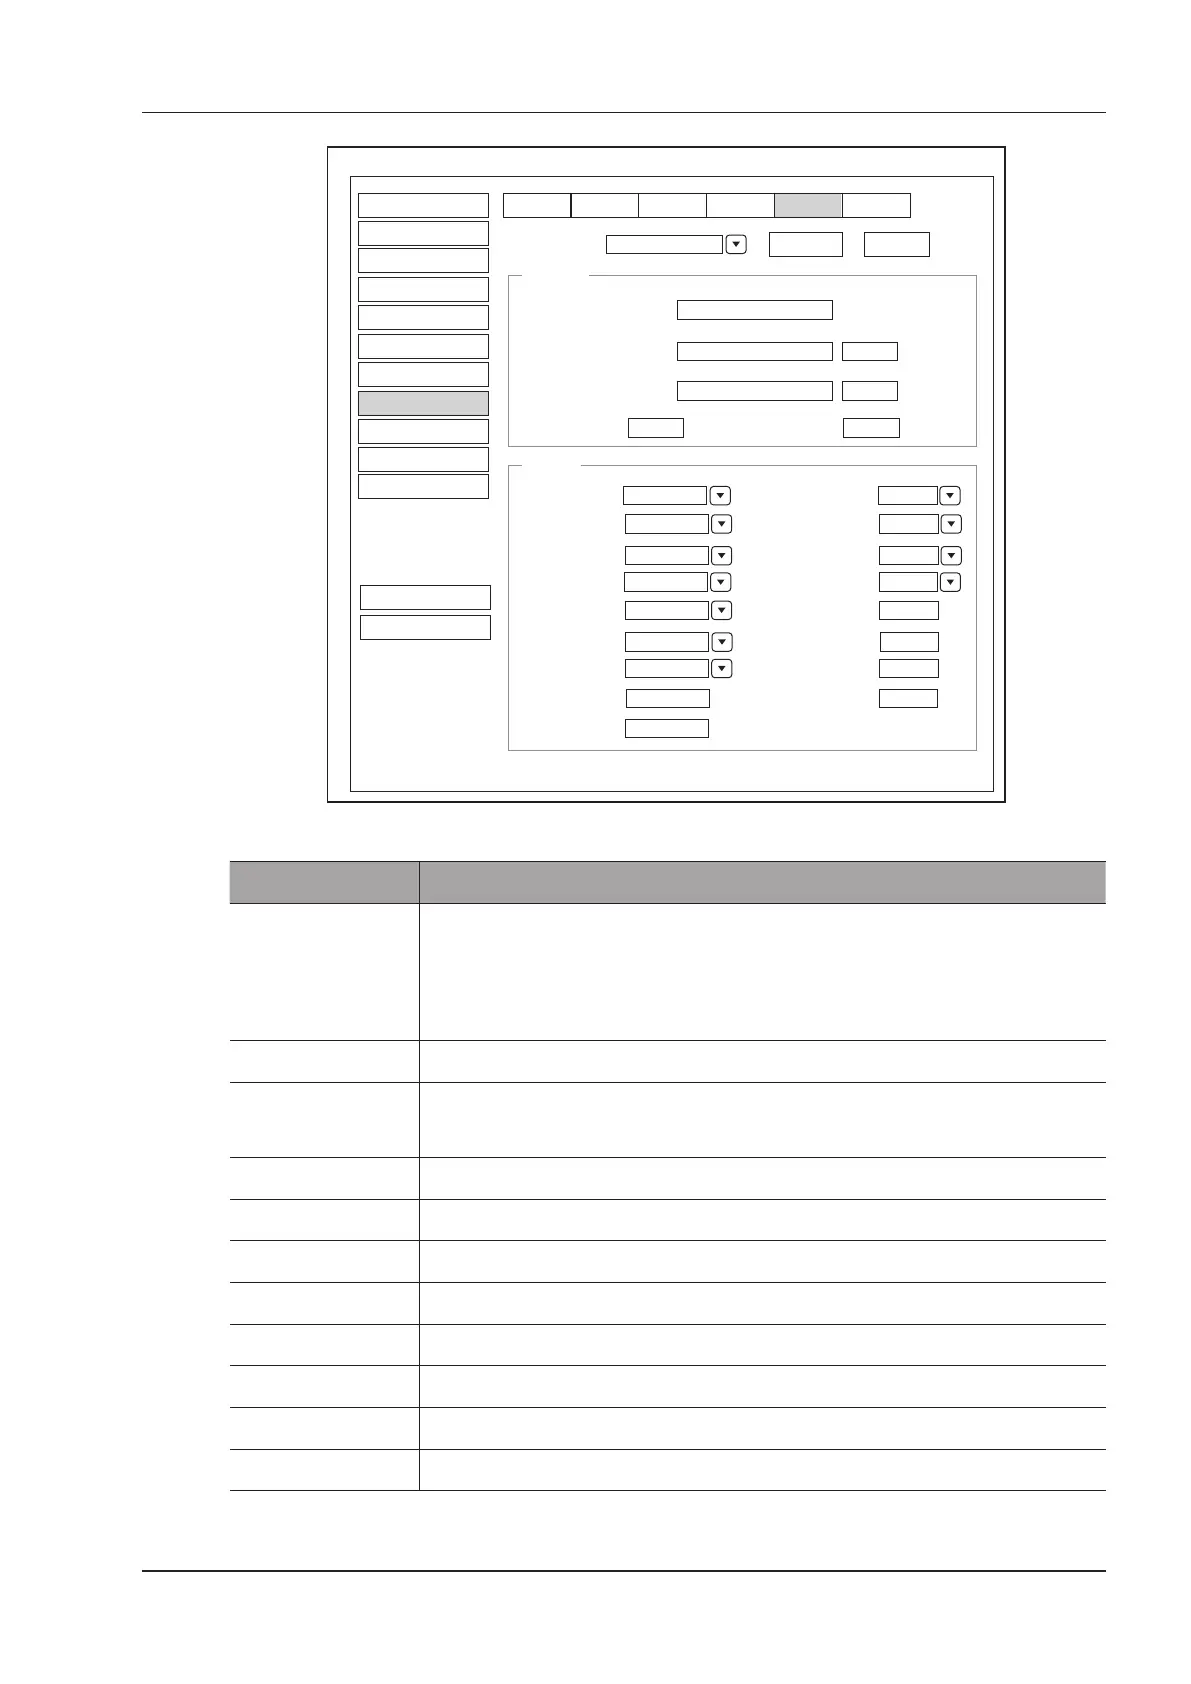
Figure 4-20 DICOM Settings Menu - Print Service Tab
Item Description
Service List Select the DICOM print server.
●
Select Append from the drop-down list beside Service List, input the relevant
parameters information and click Add to add a new server.
●
Select any server from the drop-down list and click Delete to delete the server.
Remote Host Name Enter the name of the DICOM print server.
IP Address Set the IP address of the DICOM print server.
After the setting, click Ping to test the connection.
DICOM AE Title Set the Application Entity (AE) title of the DICOM print server.
Port Number Set the port number of the DICOM print server.
Format Set the print format.
Trim Set to print or not to print a crop box around each image.
Priority Set the print job priority.
Border Set the color of the border to ll in the gap between the images.
Medium Select the print medium.
Empty Image Set the color of the empty images.