12 Managing Images/Data
120 Basic User Manual
■ To View an Image on the View Image Screen
1. Press the
Review
key on the control panel to enter the
View Image
screen.
The following screen is displayed with images and cine thumbnails.
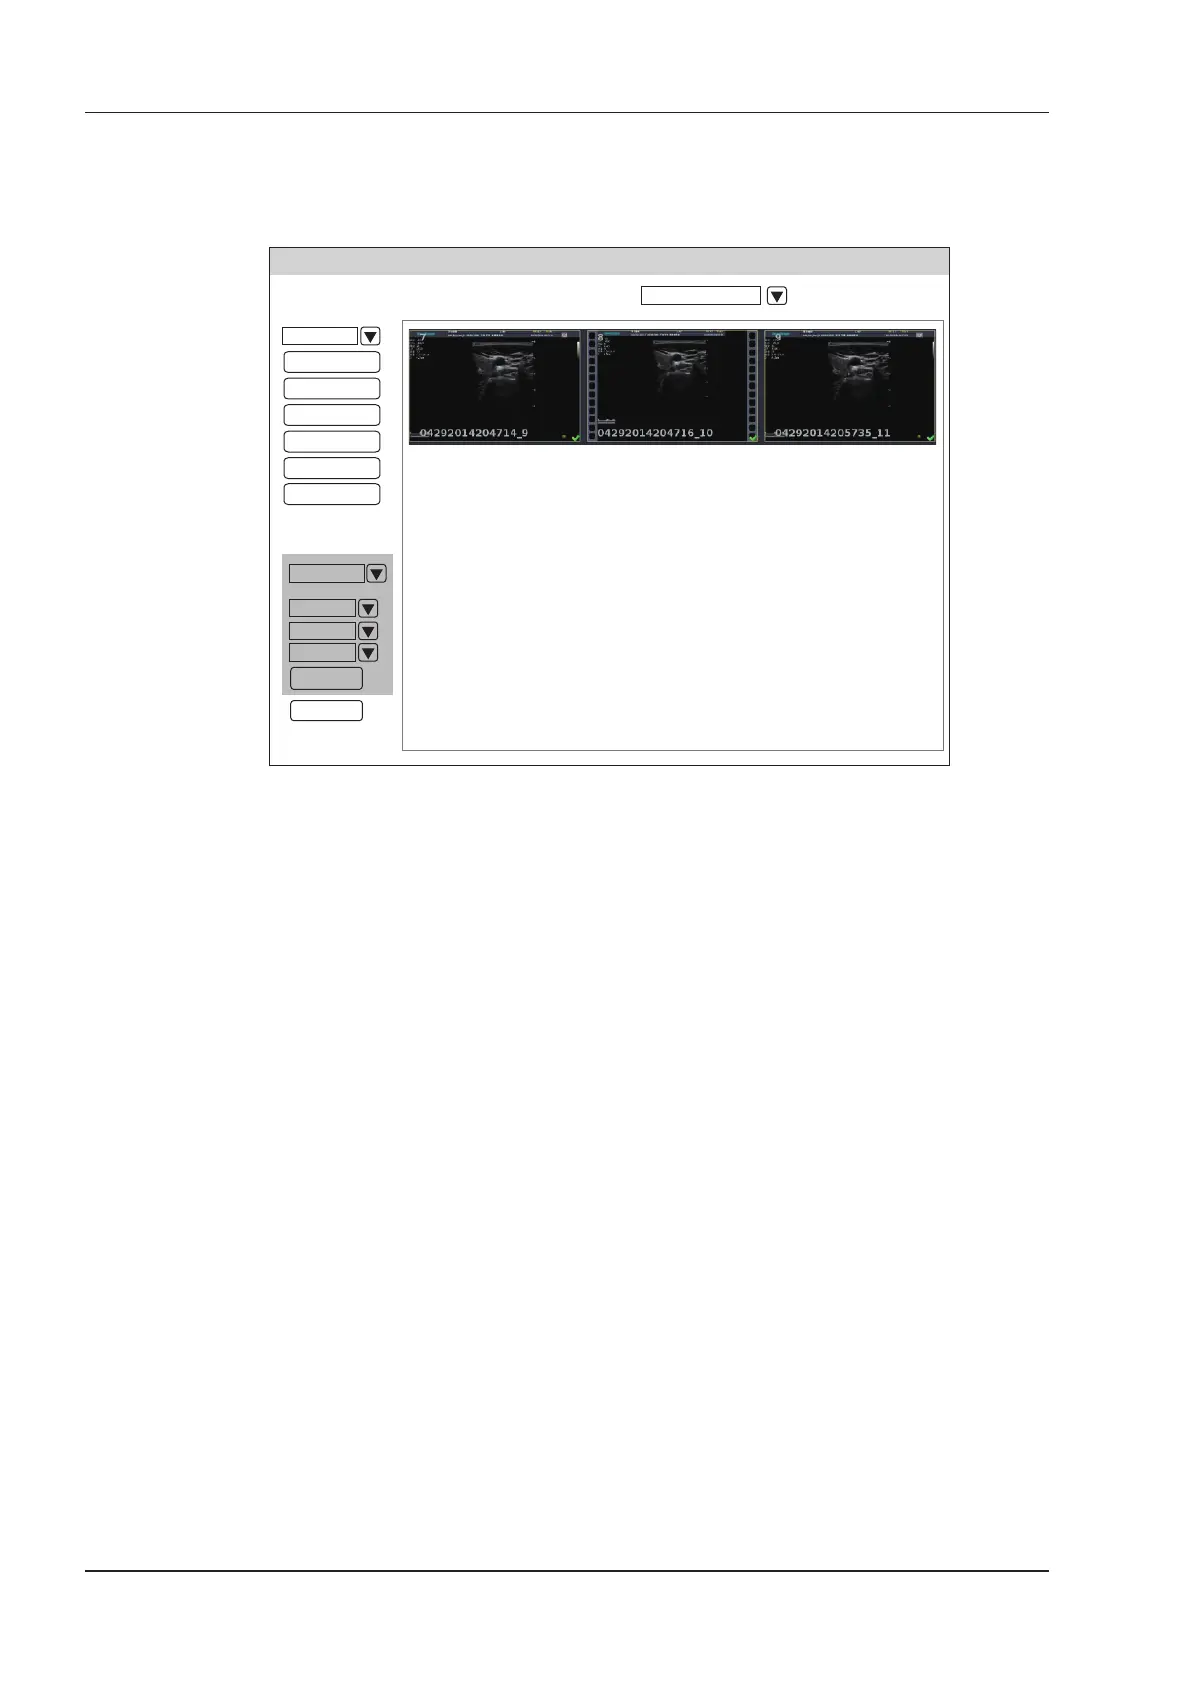
View Image
Patient ID:345 Patient Name: Mary
Files Number: 19
Exam
3X3
Exit
All Select
Delete
Review
DICOM Send
DICOM Print
Export
PC
Export
Print
If the patient has had more than one exam, you can select the desired exam from the
Exam
drop-down list.
2. Move the trackball to the thumbnails and select the conrm key to choose one image.
3. View the image.
−
Double-click the conrm key to view an image.
You can press the
Freeze
key at any time to return to the
View Image
screen.
−
Click
Review
to view the image.
12.2.2 Retrieving an Image
Perform the following steps.
1. Choose the
Patient
key >
Patient List
>
Patient Review
to enter the
Patient Review
screen.
2. Select the desired patient, and then click
View
to enter the
Exam Review
screen.
3. Select the desired exam, and click
View Image
to retrieve the image.
12.3 Sharing Data
You can remote access to the data stored in the system through a computer.
Perform the following steps.
1. Connect the computer to the system.
2. Set
Image Share Service
to
On
on the General Settings menu - Storage tab.
3. Type the IP address in the search box of the computer and press
Enter
.
4. Type the user name and password in the pop-up dialogue box.