2 System Overview
Basic User Manual 15
To avoid damaging the touch screen,
Do not expose it in direct sunlight.
Tap it gently with ngers.
Do not operate it with a sharp or hard object.
Do not locate it in environmental temperature of sudden changes.
Do not locate it near static electricity or high voltage.
Keep the screen clean without any adhesive tapes.
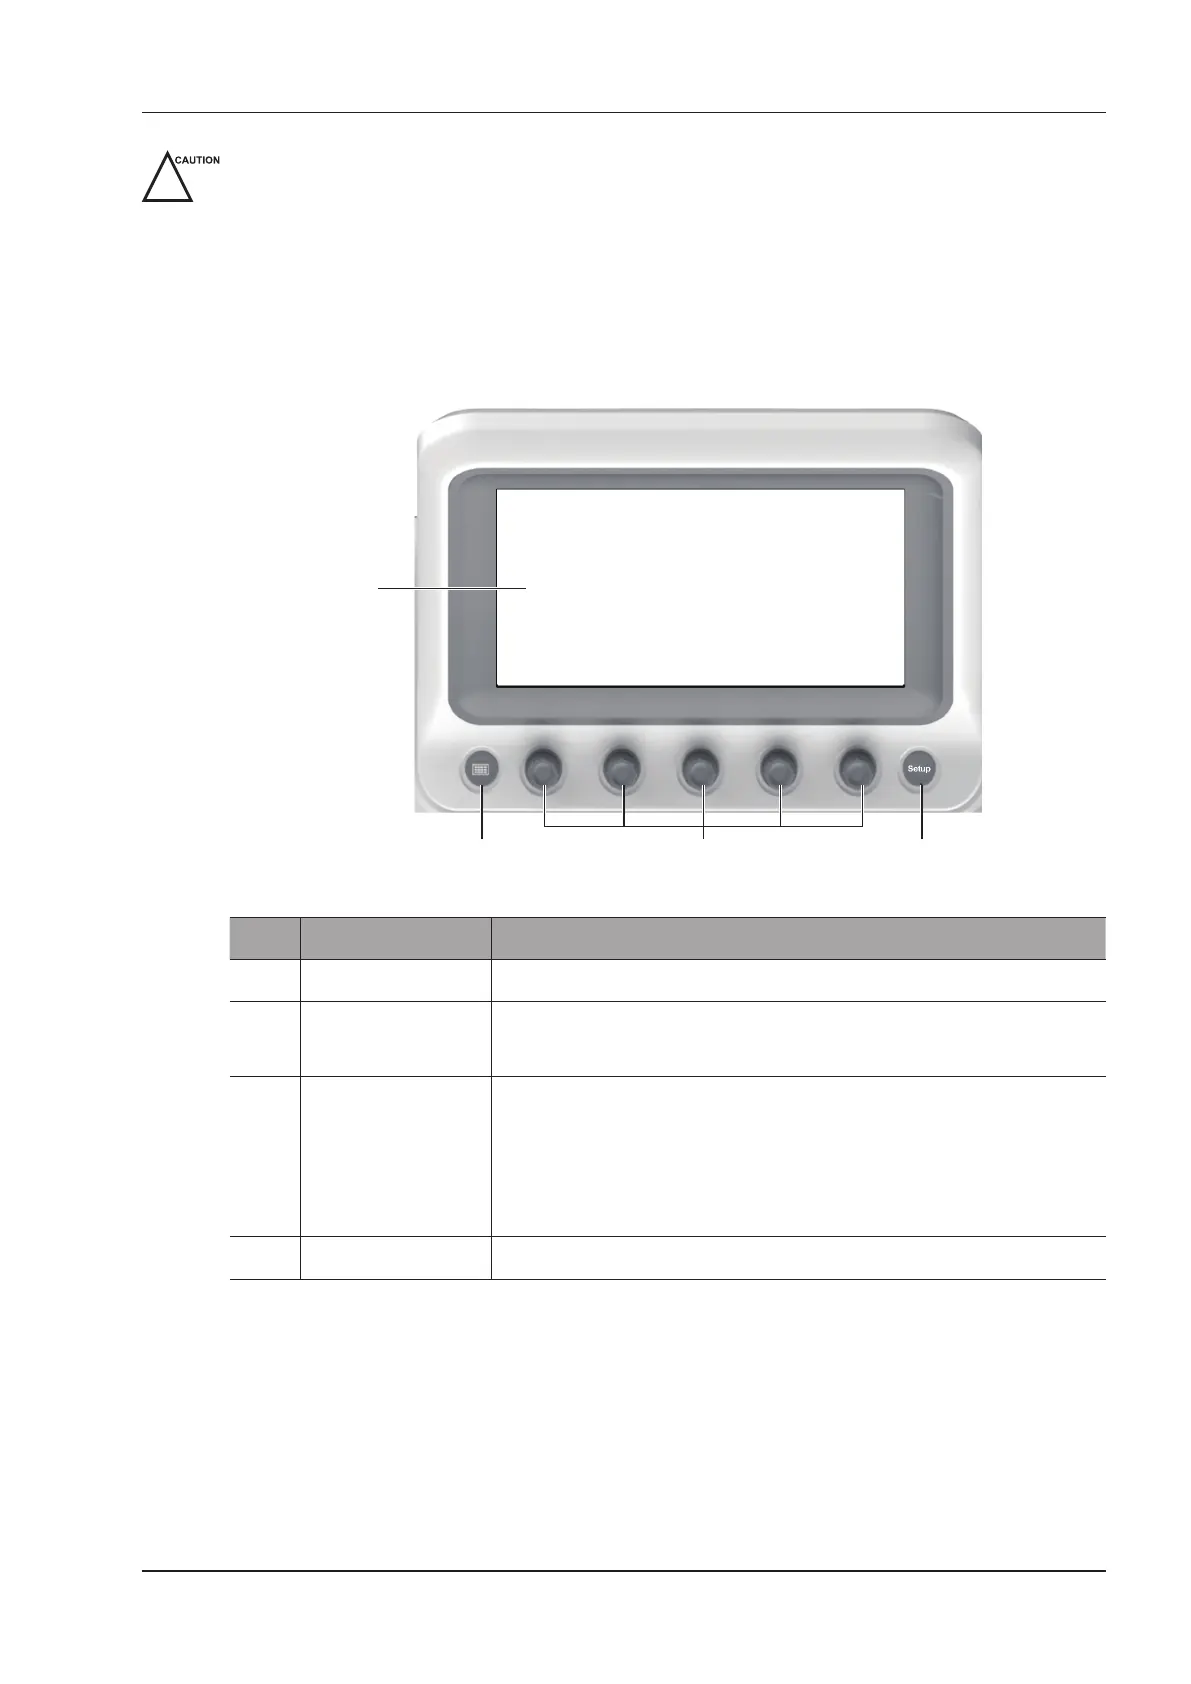
Controls located on the touch screen are displayed as follows:
1
2 3 4
Figure 2-5 Touch Screen
No. Name Description
1 Touch Screen The display varies with the feature to be performed.
2 Key-Panel Key Press it to activate the key panel of the touch screen.
Or, press it again to return to the previously operating screen.
3 Image Optimization
Knob
Rotate the knob that is directly below the desired item to adjust the value
when optimizing the image.
Generally, rotating it clockwise can enable the feature or increase the value of
the corresponding parameter; rotating it anticlockwise can disable the feature
or decrease the value of the corresponding parameter.
4 Setup Key
Press it to enter the
System Setting
menu.
■ Application Mode Screen
The application mode screen (as shown below) is used to select the probe model or exam type.
The system enters the following screen by default once it is started up. Press the
Probe
key on the control panel to
return to the following screen when you enter other screens.