3.
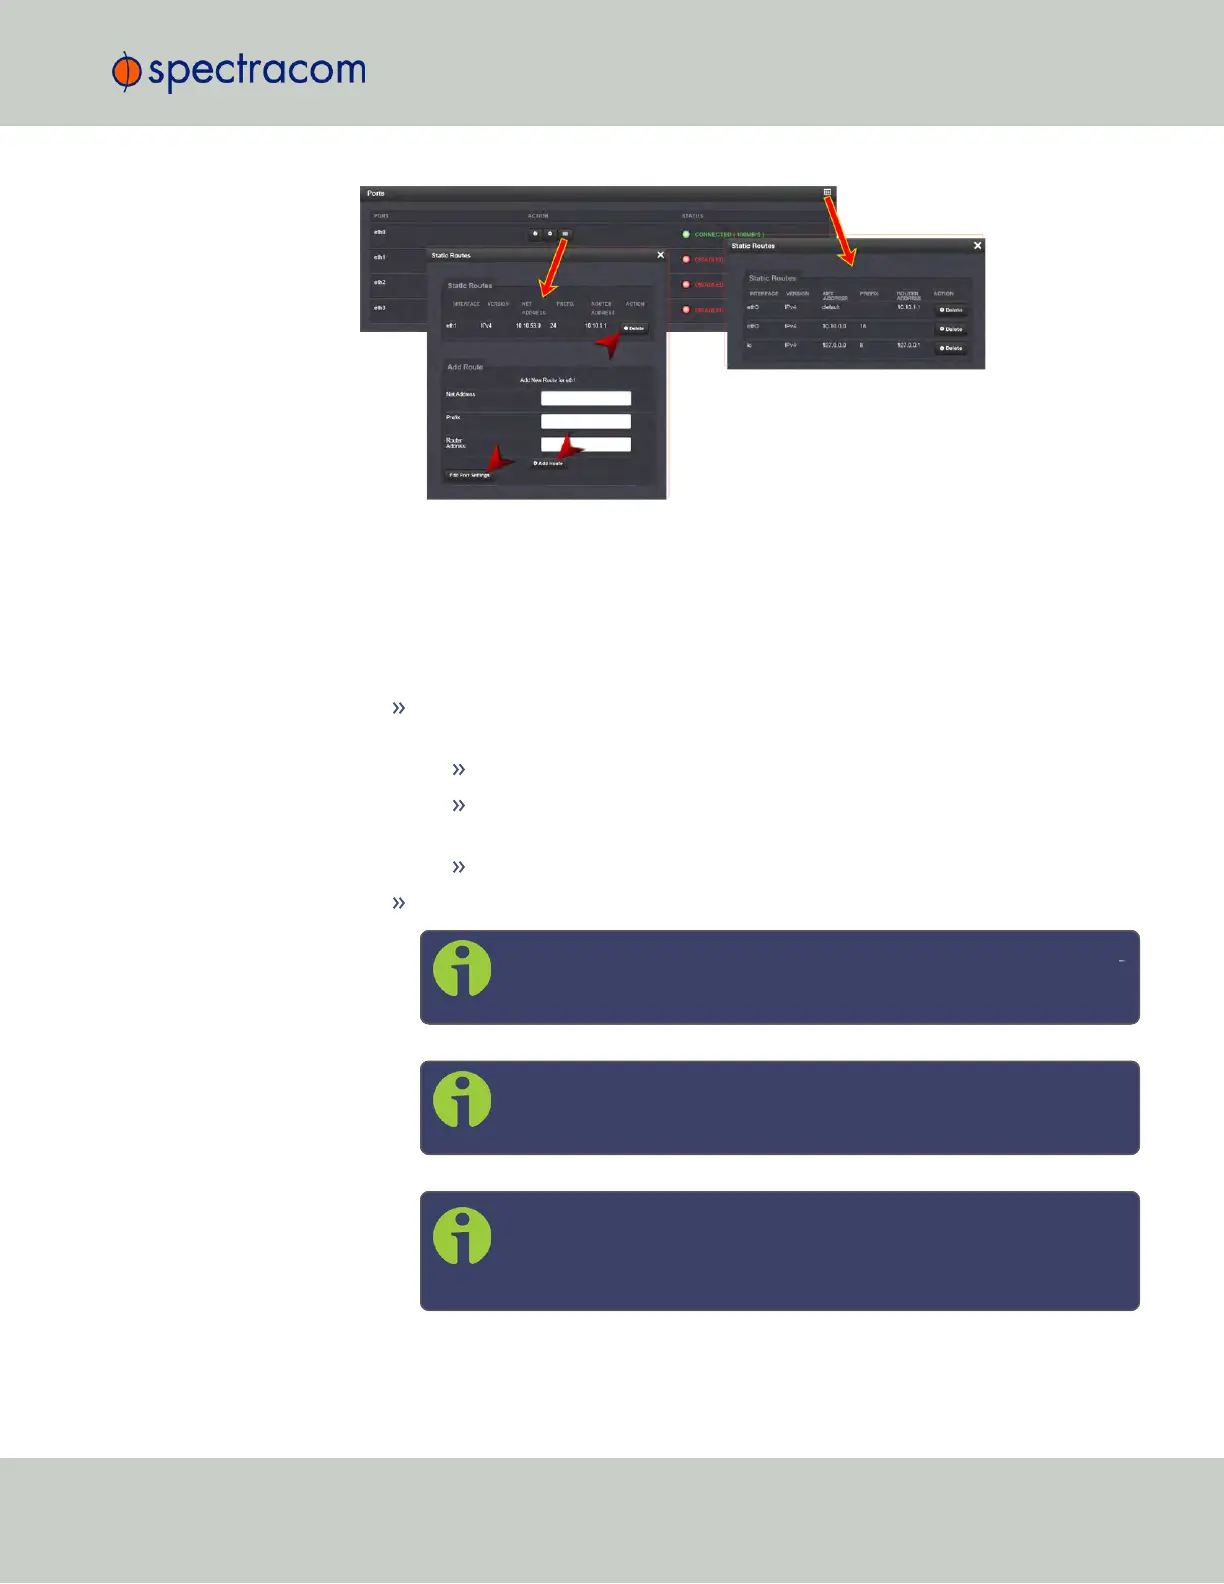
To view all configured Static Routes for all Ethernet Ports, or delete one or more Static
Routes, click the TABLE icon in the top-right corner.
4.
To add a new Route, view or delete an existing Route for a specific Ethernet Port, locate
the Port listing you want to configure, and click the TABLE button next to it.
The Static Routes window for the chosen Port will open, displaying its Routing Table,
and an Add Route panel.
In the Add Route panel, populate these fields in order to assign a Static Route to
a Port:
Net Address: This is the address/subnet to route to.
Prefix: This is the subnet mask in prefix form e.g., "24". See also "Subnet
Mask Values" on page52.
Router Address: This is where you will go through to get there.
Click the Add Route button at the bottom of the screen.
Note: To set up a static route, the Ethernet connector must be phys
ically connected to the network.
Note: Do not use the same route for different Ethernet ports; a route
that has been used elsewhere will be rejected.
Note: The eth0 port is the default port for static routing. If a port is
not given its own static route, all packets from that port will be sent
through the default.
2.14 Configuring Network Settings
CHAPTER 2 • SecureSync User Reference Guide Rev. 23
59