2.1.2.4 Grounding
The unit can be grounded in two different ways:
By connecting the DC negative terminals to the chassis of the unit, and to the vehicle
metallic structure. This option is the factory standard for VersaSync.
By isolating the DC negative terminals from the chassis of the unit ("airborne mode").
This option must be requested at the time of ordering your unit.
2.2 Initial Network Setup
After making the hardware connections outlined in the Installation Overview list, the following
information will help you to establish a network connection.
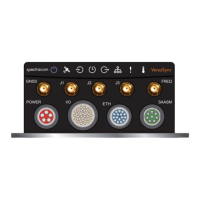
VersaSync has a Command Line Interpreter ("CLI"). Using the CLI connection, you can set up
access to the web user interface ("Web UI") that is used to configure and monitor the unit. You
will need a terminal emulator program installed on the PC that will be used to configure Ver-
saSync in order to communicate. See "Setting up a Terminal Emulator" on page240 for more
detailed instructions.
Default settings:
VersaSync network settings default to DHCP: if the unit is connected to a DHCP server via ETH0
or ETH1, it will accept an assigned dynamic IP address.
In order to apply a static IP address, DHCP must be disabled. (See "Assigning a Static IP
Address" on page33).
Note: VersaSync supports zeroconf: If you have a DHCP enabled network, you
can use zeroconf for initial setup. For more information, see "Zero Configuration
Setup" on page30. Otherwise follow the instructions below for conventional
setup.
2.2.1 USB Driver
On the PC connected to the unit, new hardware (the USB interface) will be detected. The
correct driver should be installed automatically. If not, download the driver from
www.ftdichip.com/Drivers/VCP.htm, and install it manually via the instructions for
your operating system.
2.2 Initial Network Setup
CHAPTER 2 • VersaSync User Manual Rev. 6.0
27