4-30
920011-649 Operator Manual Processing Instructions
8. In Idle mode (when READY is shown again on display), press
START touch pad four times. The following printout is printed at
end of testing:
========================
HH:MM:SS XM MM-DD-YY
========================
= LEAK TEST =
= SELF-DIAGNOSTIC =
========================
TEST 1: XXXX
TEST 2: XXXX
========================
XXXX shows "PASS" for passing test or "FAIL" for failed test.
9. Proceed with S
ECTION 4.8.2, STARTING CYCLE, Step 4, to perform
endoscope processing cycle.
4.8.2 Starting Cycle 1. Before starting cycle, ensure pre-processing checklist was
completed (see S
ECTION 4.7, PRE-PROCESSING CHECKLIST).
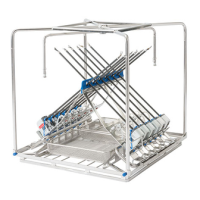
IMPORTANT: Ensure no accessories stick out of endoscope
processing support.
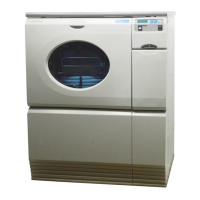
2. Roll endoscope processing support into chamber. Push firmly so
it connects into manifold connectors at the back of chamber.
3. Close processor door. Push processor door firmly to engage
locking mechanism. Ensure door is closed tightly. Verify display
shows current date and time:
then, if optional Automated Leak Test Assembly is present:
NOTE: If display shows D-SHORT REQUIRED XX HOURS
LEFT or D-SHORT REQUIRED XX MINUTES LEFT, refer to
S
ECTION 6.5, D-SHORT CYCLE. If display shows D-LONG
REQUIRED NOW, refer to SECTION 6.11, D-LONG CYCLE.
IMPORTANT: When a SINGLE or a DOUBLE cycle is selected,
and WASHING SELECT option is set to YES in Miscellaneous
Values menu of Supervisor mode (refer to S
ECTION 5.2.3, SETTING
MISCELLANEOUS VALUES), pressing cycle touch pad again will
toggle WITH WASHING/WITHOUT WASHING mode. When
WITH WASHING is selected, washing phase is added to
beginning of cycle.
READY
MM-DD-YY HH:MM XM
LEAK TEST
DETECTED
WARNING – INEFFECTIVE
PROCESS HAZARD: Before
operating processor, always
firmly push endoscope
processing support into
manifold connectors at the back
of chamber. If support is not
positioned correctly, door will
not close, damage may result
and processor will be unable to
effectively process load.