Customer Replaceable Units Oven Thermistor
Page 169
© Copyright 2020 Stratasys. All rights reserved.
5. Reconnect the input power cable to the 3.3/5/12 VDC ATX power supply.
6. Make sure that the switch on the power supply is in the ON position.
7
. Reinstall the right side panel. See “
Installing the Side Panels” (page 164)
8. Reinstall the rear panel. See “
Installing the Rear Panel” (page 161).
Oven Thermistor
Required Tools
• 3 mm hex wrench
Removing the Oven Thermistor
1. Power OFF the printer. See “Powering Off” (page 159).
2. Remove the rear panel. See “
Removing the Rear Panel” (page 161).
3. Remove the right side panel. See “
Removing the Side Panels” (page 162).
4. Disconnect the thermistor cable from the I/O board (J36).
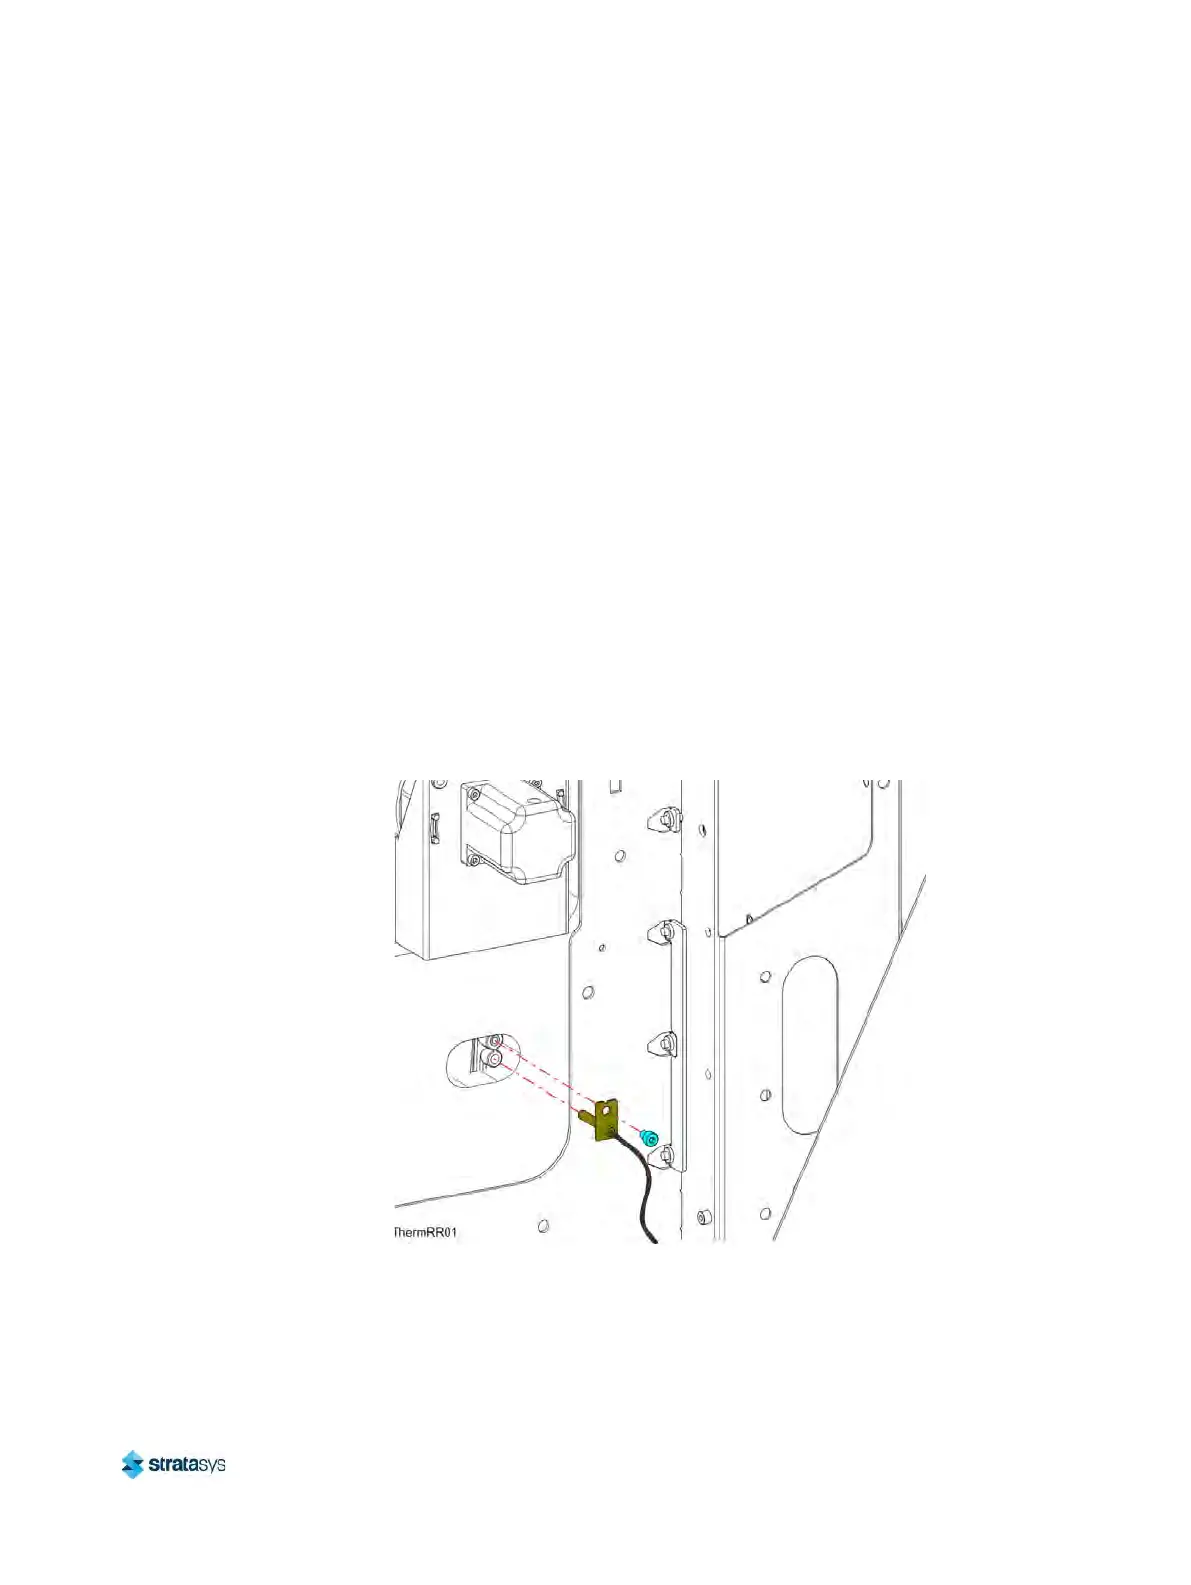
5
. Use a 3mm hex wrench to remove the mounting screw (1) that secures the thermistor to
t
he oven wall. See Figure 23.
6. Remove the thermistor from the printer. See F
igure 23.
Figure 23: Thermistor Detail
Installing the Oven Thermistor
1. Align the oven thermistor with its mounting location and use a 3 mm hex wrench to reinstall
the mounting screw (1). See Figure 23.
2. Route the oven thermistor wire through the printer and reconnect it to the I/O board (J36).