Basic Setup Connecting the Power Cable
Page 11
© Copyright 2020 Stratasys. All rights reserved.
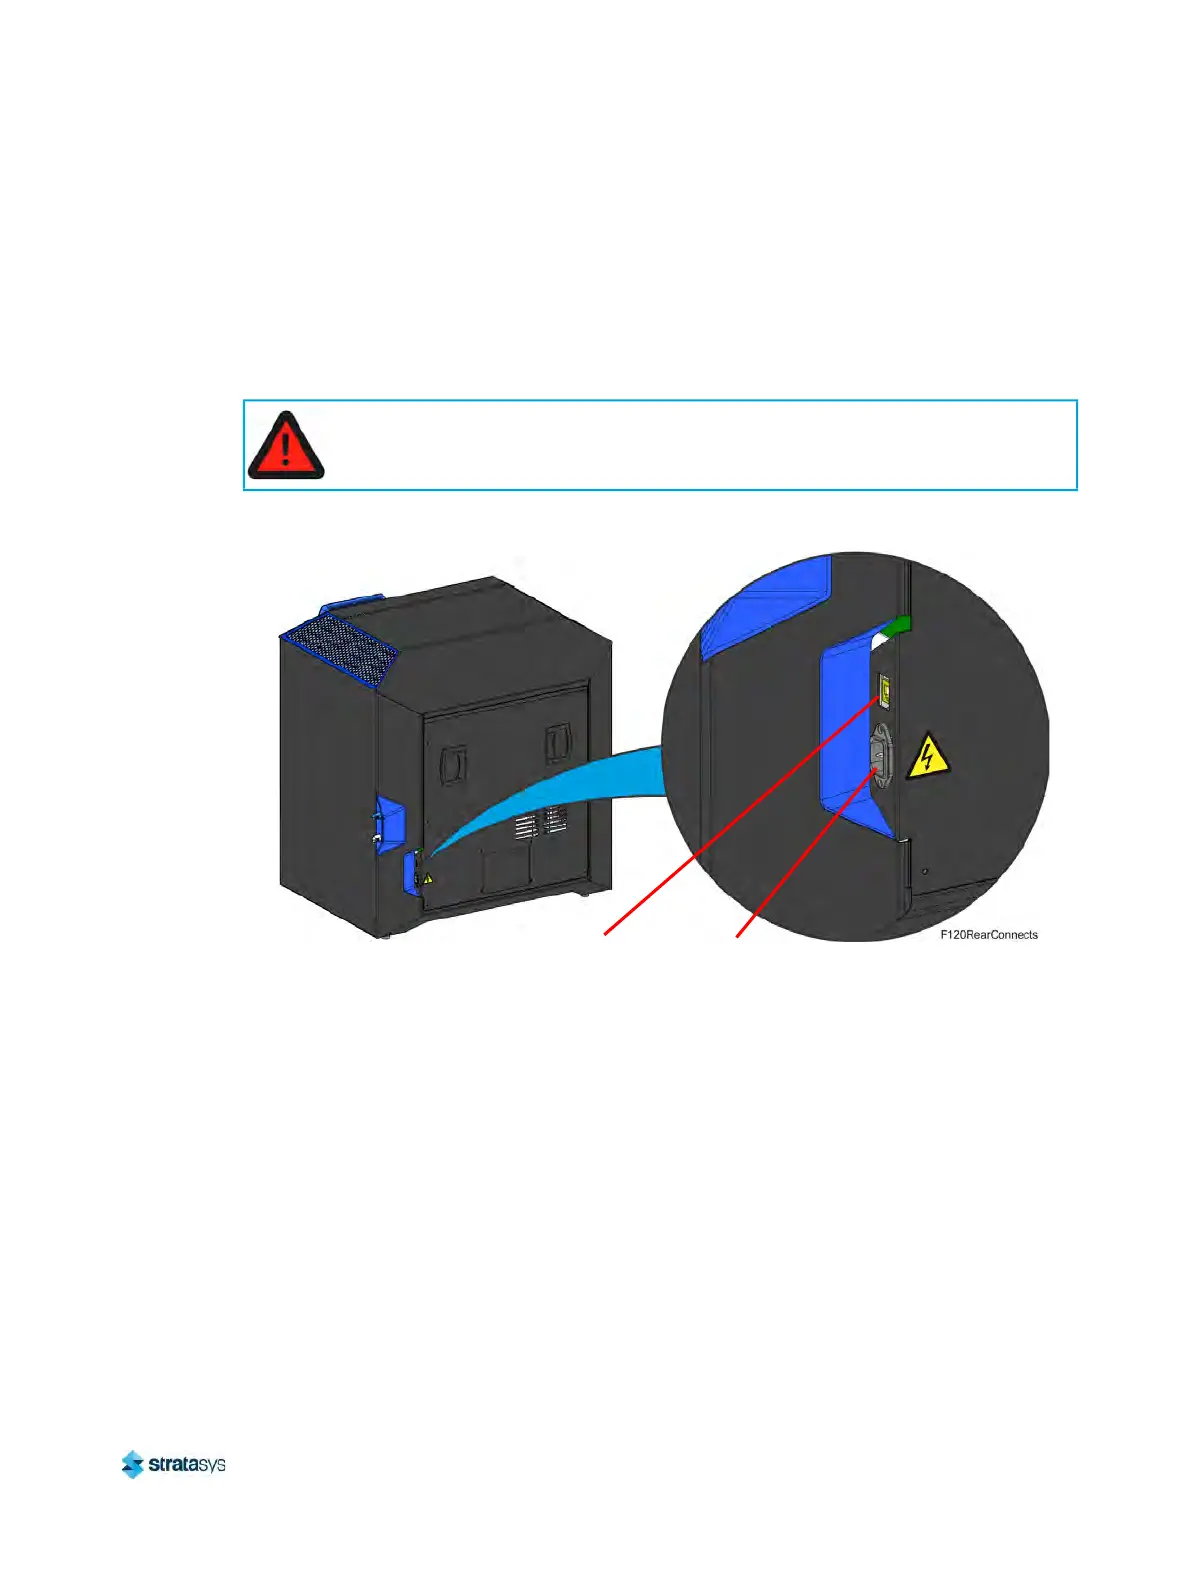
Connecting the Power Cable
To connect the power cable:
1. Connect the male end of the supplied power cord (US or European) directly into a
g
rounded electrical outlet.
2. Connect the female end of the power cord directly into the socket located on the back of
t
he printer (see Figure 4).
Figure 4: Rear Connections
Configuring the Network
This section is provided in case you need to change your network settings. Within the Network
page you can set your printer’s address type to Static, Dynamic (DHCP), or Wi-Fi; Dynamic is
selected by default.
• Static address - you must enter an IP address, subnet mask, and gateway address for the
p
rinter (provided by the system administrator). Once entered, the address will not change.
• Dynamic address (DHCP) - a network server or PC will generate an IP address for the
p
rinter. A different IP address may be generated from time to time by the server or PC.
• Wi-Fi address - the printer will scan for and allow you to connect to an available Wi-Fi
n
etwork (if the Wi-Fi dongle has been installed).
Warning: Electrical Shock Hazard.
The power cord serves as the disconnect device. The socket outlet must be easily
accessible.
Ethernet Network
Connection (RJ45)
Power Cable
Connection